Sponsored

Yamazuki

Well-Known Member
Joined
May 14, 2025
Threads
4
Messages
432
Reaction score
656
Location
North Dakota, USA
Vehicle(s)
2024 Dark Horse, 2013 Ford Raptor, 2004 F150
Which one is this. BlendMount shows two options depending
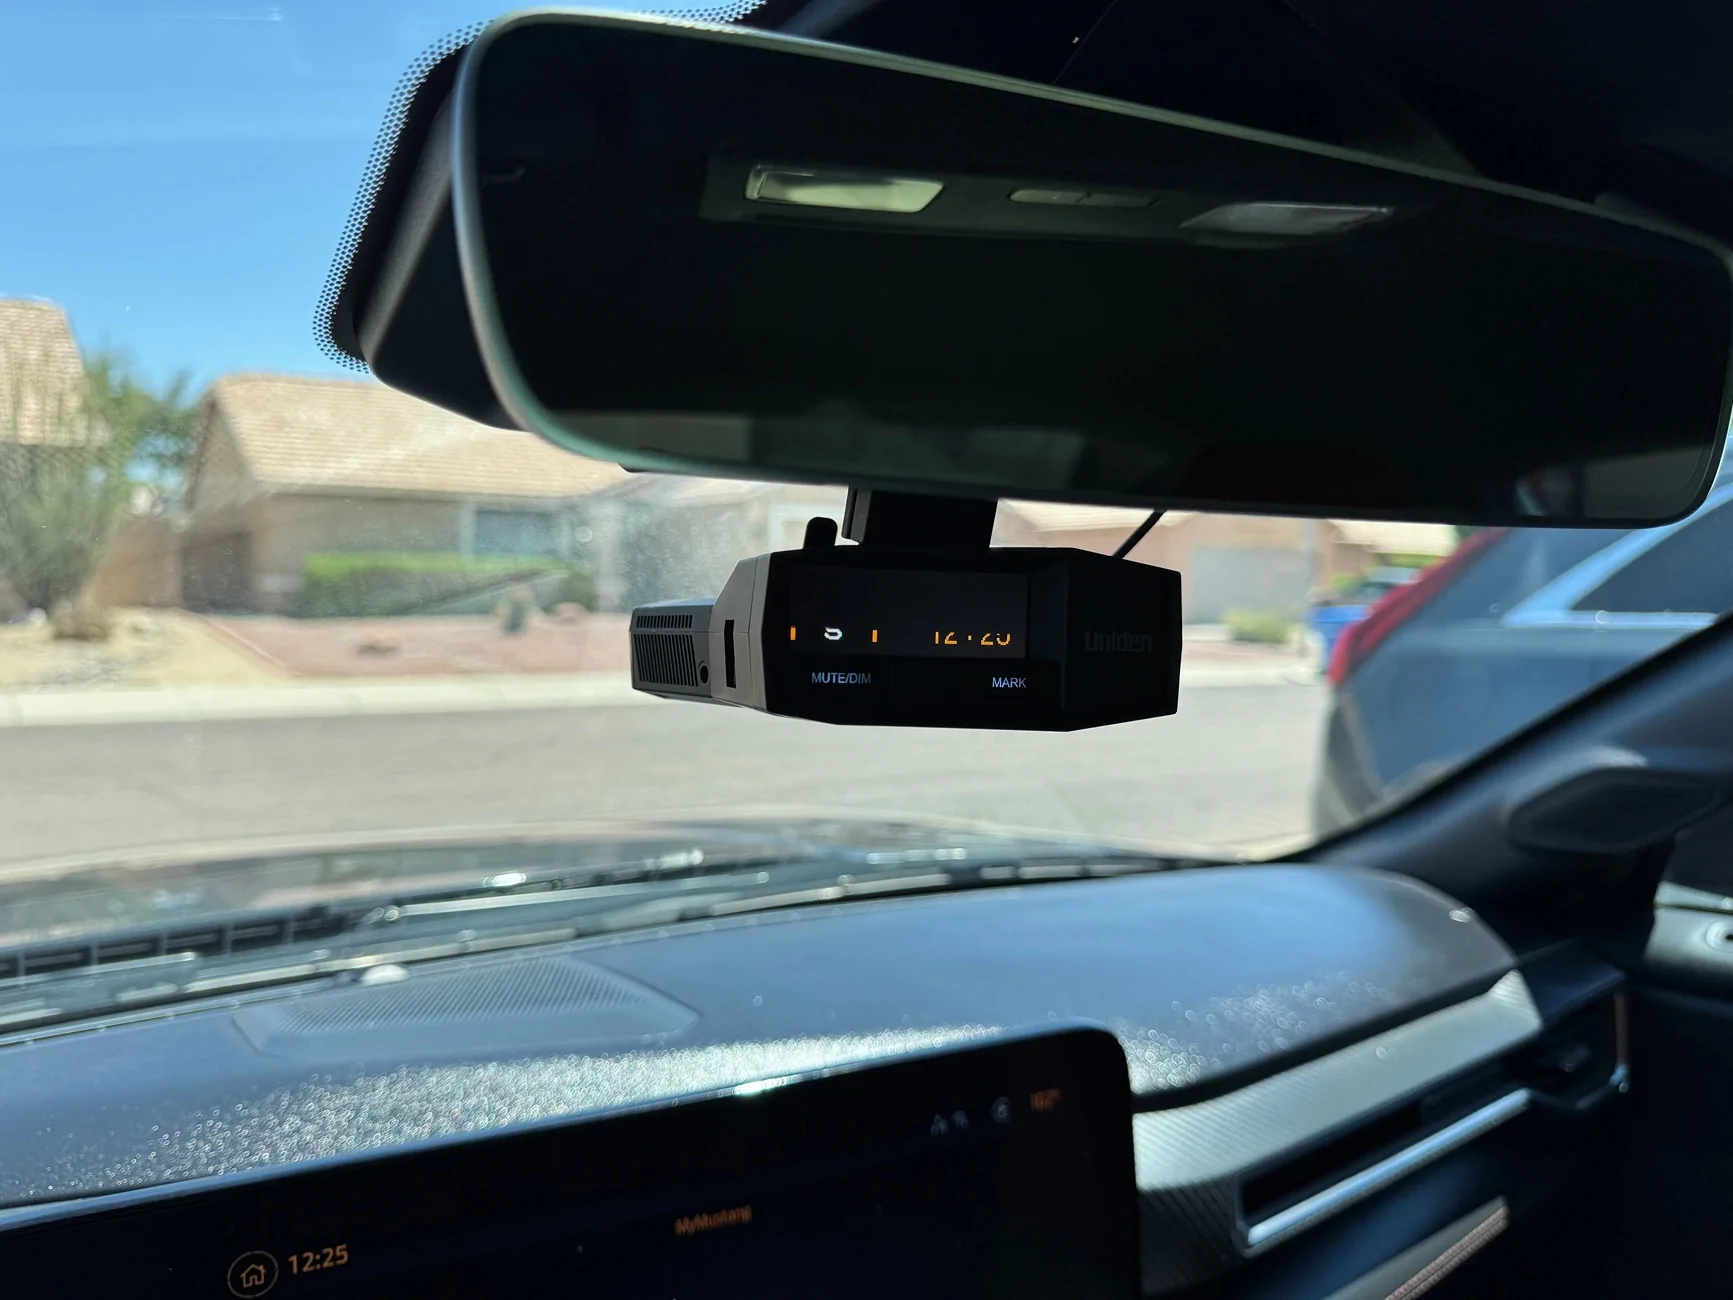
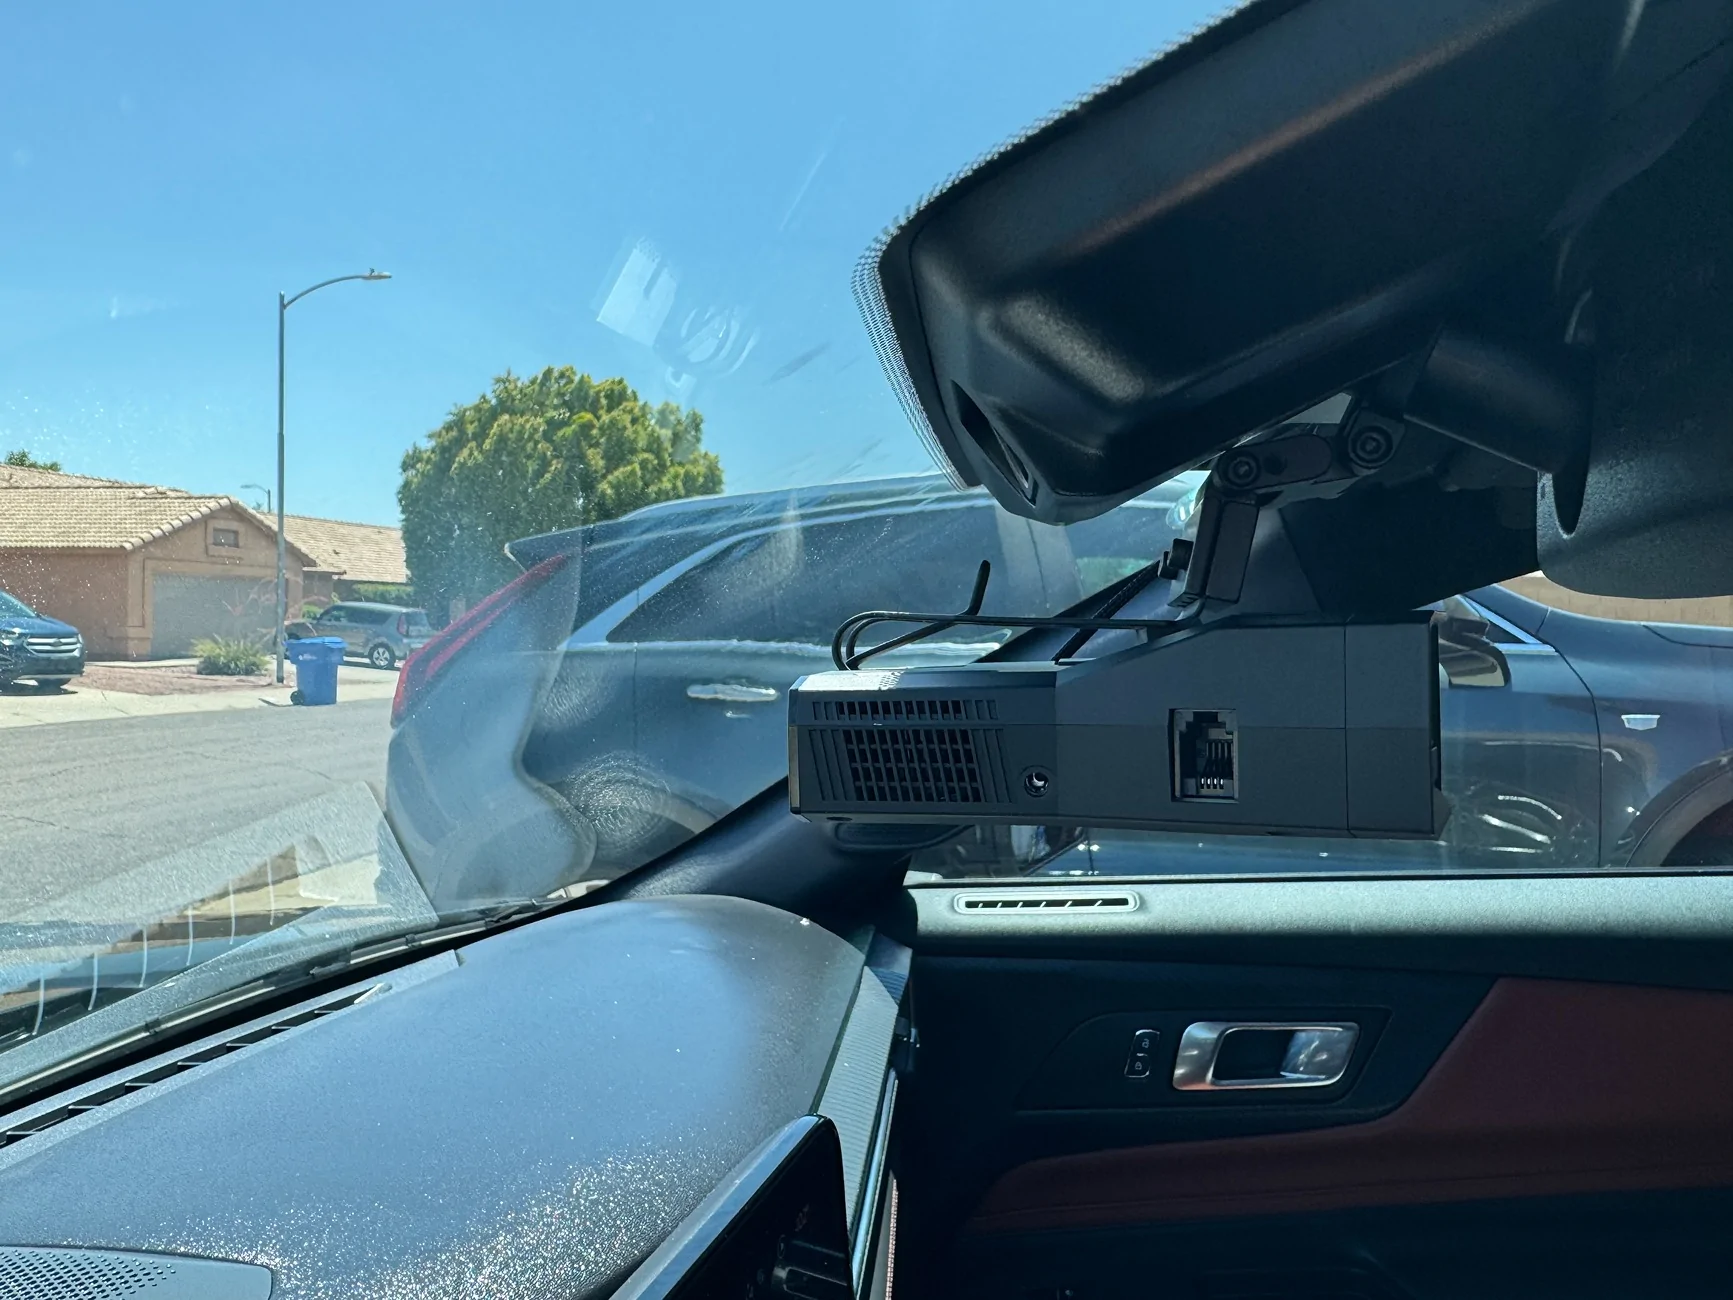
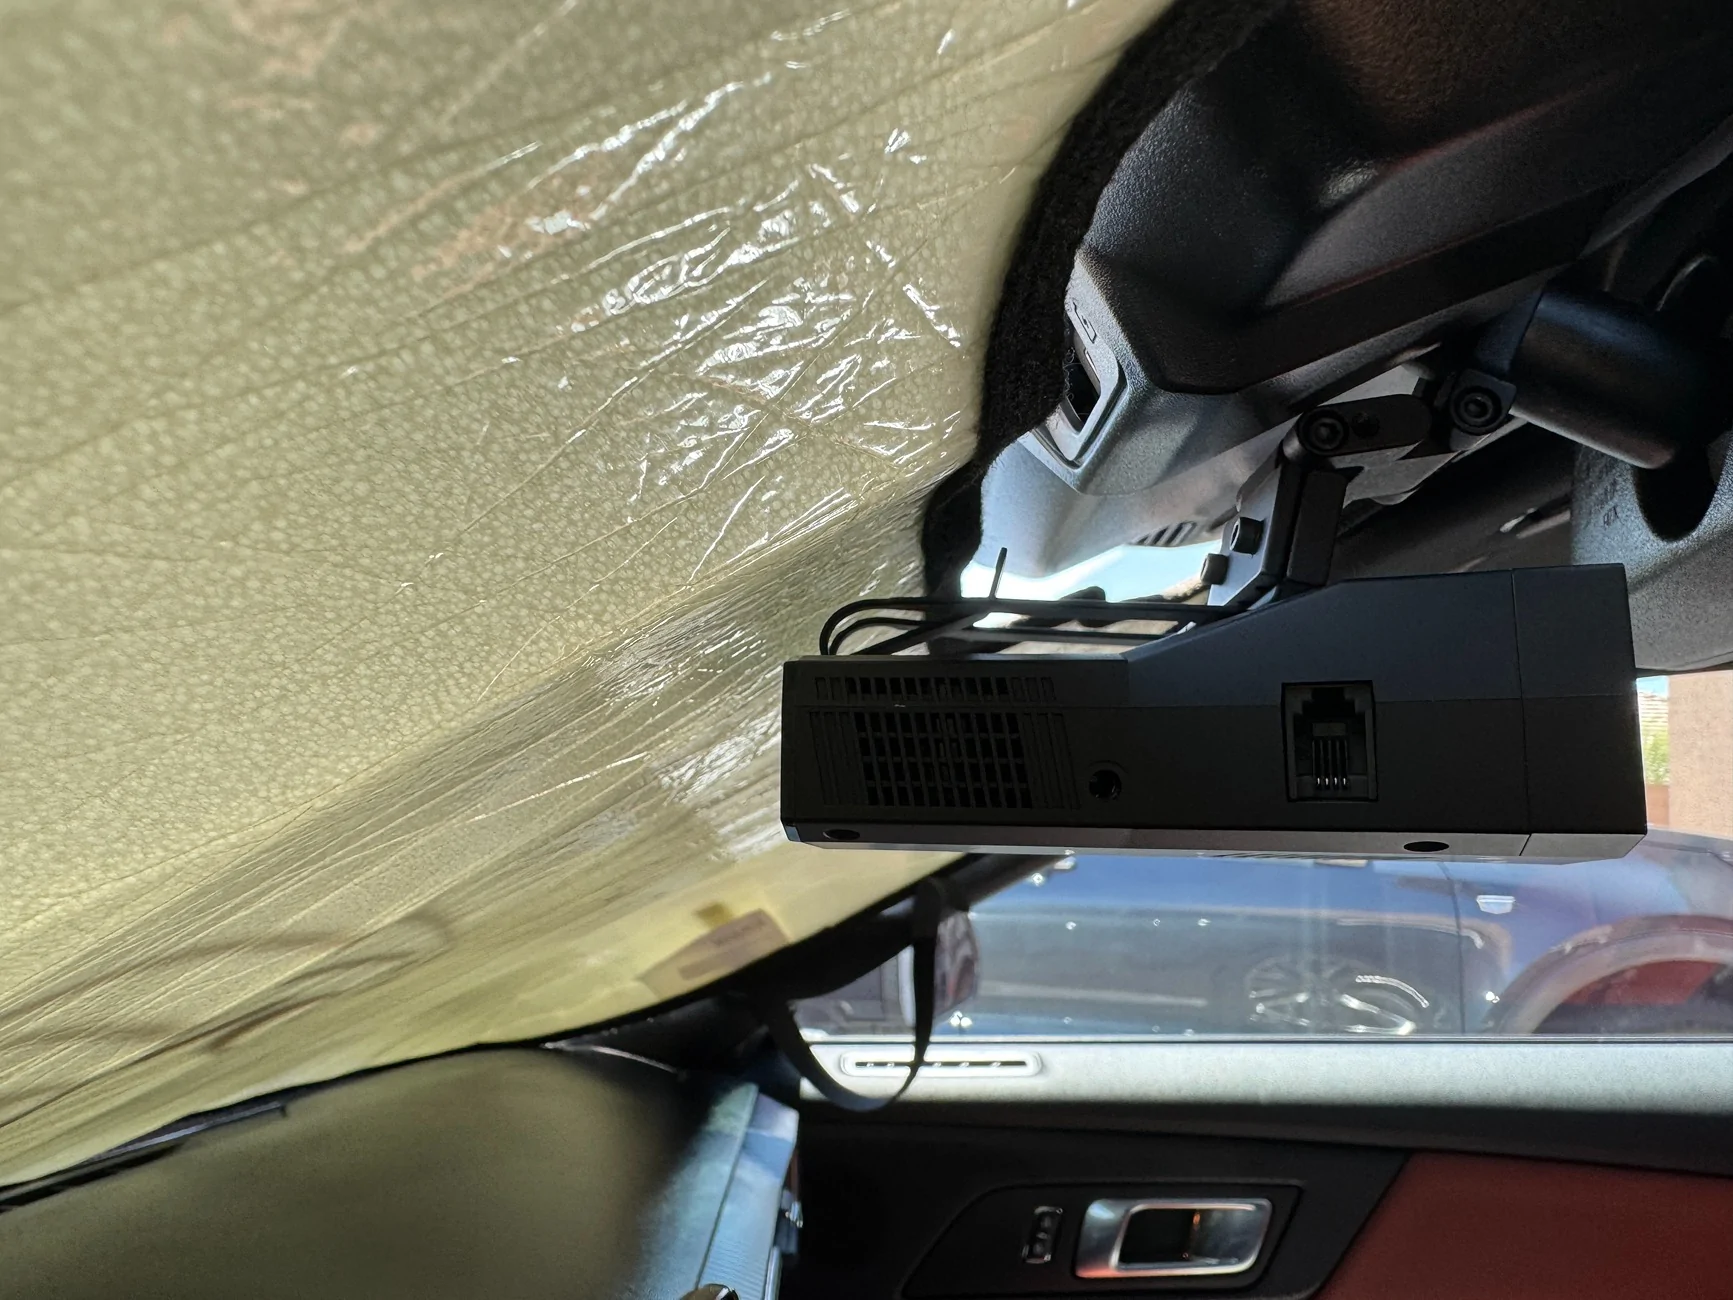
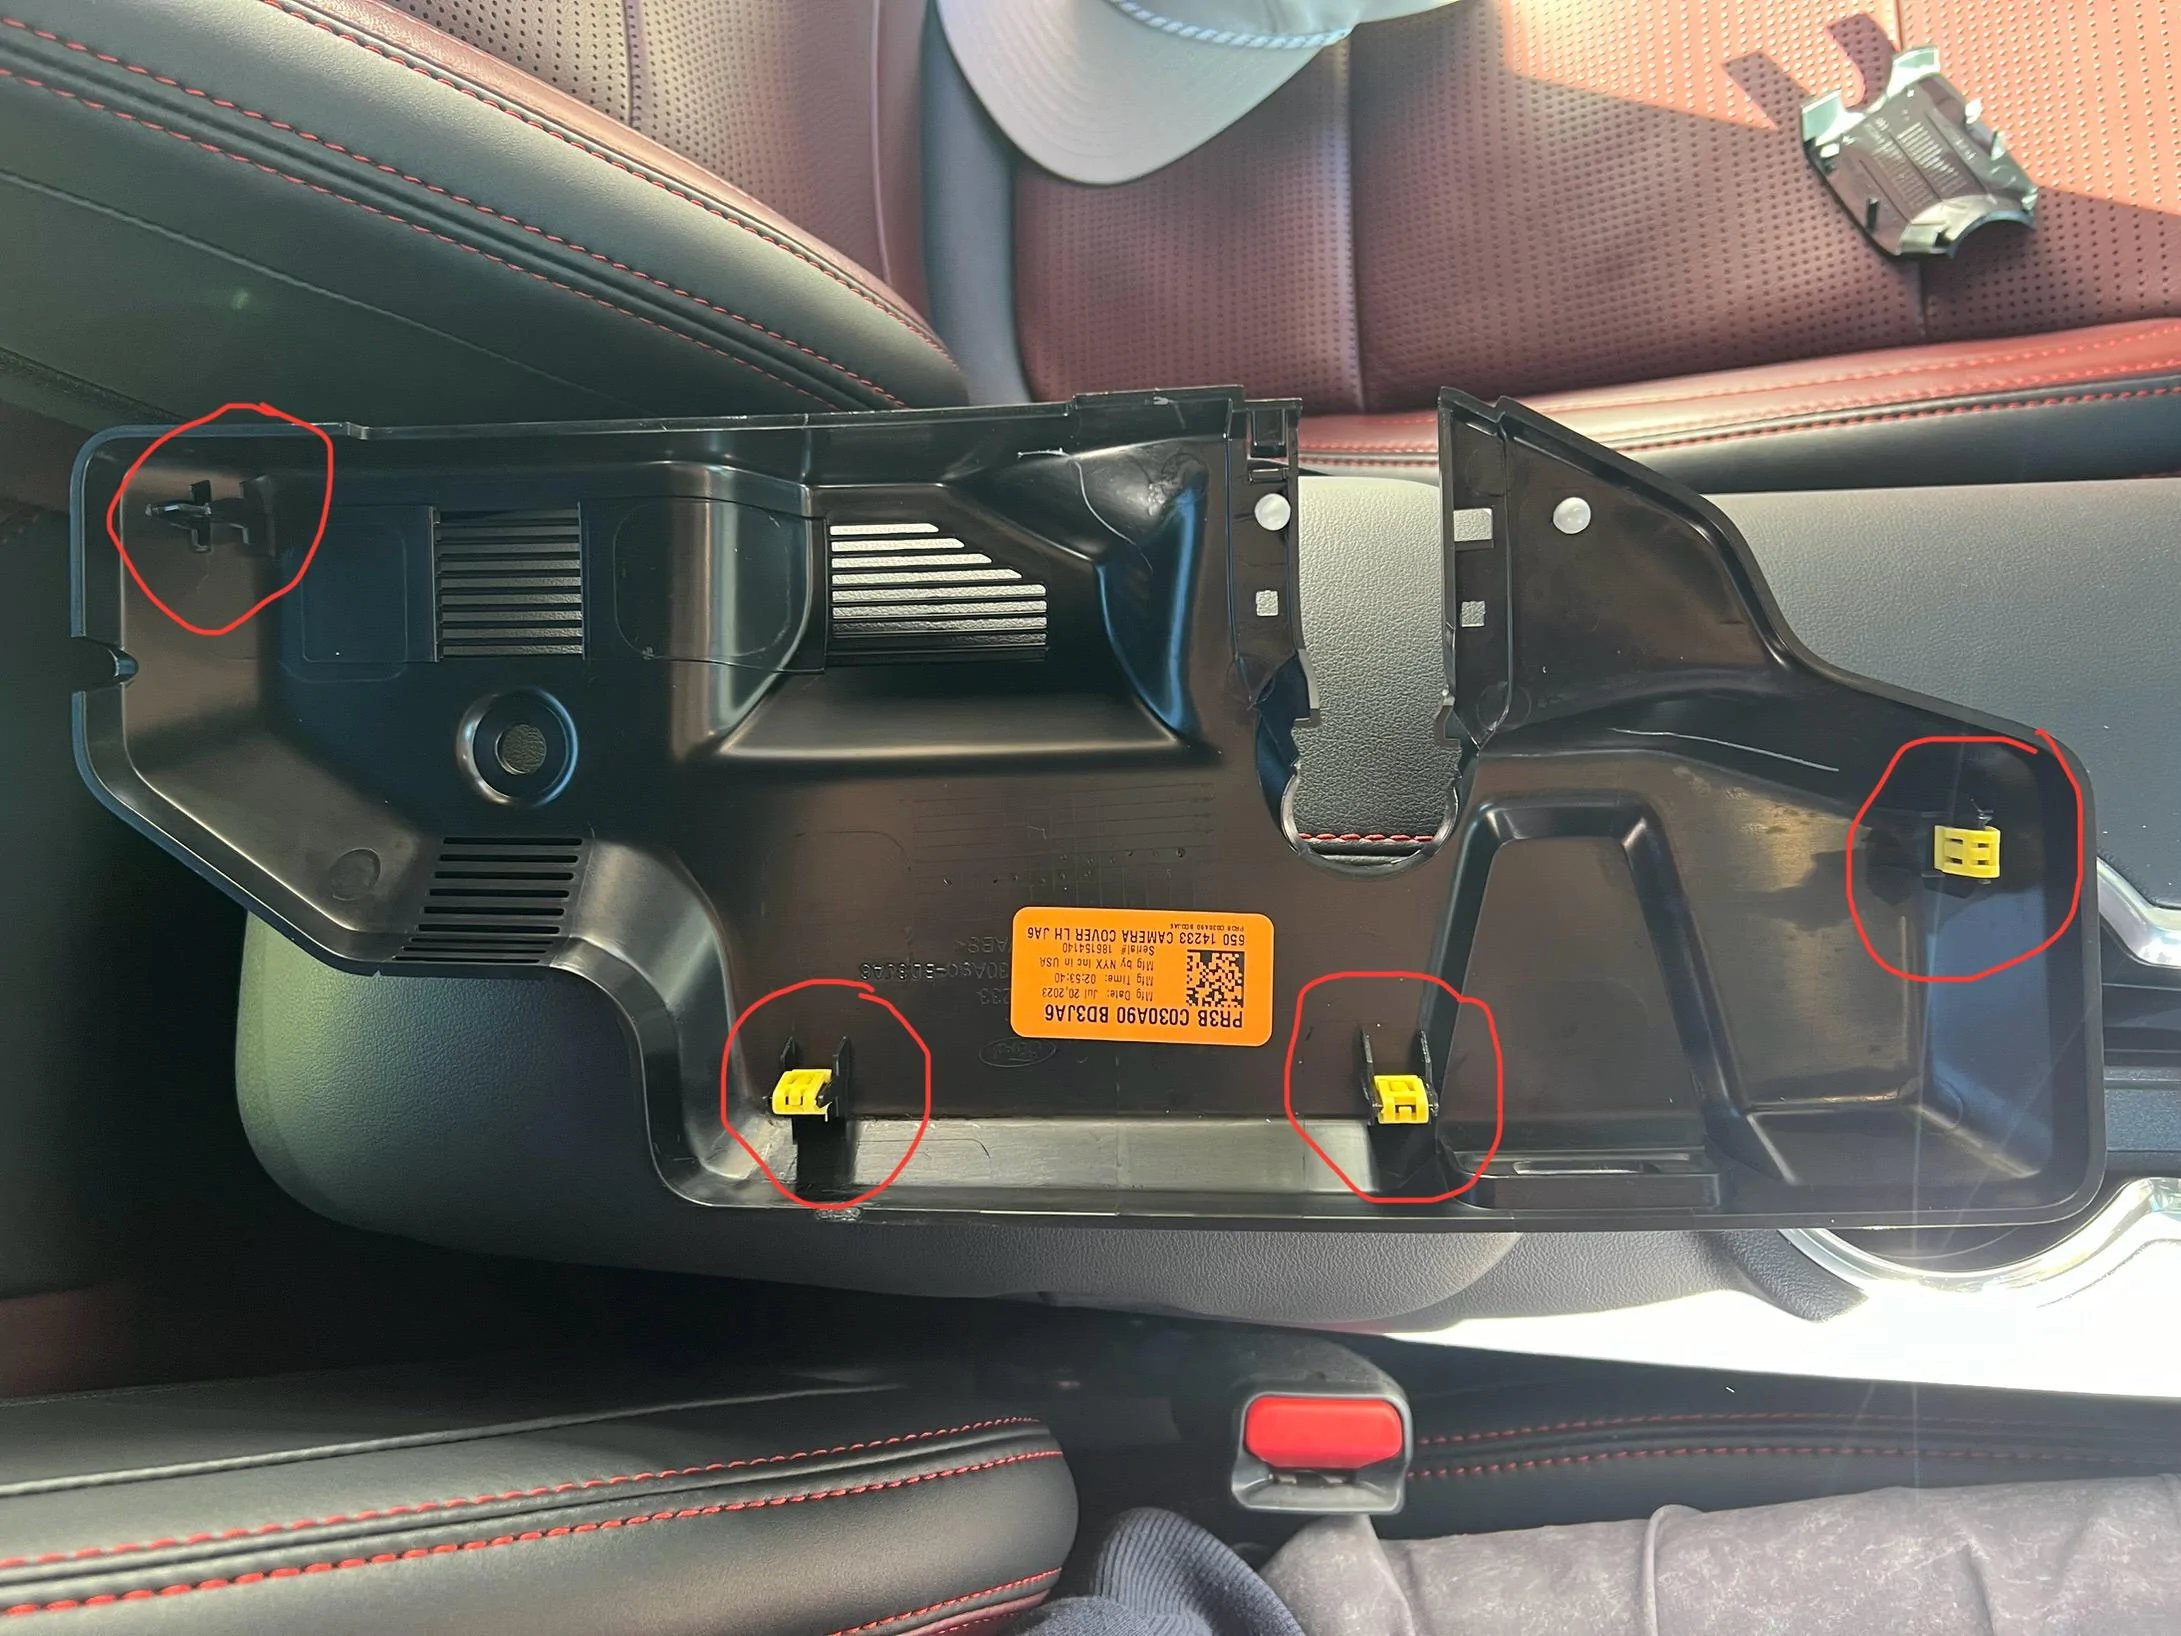
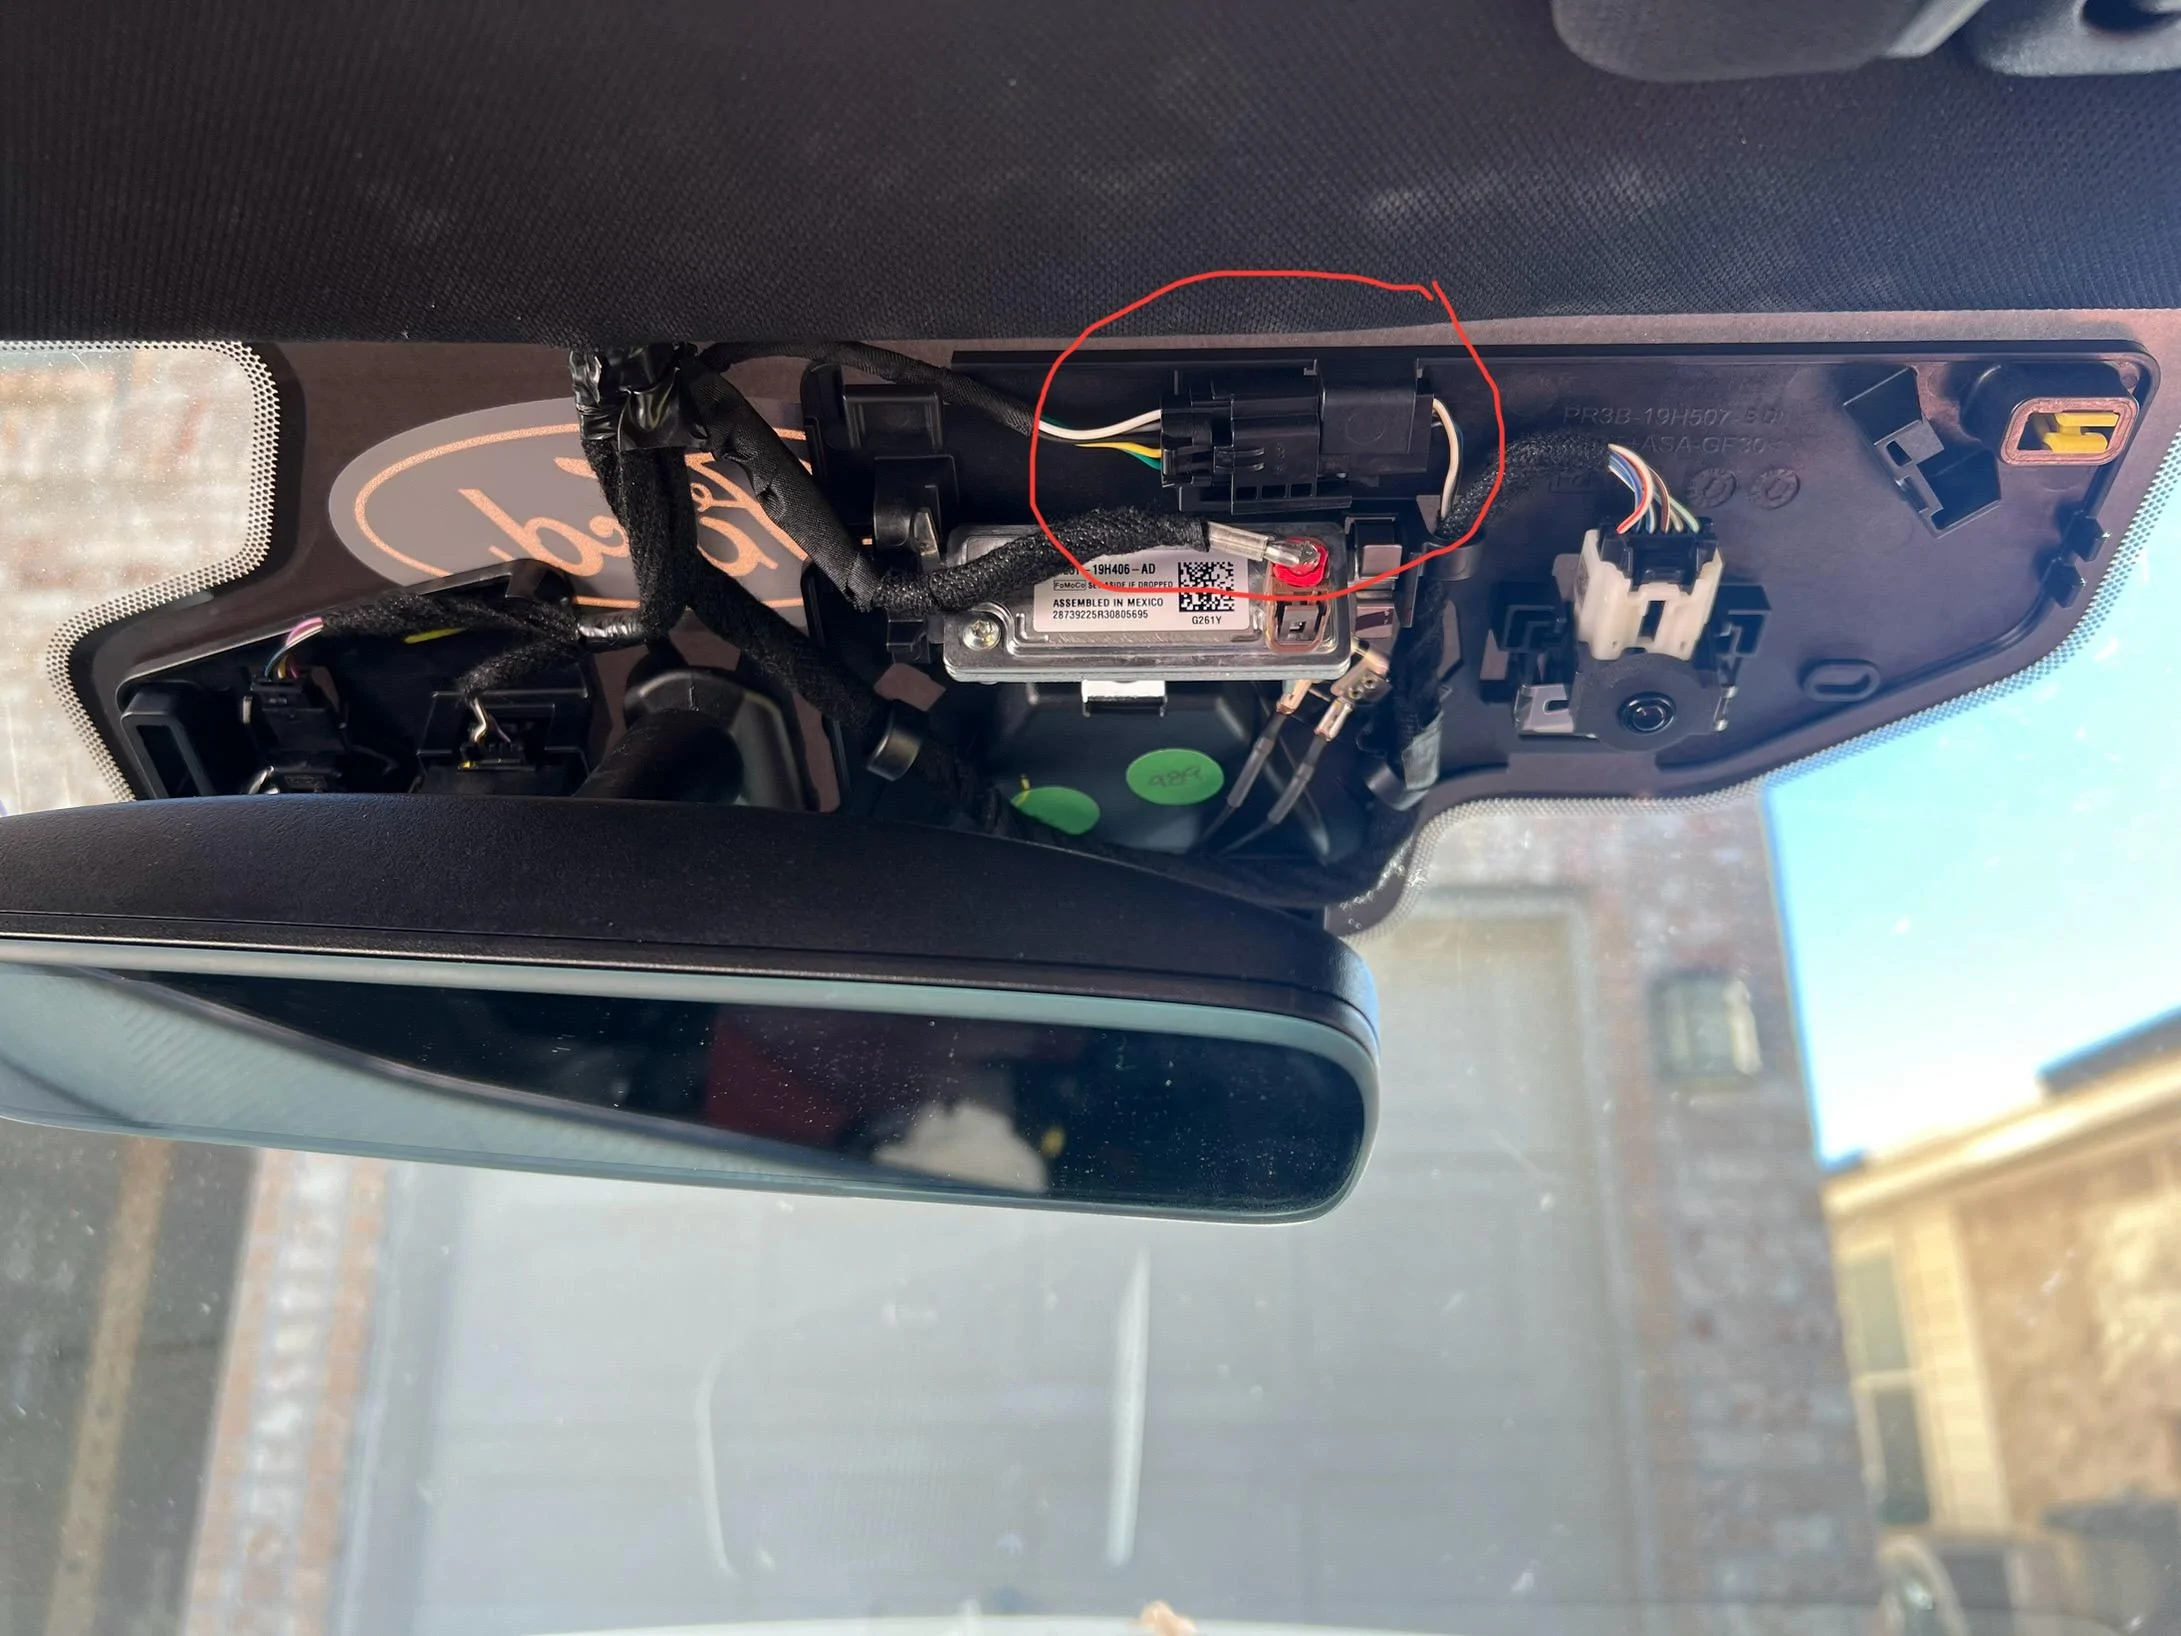
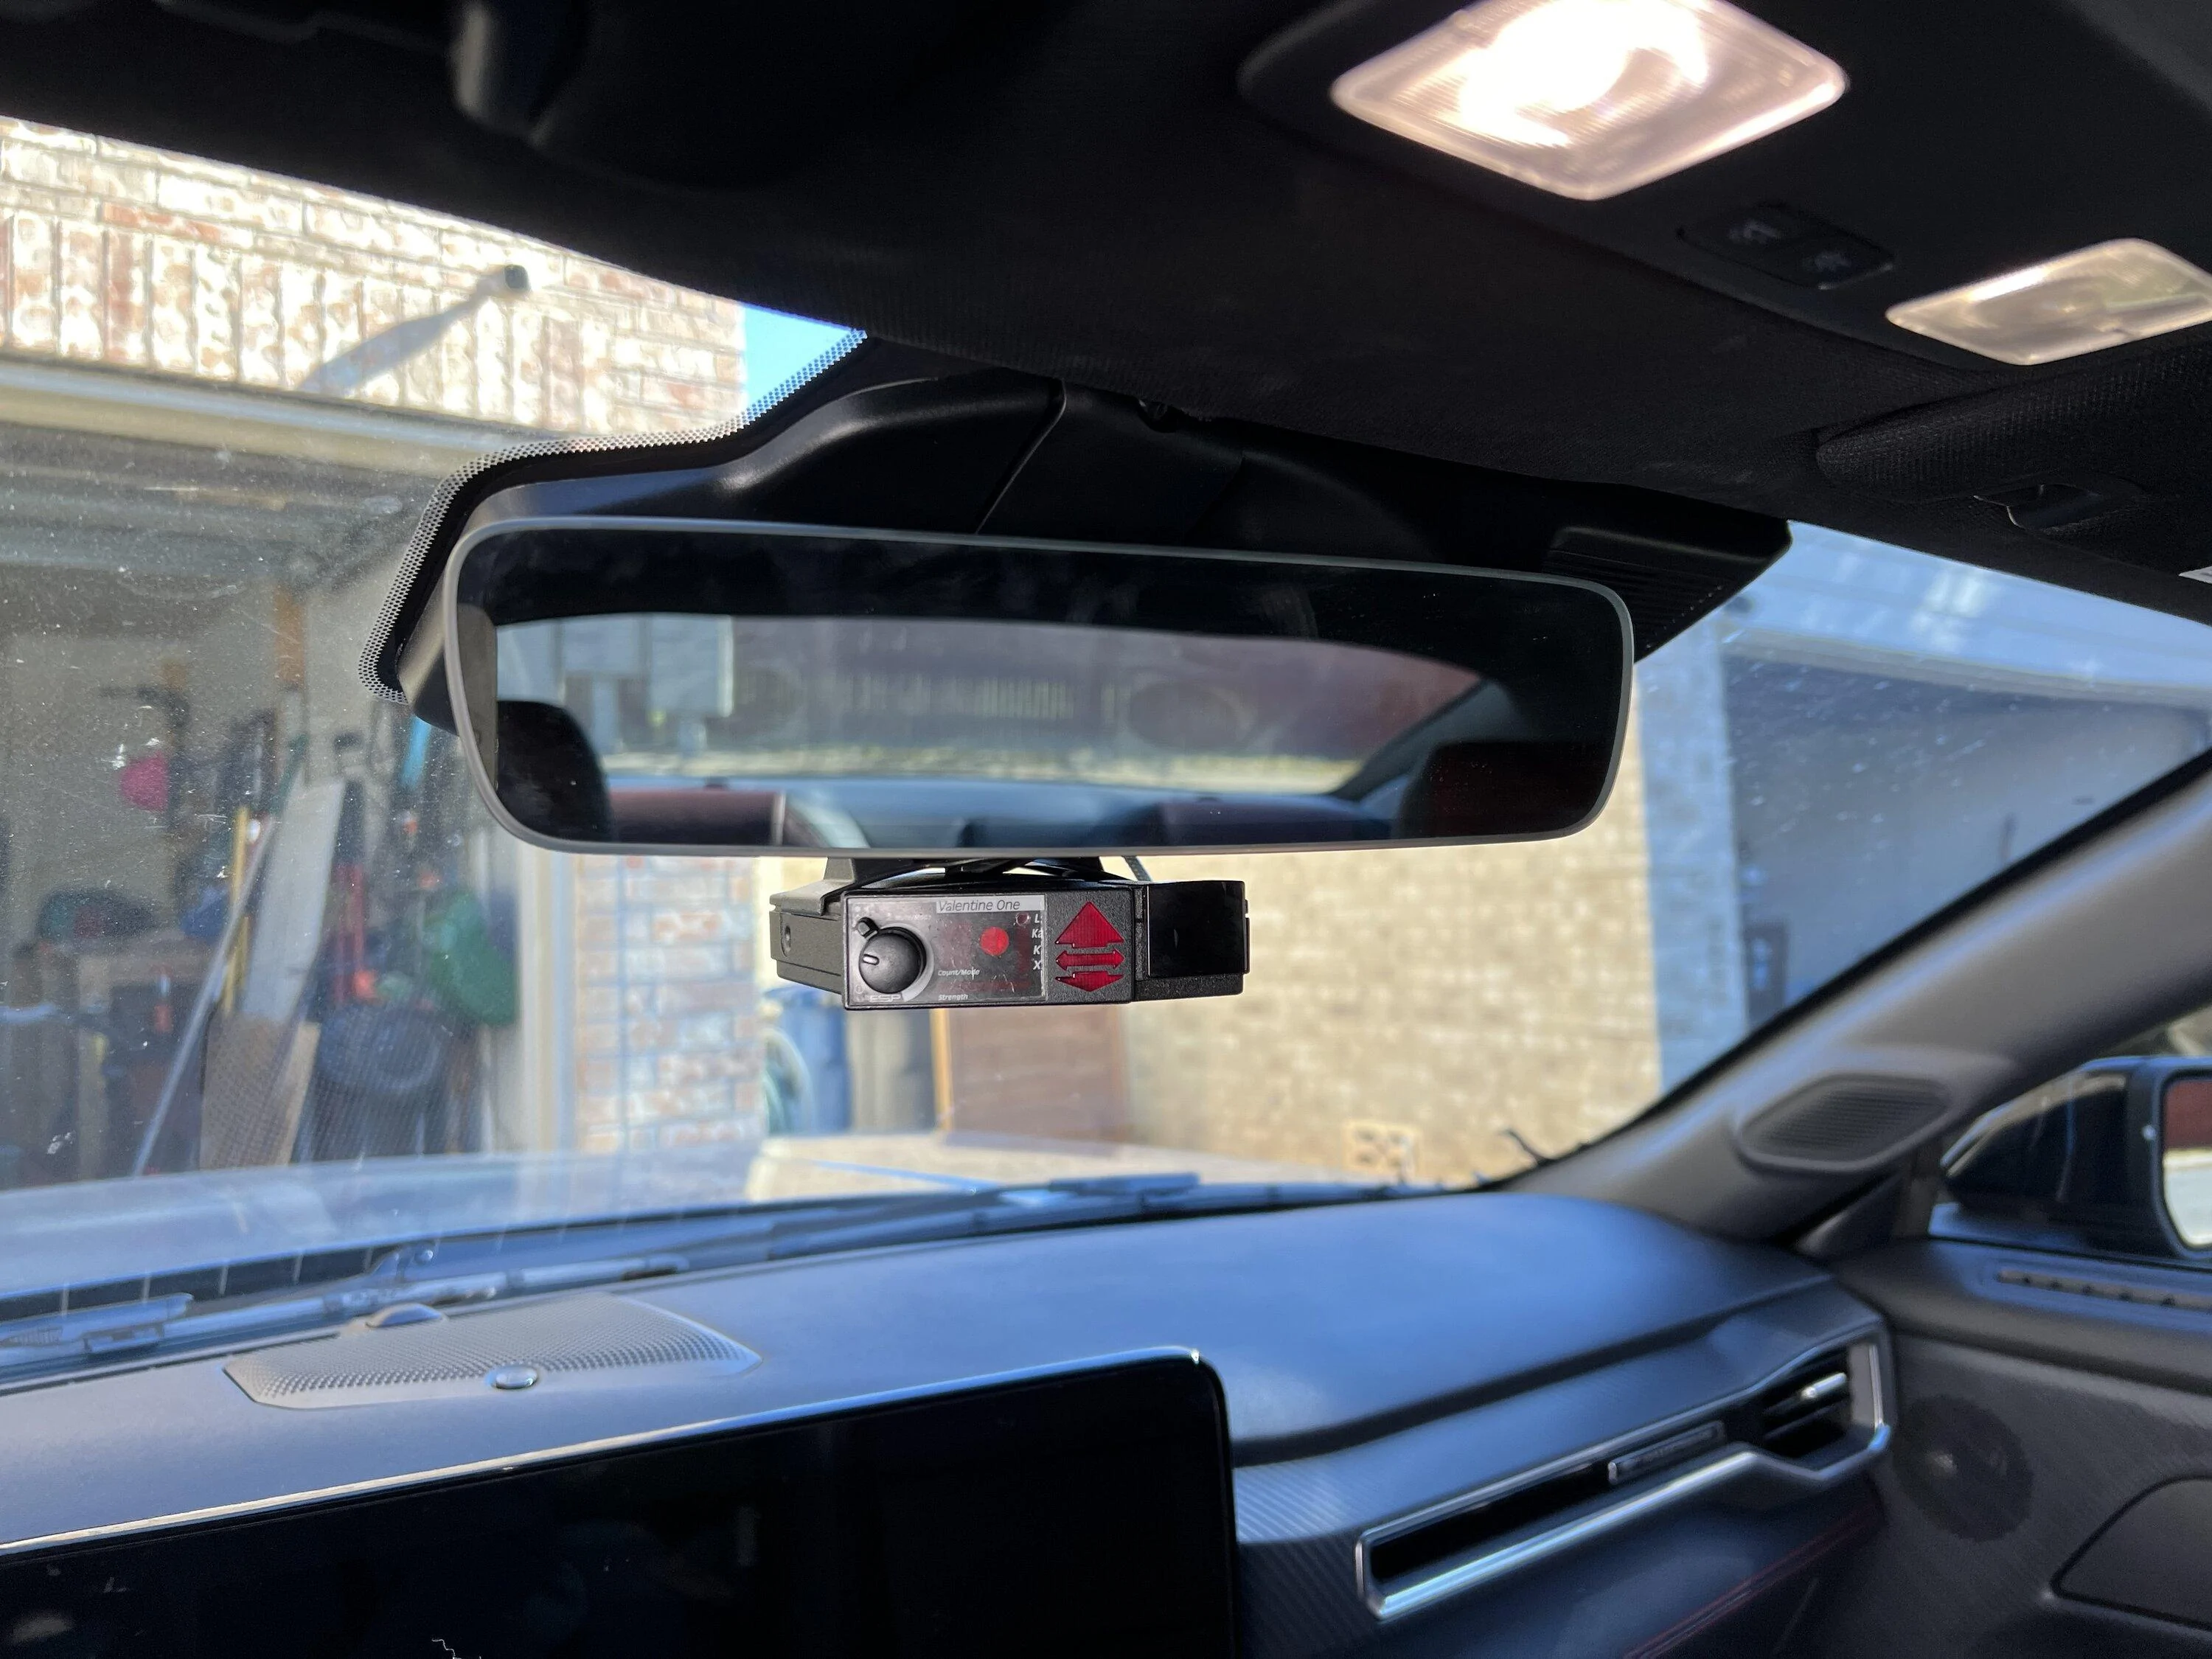
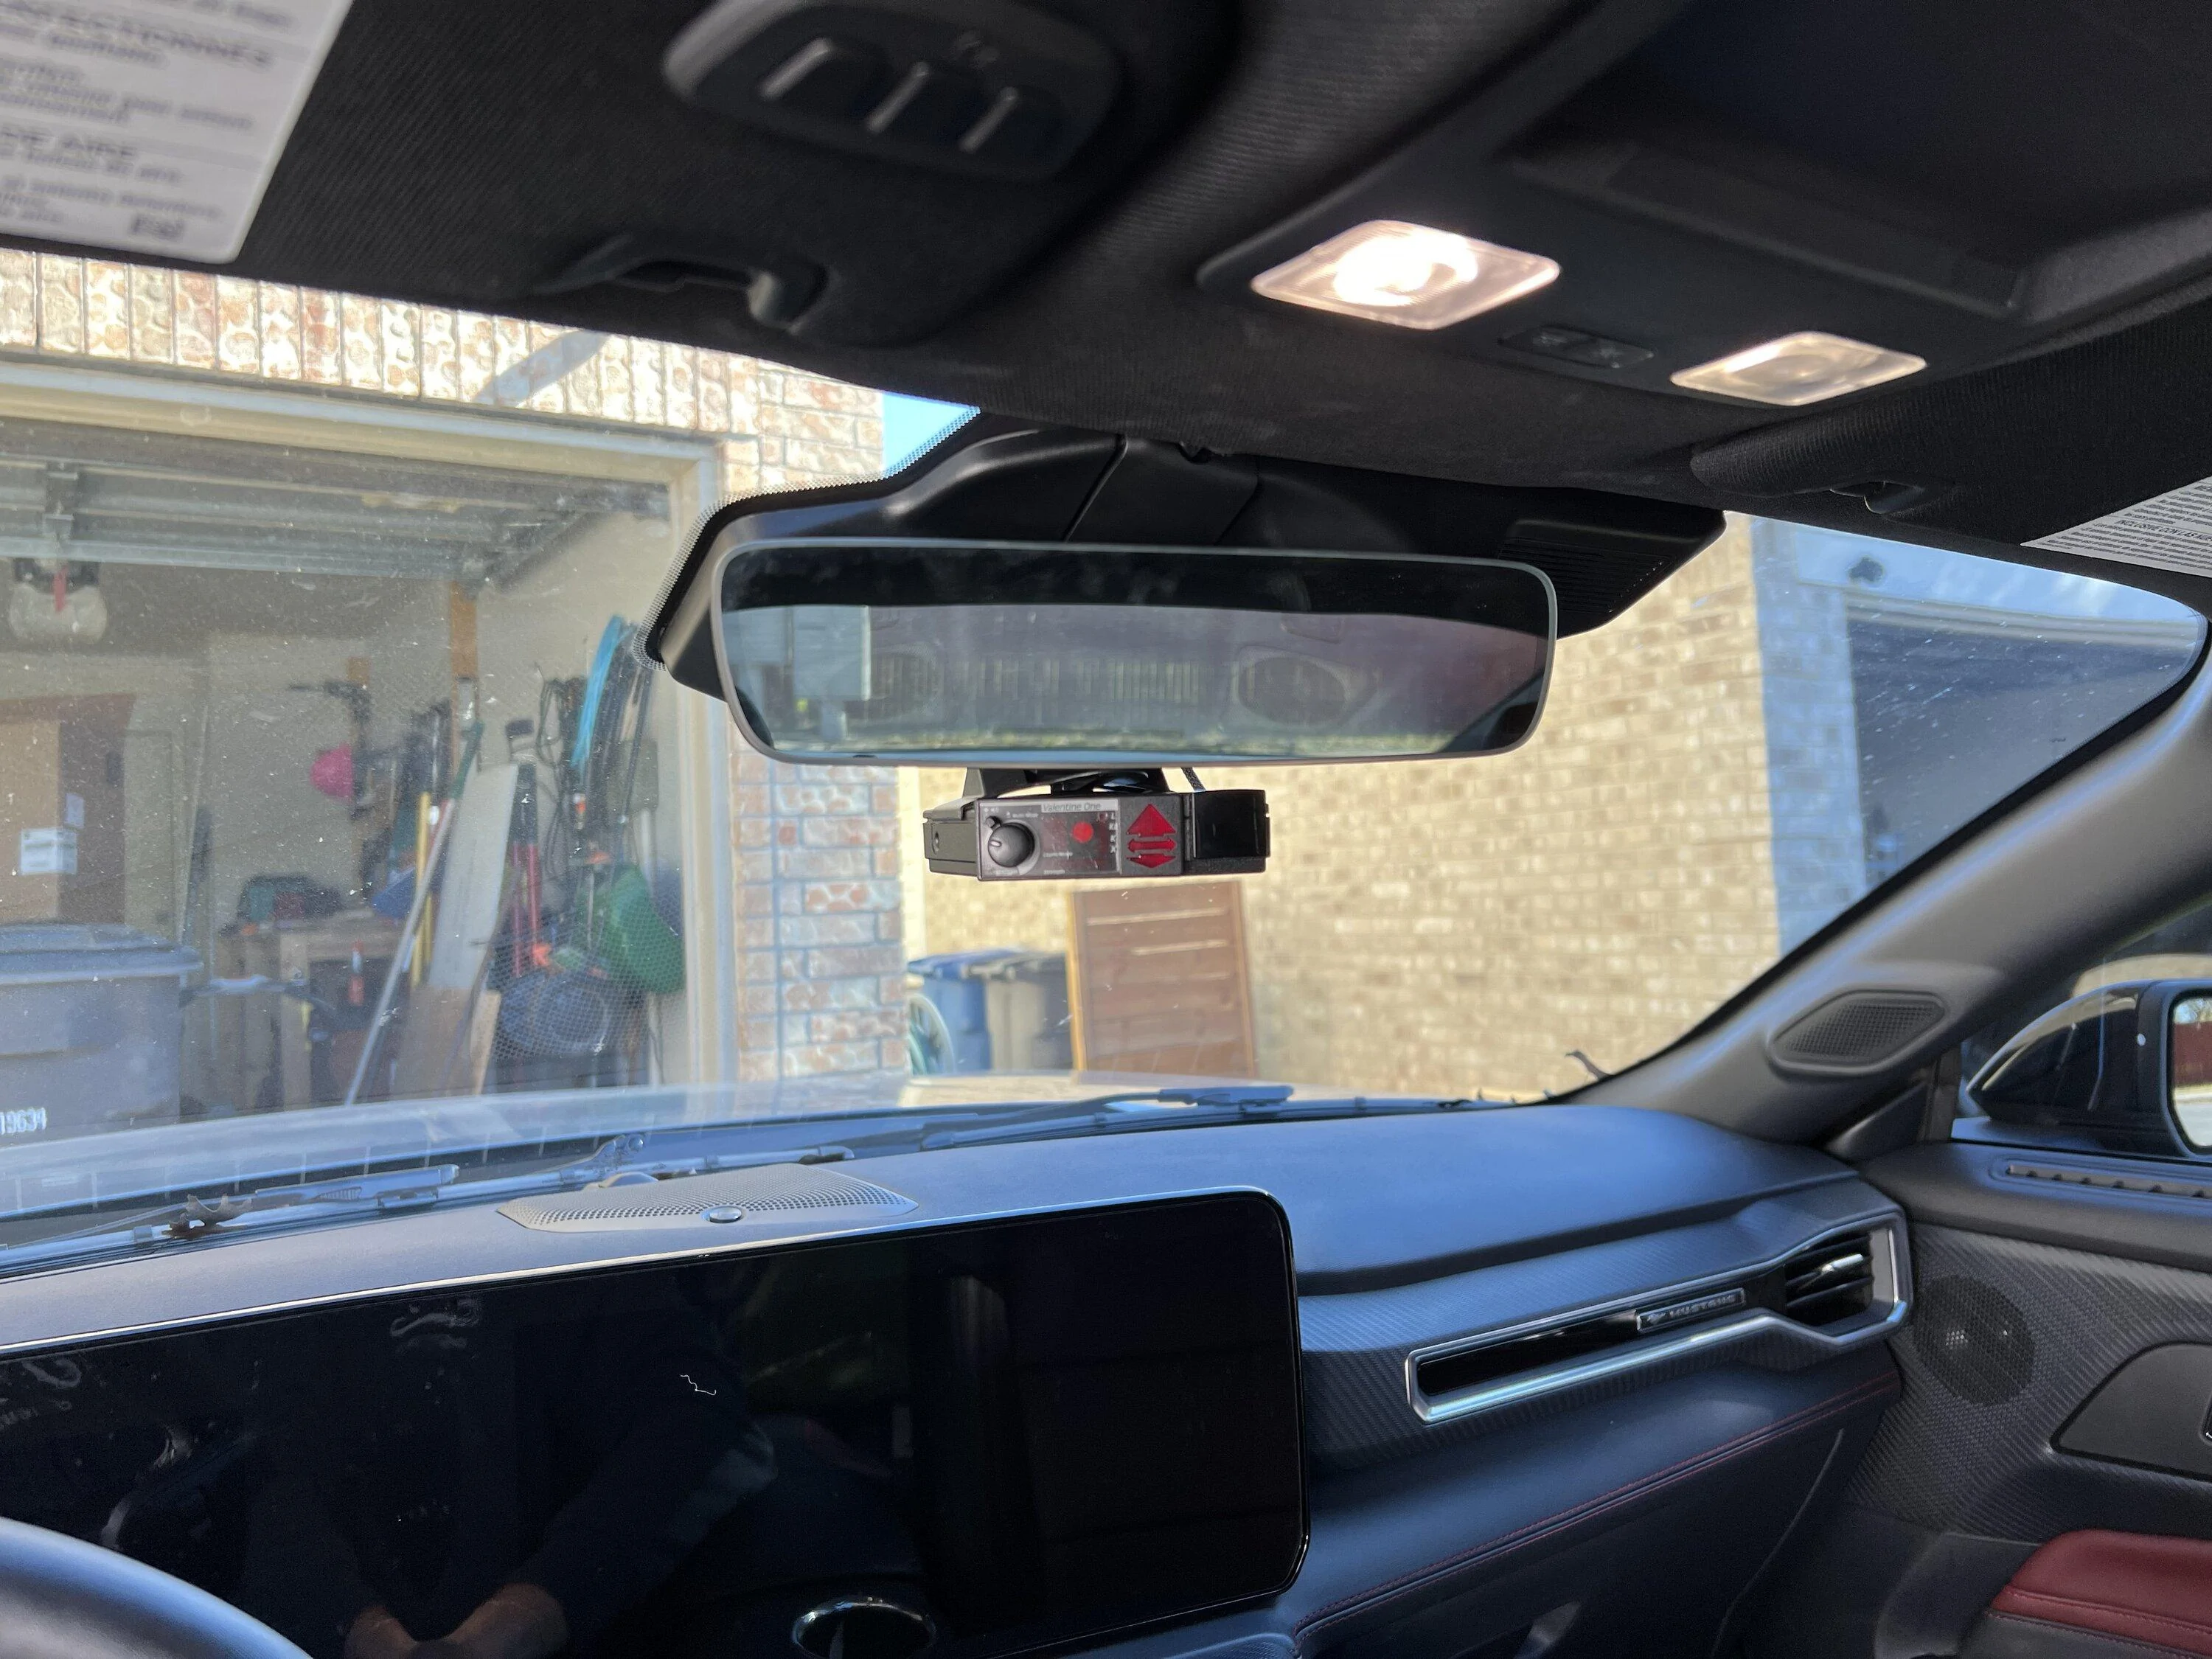
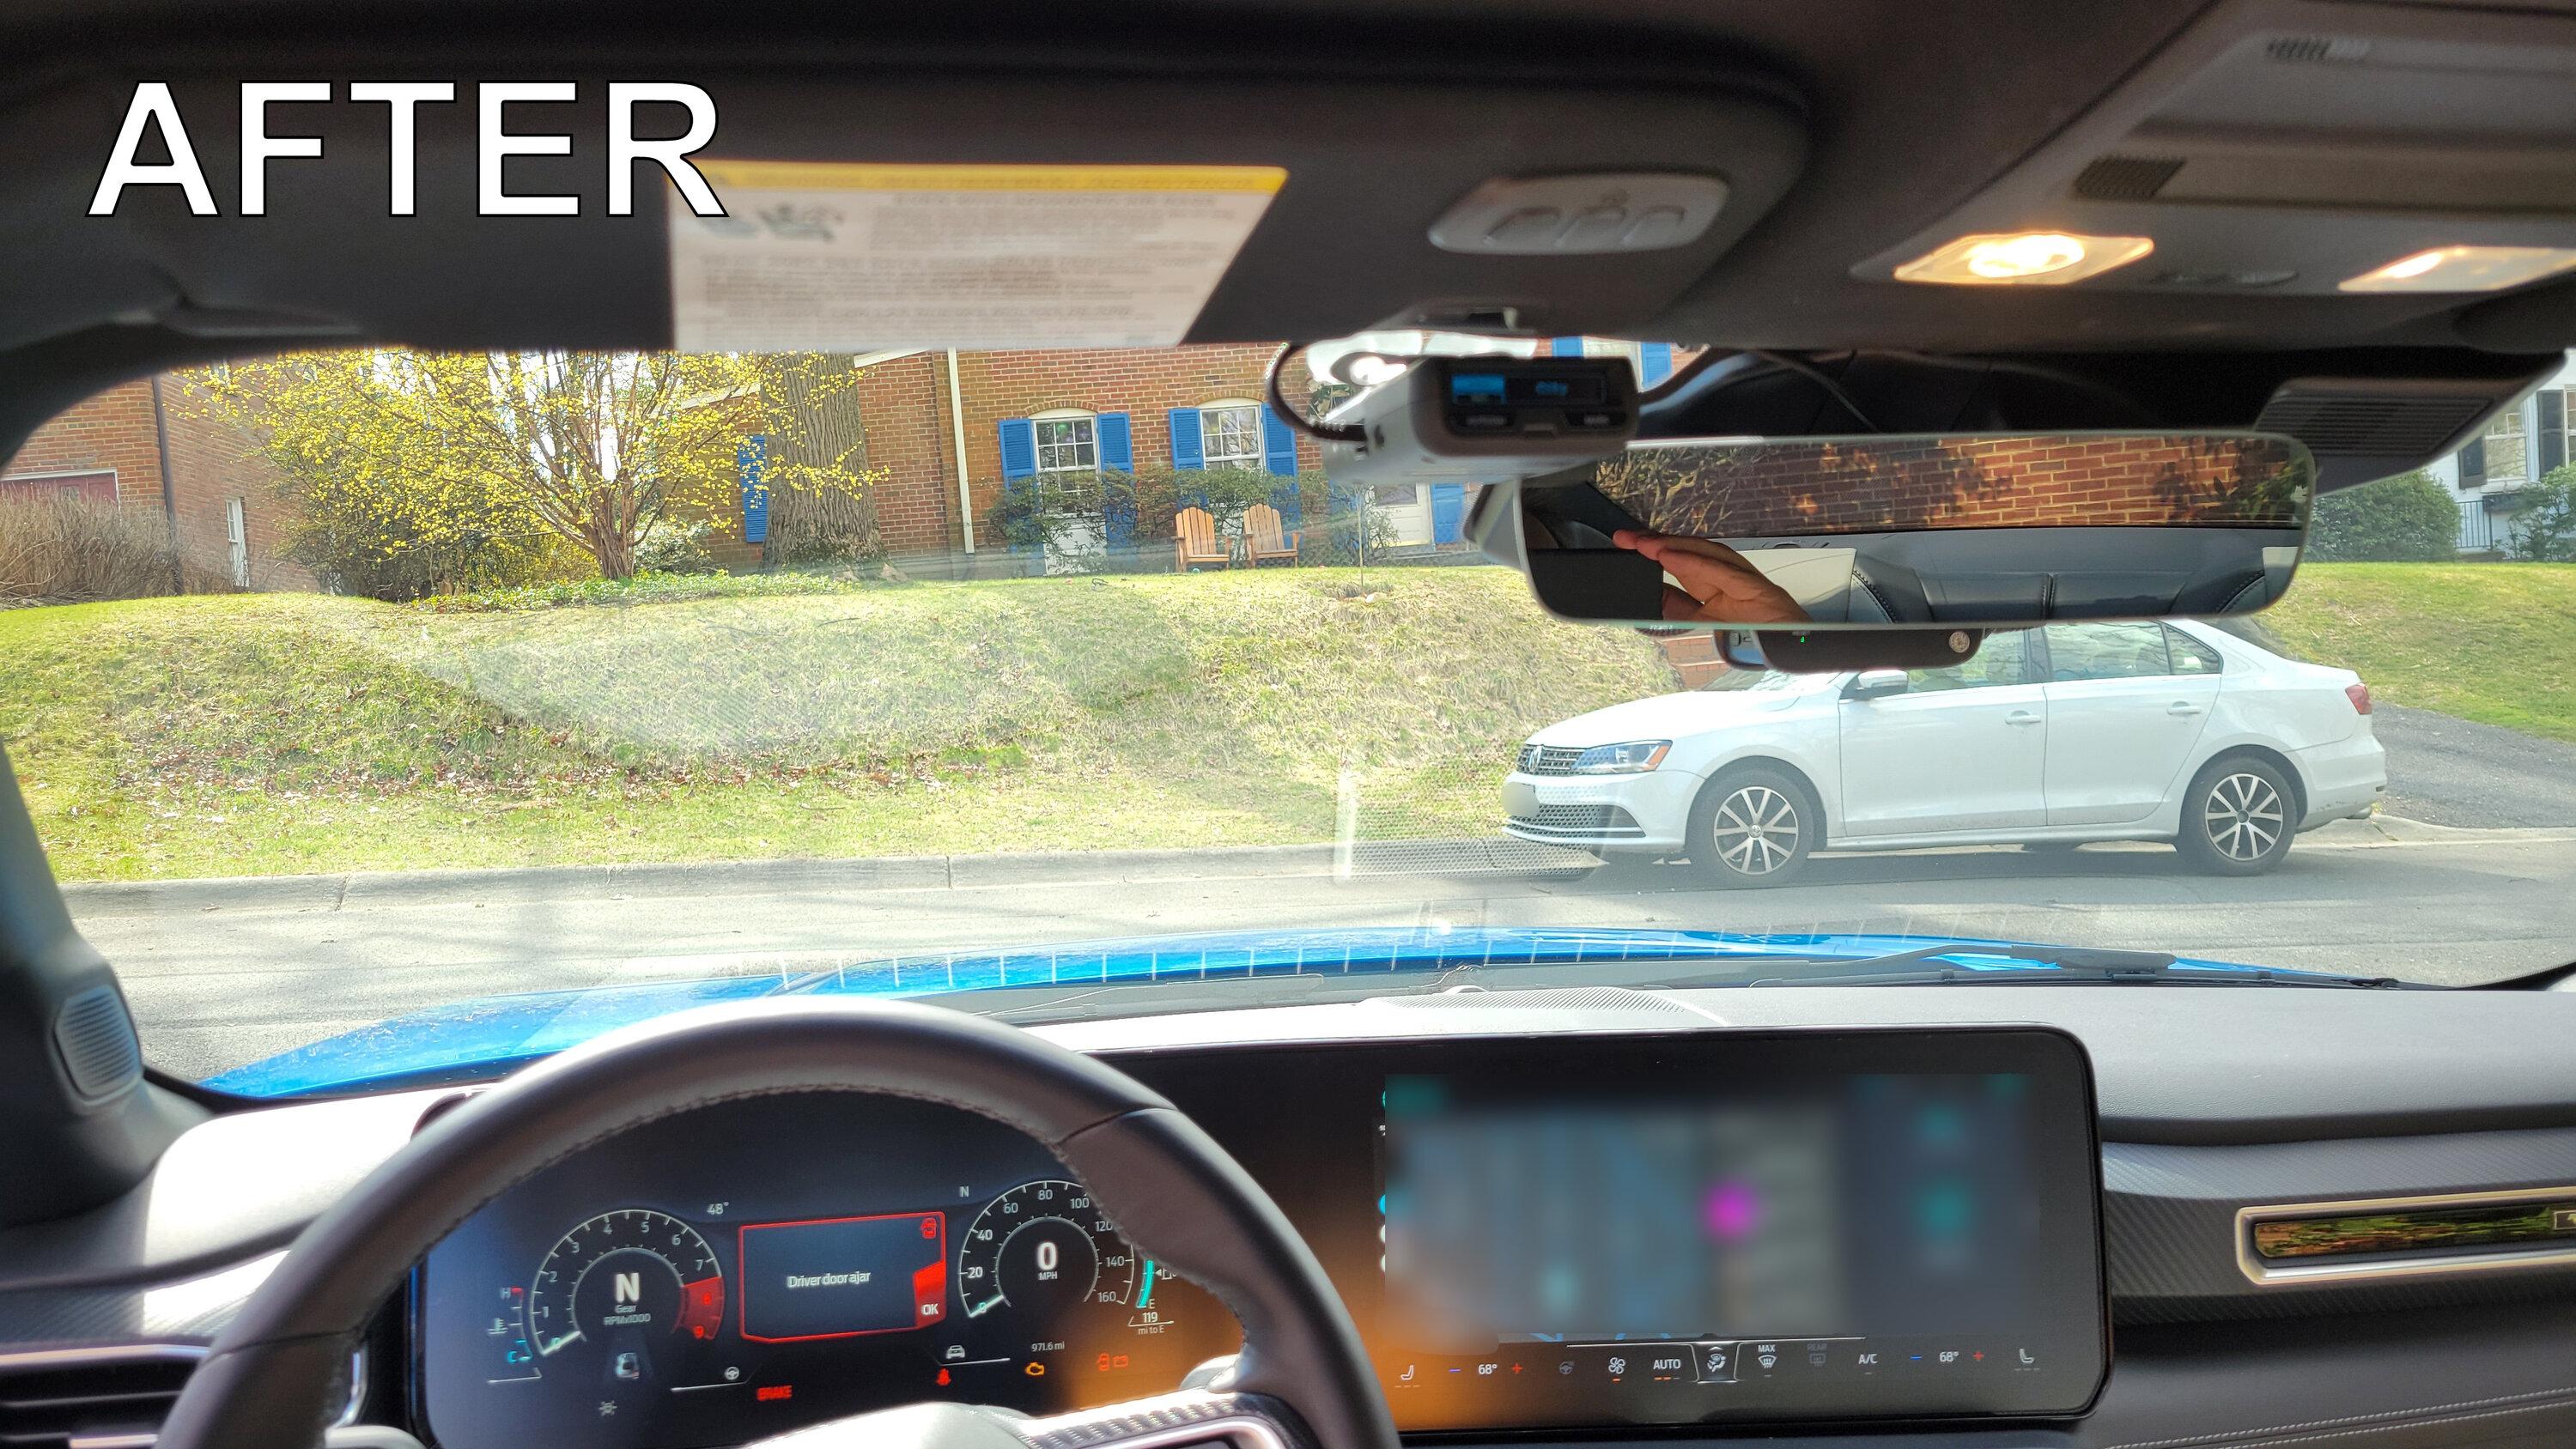
I don't know which mirror you have, but this is the blendmount that worked for my Dark Horse.
Sponsored


Ducatti20

Well-Known Member
Joined
Sep 24, 2024
Threads
0
Messages
114
Reaction score
172
Location
Phoenix, AZ
Vehicle(s)
2024 Mustang GT, 1967 Mustang Coupe 289
Followed this guide today and hardwired in my Uniden R8W with Blendmount. Works great!
Will probably still tinker with location and angles, but its all tucked up there for now. -No idea why it look like it's half on in that picture lol.

IMG_2832.JPG
IMG_2833.JPG
IMG_2835.JPG
 

EX-LIGHTFIGHTER317

New Member
Joined
Aug 14, 2025
Threads
0
Messages
1
Reaction score
0
Location
Pawleys Island, SC
Vehicle(s)
2024 MUSTANG GT PREMIUM CONVERTIBLE
Howdy all,

Saw a previous thread regarding hard wiring a radar detector but wanted to create a how to thread since it’s pretty simple but not very self explanatory if you don’t know what you’re looking for. With this, your radar will turn on and off with the car

First off, grab your mirror and the mirror stem and pull it out and down to give good access to the giant plastic housing behind the mirror. The black housing has two pieces, the first is directly above the mirror stem and comes off with a little bit of force. You don’t have to remove this piece just yet and I found it easier to first take off the giant plastic piece then take off the smaller one.

To take off the big housing, I started on the driver’s side with just my fingers (a trim removal tool would be great here). Start at the top and slowly pull down with your fingers running across the edge. There are only 4 tabs, and once you get the left tab loose, it’s much easier to do the rest. The tabs are circled in red below.
IMG_6645.jpeg

The tab on the far passenger side gave me some trouble. First off I think the plastic tab was not made properly because it’s all twisted. When I got the housing off the yellow clip stayed on the window. Hasn’t caused me any issues but just be careful even if I wasn’t. It’s sturdy but I’m sure you can break something.
With the housing off, your mirror will now look like this. 12V switched power can be drawn from the rain sensing wipers which is circled in red below.
IMG_6642.jpeg


Unplug the sensor and look for the white and black wires. White is power and black is ground.
IMG_6646.jpeg


I used a simple tap in pin harness and just slid the pins into the holes where the wires go. No cutting or splicing needed. Something like this from Amazon
1704155071431.png


Once you insert the pins it will look like this!
IMG_6647.jpeg


I wrapped the wires with some electrical tape just so nothing comes loose and plugged the connector back in.
TO CHECK IF IT WORKS YOU HAVE TO PLUG THE CONNECTOR BACK IN. It will not work with the connector disconnected from the windshield.
IMG_6649.jpeg


Turn the car or accessory power on and your radar should now turn on and off with the car!

Now put everything back one. I routed the cord out the “back” of the housing, near the USB port. There’s actually a slot on the right side of the housing for a cable but 1. My cable was too short to do that and 2. The cable just looks dumb hanging out so much.

So I also got a BlendMount for Christmas. This is my second BlendMount and I highly recommend them. I will say though, install is a big pain in the ass since everything is so small and you have to tighten the screws with Allen keys.
The included instructions with the BlendMount are great, so I’m not gonna rewrite them but I do have 3 tips.
1. Step 7 talks about removing the middle spacer on the BlendMount if it hangs too low. I found that it did look like garbage with that middle piece so I removed it before I installed.
2. Since I wanted the radar as close to the mirror as possible, I had to mount the BlendMount as far up with mirror stem as possible. I.e as close to the plastic housing as possible. It’s a pain in the ass, see #3
3. Once you have it in position and lined up semi snug on the stem, it’s going to seem impossible to tighten the final screw. Move the entire stem out and sideways and you’ll have some more room which seems obvious but I struggled for a bit.

Congrats!! After about an hour or so you’ll have a real nice looking and sturdy mount with a radar that turns on and off with the car and no wire routing or splicing needed. I hate the suction cups and like a clean look. Here is my final install picture.
IMG_6650.jpeg

IMG_6652.jpeg
Very helpful, thank you!
 

Junkyard Dog

Well-Known Member
Joined
Jun 3, 2025
Threads
54
Messages
2,565
Reaction score
2,067
Location
Georgia
Vehicle(s)
2024 Dark Horse
Thanks for this post. I had a very messy install between a dashcam plugged into the visor USB, and a Uniden R3 plugged into the ol' cigarette lighter. I'm a little anxious about just yanking and pulling panels, not trusting where or how they're fastened, so this write up and your pictures gave me the confidence to take a go at it. Very happy with the result. Before and after pictures below.

Next weekend, I'm having a sunstrip installed, then after it cures a better mount for the RD, but the wiring is already a huge improvement. Thanks again!

BEFORE.jpg
AFTER.jpg
Excellent result. Like you, I am scared to start popping open panels. I would like to have front and rear cameras and a radar detector mounted, though.


Frank Raspanti

Stangienator
Joined
Mar 26, 2015
Threads
2
Messages
26
Reaction score
13
Location
Brewster NY
Vehicle(s)
2015 Mustang V6
Thanks for this post, which enabled me to order my Valentine 1, gen2 radar detector. The blendmount comes Friday but I will get the detector and mirror wire tap tomorrow so I can do the hardwiring prior and be ready for the Blendmount. This forum is awesome!
Thank you Interstellar.
 
OP
OP
Interstellar

Interstellar

Well-Known Member
Joined
Mar 27, 2023
Threads
17
Messages
736
Reaction score
984
Location
Dallas
Vehicle(s)
C6 Z06
Thanks for this post, which enabled me to order my Valentine 1, gen2 radar detector. The blendmount comes Friday but I will get the detector and mirror wire tap tomorrow so I can do the hardwiring prior and be ready for the Blendmount. This forum is awesome!
Thank you Interstellar.
Glad you found it useful. Nearly 30k miles later, no tickets, no electrical gremlins, no regrets 😎
 

nitepony

Well-Known Member
Joined
Apr 3, 2024
Threads
6
Messages
51
Reaction score
59
Location
Charlotte
Vehicle(s)
2024 Mustang GT Premium
Anyone have any advice for removing the mirror housing? I'm using a trim removal tool and can't get the clips to budge for the life of me. I already cut my finger trying to get the driver's side clip removed- I'm using a decent amount of force but it doesn't seem to be getting me anywhere. I don't want to pull too hard because I'm scared of breaking something. Any advice is appreciated!
 

LouG

Well-Known Member
Joined
Mar 11, 2025
Threads
33
Messages
2,588
Reaction score
3,000
Location
New Zealand
Vehicle(s)
2025 Mustang GT
I just went as carefully as I could, but it does require force. I did break one tab though.
It might pay to price a new cover.
 

nitepony

Well-Known Member
Joined
Apr 3, 2024
Threads
6
Messages
51
Reaction score
59
Location
Charlotte
Vehicle(s)
2024 Mustang GT Premium
I just went as carefully as I could, but it does require force. I did break one tab though.
It might pay to price a new cover.
I ended up getting one clip undone on the passenger side. From there, I could see that the piece that holds the housing itself onto the glass was starting to come off around the other clips, so I gave up and will be returning my blendmount/wire tap kit.

I’ll just be sticking to my current suction-cup/12V setup. The risk of breaking the damn thing isn’t worth it for me. Others have said the housing comes off with no issue at all, so I might have gotten an unlucky, difficult build.
 

LouG

Well-Known Member
Joined
Mar 11, 2025
Threads
33
Messages
2,588
Reaction score
3,000
Location
New Zealand
Vehicle(s)
2025 Mustang GT
That's a pain. But have you already got a 12v feed with an RJ plug up there?
 

nitepony

Well-Known Member
Joined
Apr 3, 2024
Threads
6
Messages
51
Reaction score
59
Location
Charlotte
Vehicle(s)
2024 Mustang GT Premium
That's a pain. But have you already got a 12v feed with an RJ plug up there?
I’m just running the standard cord from the cigarette lighter to my radar. It’s mounted low (right above my dash) so it doesn’t get in the way too much.
 

LouG

Well-Known Member
Joined
Mar 11, 2025
Threads
33
Messages
2,588
Reaction score
3,000
Location
New Zealand
Vehicle(s)
2025 Mustang GT
I’m just running the standard cord from the cigarette lighter to my radar. It’s mounted low (right above my dash) so it doesn’t get in the way too much.
Gotcha. I normally mount detectors as high as poss. But under the mirror is the only practical place on the "Stang. It's usually easy to tuck power cords under the A pillar trim and edge of the headlining without disassembling stuff.
 

Paul's stable

Well-Known Member
Joined
May 4, 2024
Threads
0
Messages
983
Reaction score
946
Location
Maple Ridge BC Canada
Vehicle(s)
2024 Dark Horse 2006 GT with Temec 6 speed 4.11
Gotcha. I normally mount detectors as high as poss. But under the mirror is the only practical place on the "Stang. It's usually easy to tuck power cords under the A pillar trim and edge of the headlining without disassembling stuff.
Mine is mounted on the windshield passenger side of the mirror at the top. The power comes from the wiper sensor. No vision blocked and no hanging wires.
 

LouG

Well-Known Member
Joined
Mar 11, 2025
Threads
33
Messages
2,588
Reaction score
3,000
Location
New Zealand
Vehicle(s)
2025 Mustang GT
Mine is mounted on the windshield passenger side of the mirror at the top. The power comes from the wiper sensor. No vision blocked and no hanging wires.
I couldn't do that. The V1 stopped the sunvisor from going back to the screen.
Sponsored


Top