Interstellar
Well-Known Member
- Thread starter
- #1
Howdy all,
Saw a previous thread regarding hard wiring a radar detector but wanted to create a how to thread since it’s pretty simple but not very self explanatory if you don’t know what you’re looking for. With this, your radar will turn on and off with the car
First off, grab your mirror and the mirror stem and pull it out and down to give good access to the giant plastic housing behind the mirror. The black housing has two pieces, the first is directly above the mirror stem and comes off with a little bit of force. You don’t have to remove this piece just yet and I found it easier to first take off the giant plastic piece then take off the smaller one.
To take off the big housing, I started on the driver’s side with just my fingers (a trim removal tool would be great here). Start at the top and slowly pull down with your fingers running across the edge. There are only 4 tabs, and once you get the left tab loose, it’s much easier to do the rest. The tabs are circled in red below.

The tab on the far passenger side gave me some trouble. First off I think the plastic tab was not made properly because it’s all twisted. When I got the housing off the yellow clip stayed on the window. Hasn’t caused me any issues but just be careful even if I wasn’t. It’s sturdy but I’m sure you can break something.
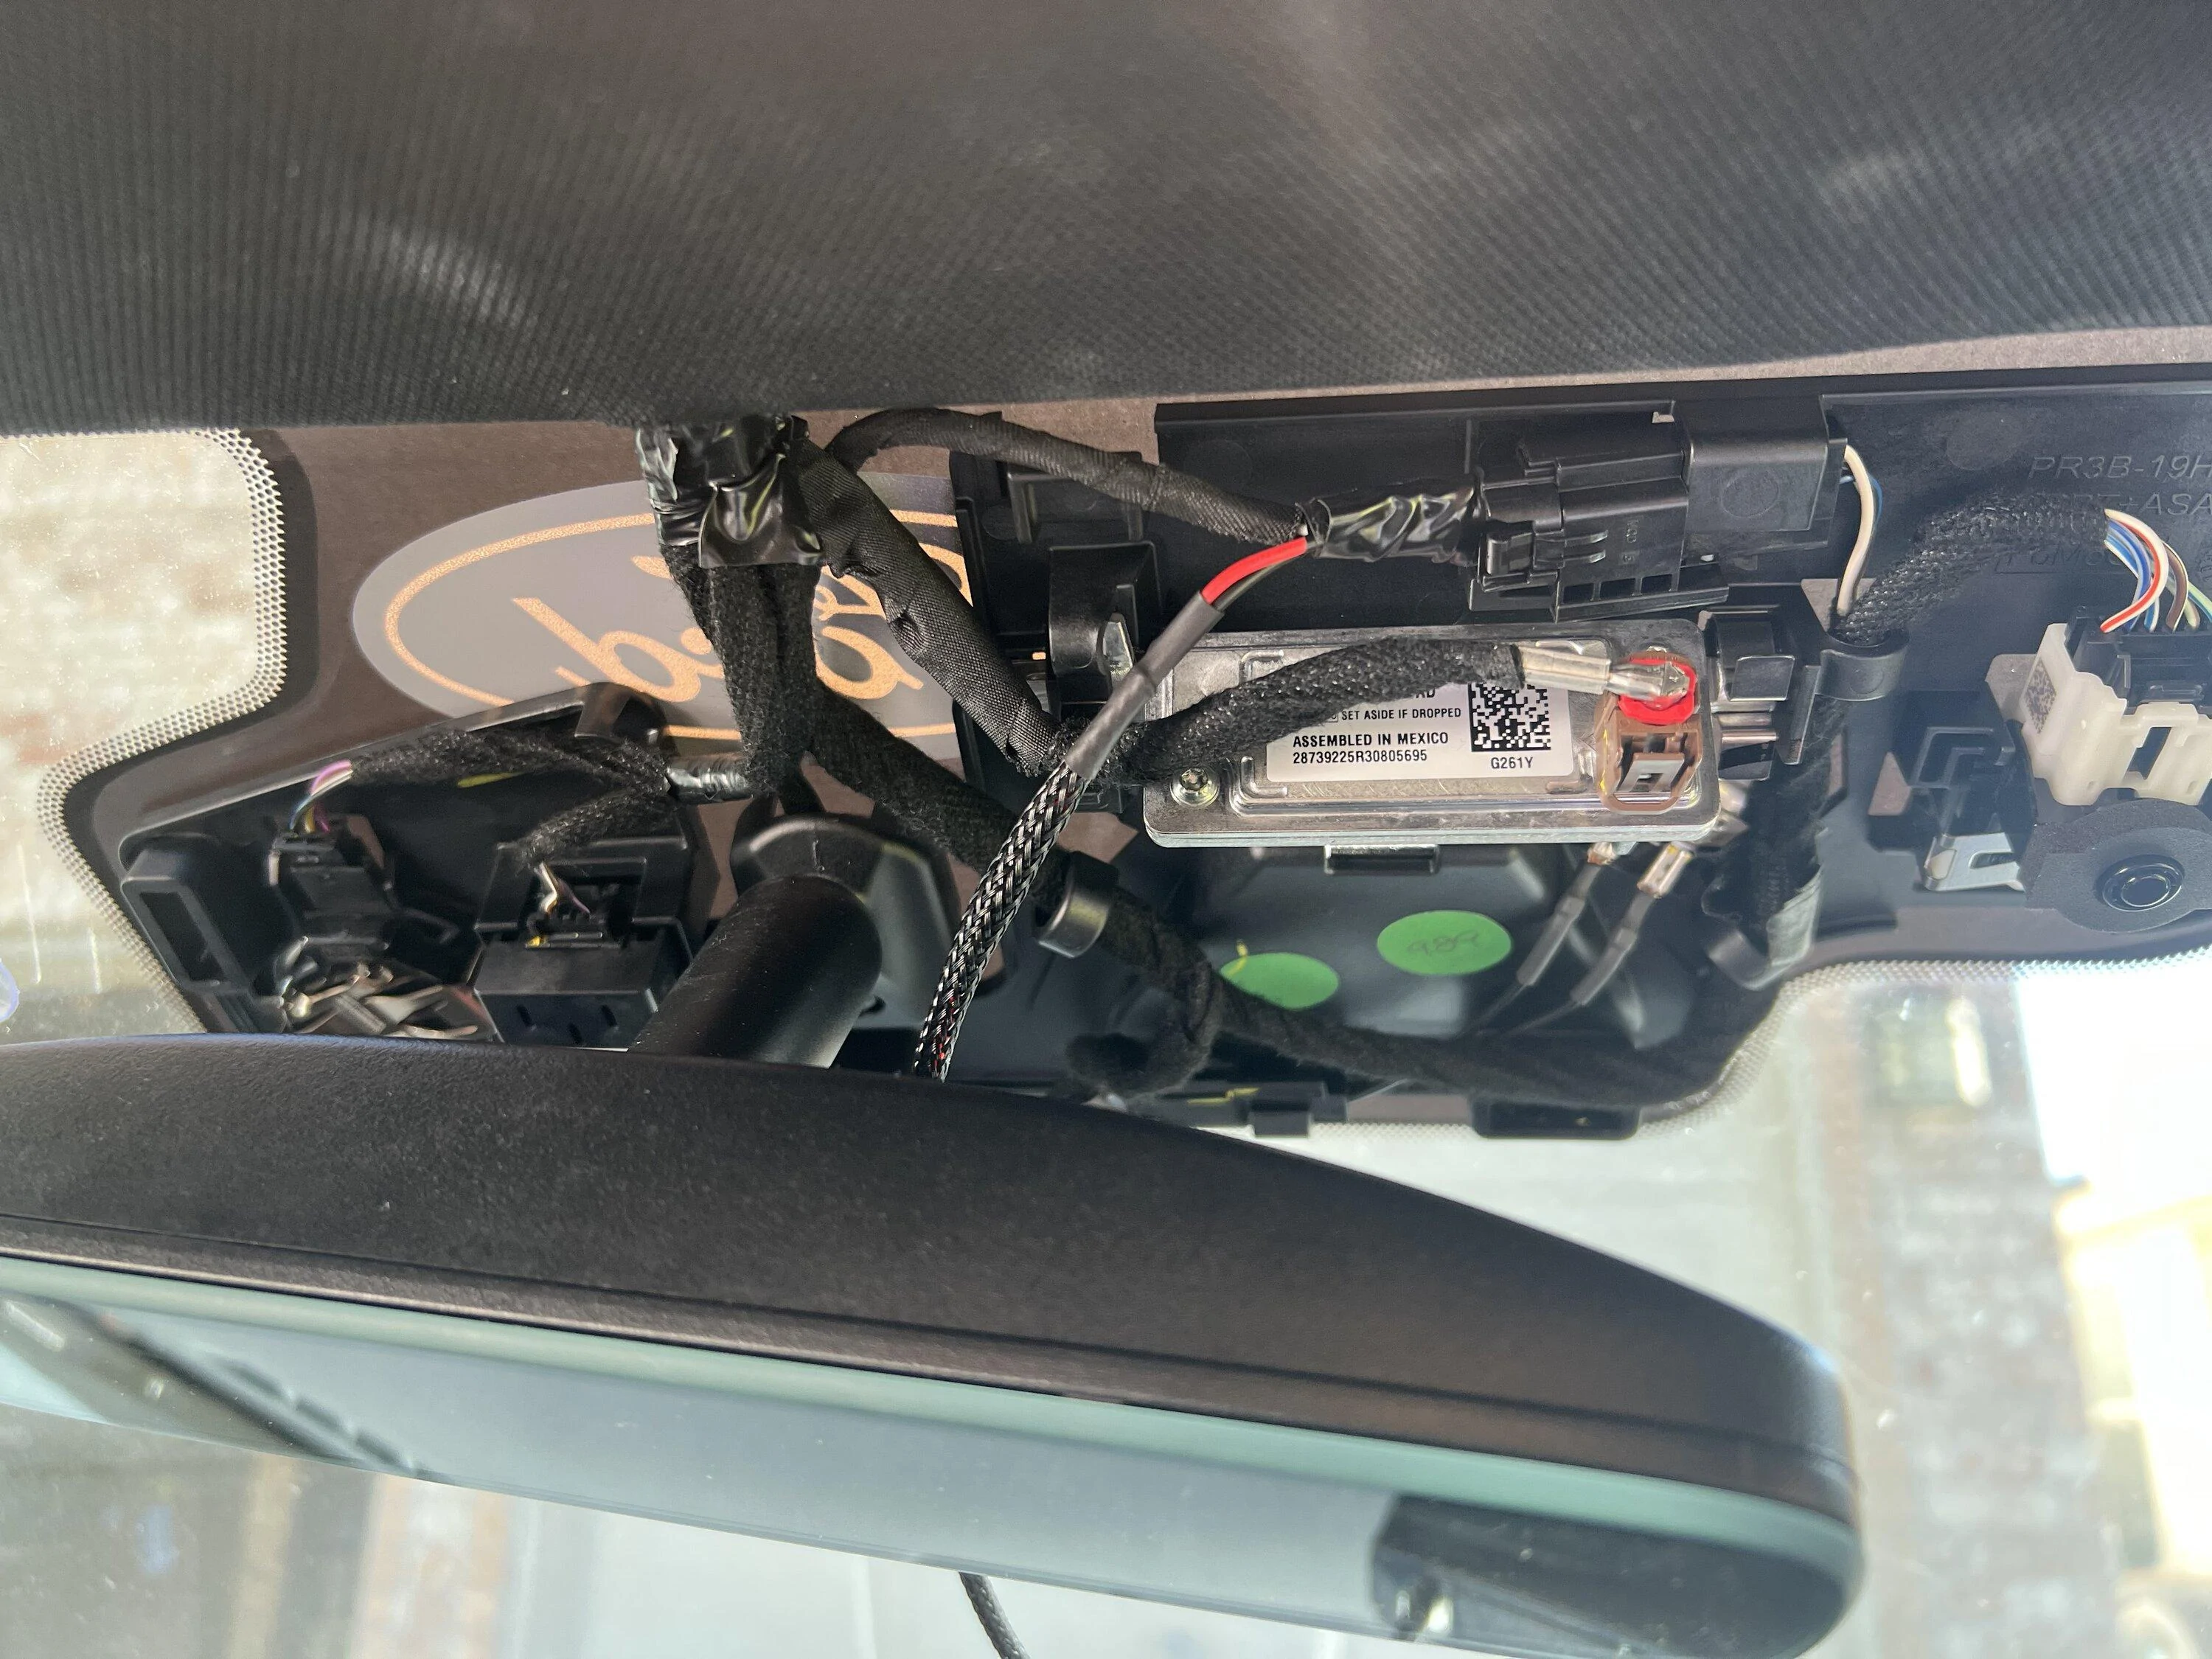
With the housing off, your mirror will now look like this. 12V switched power can be drawn from the rain sensing wipers which is circled in red below.
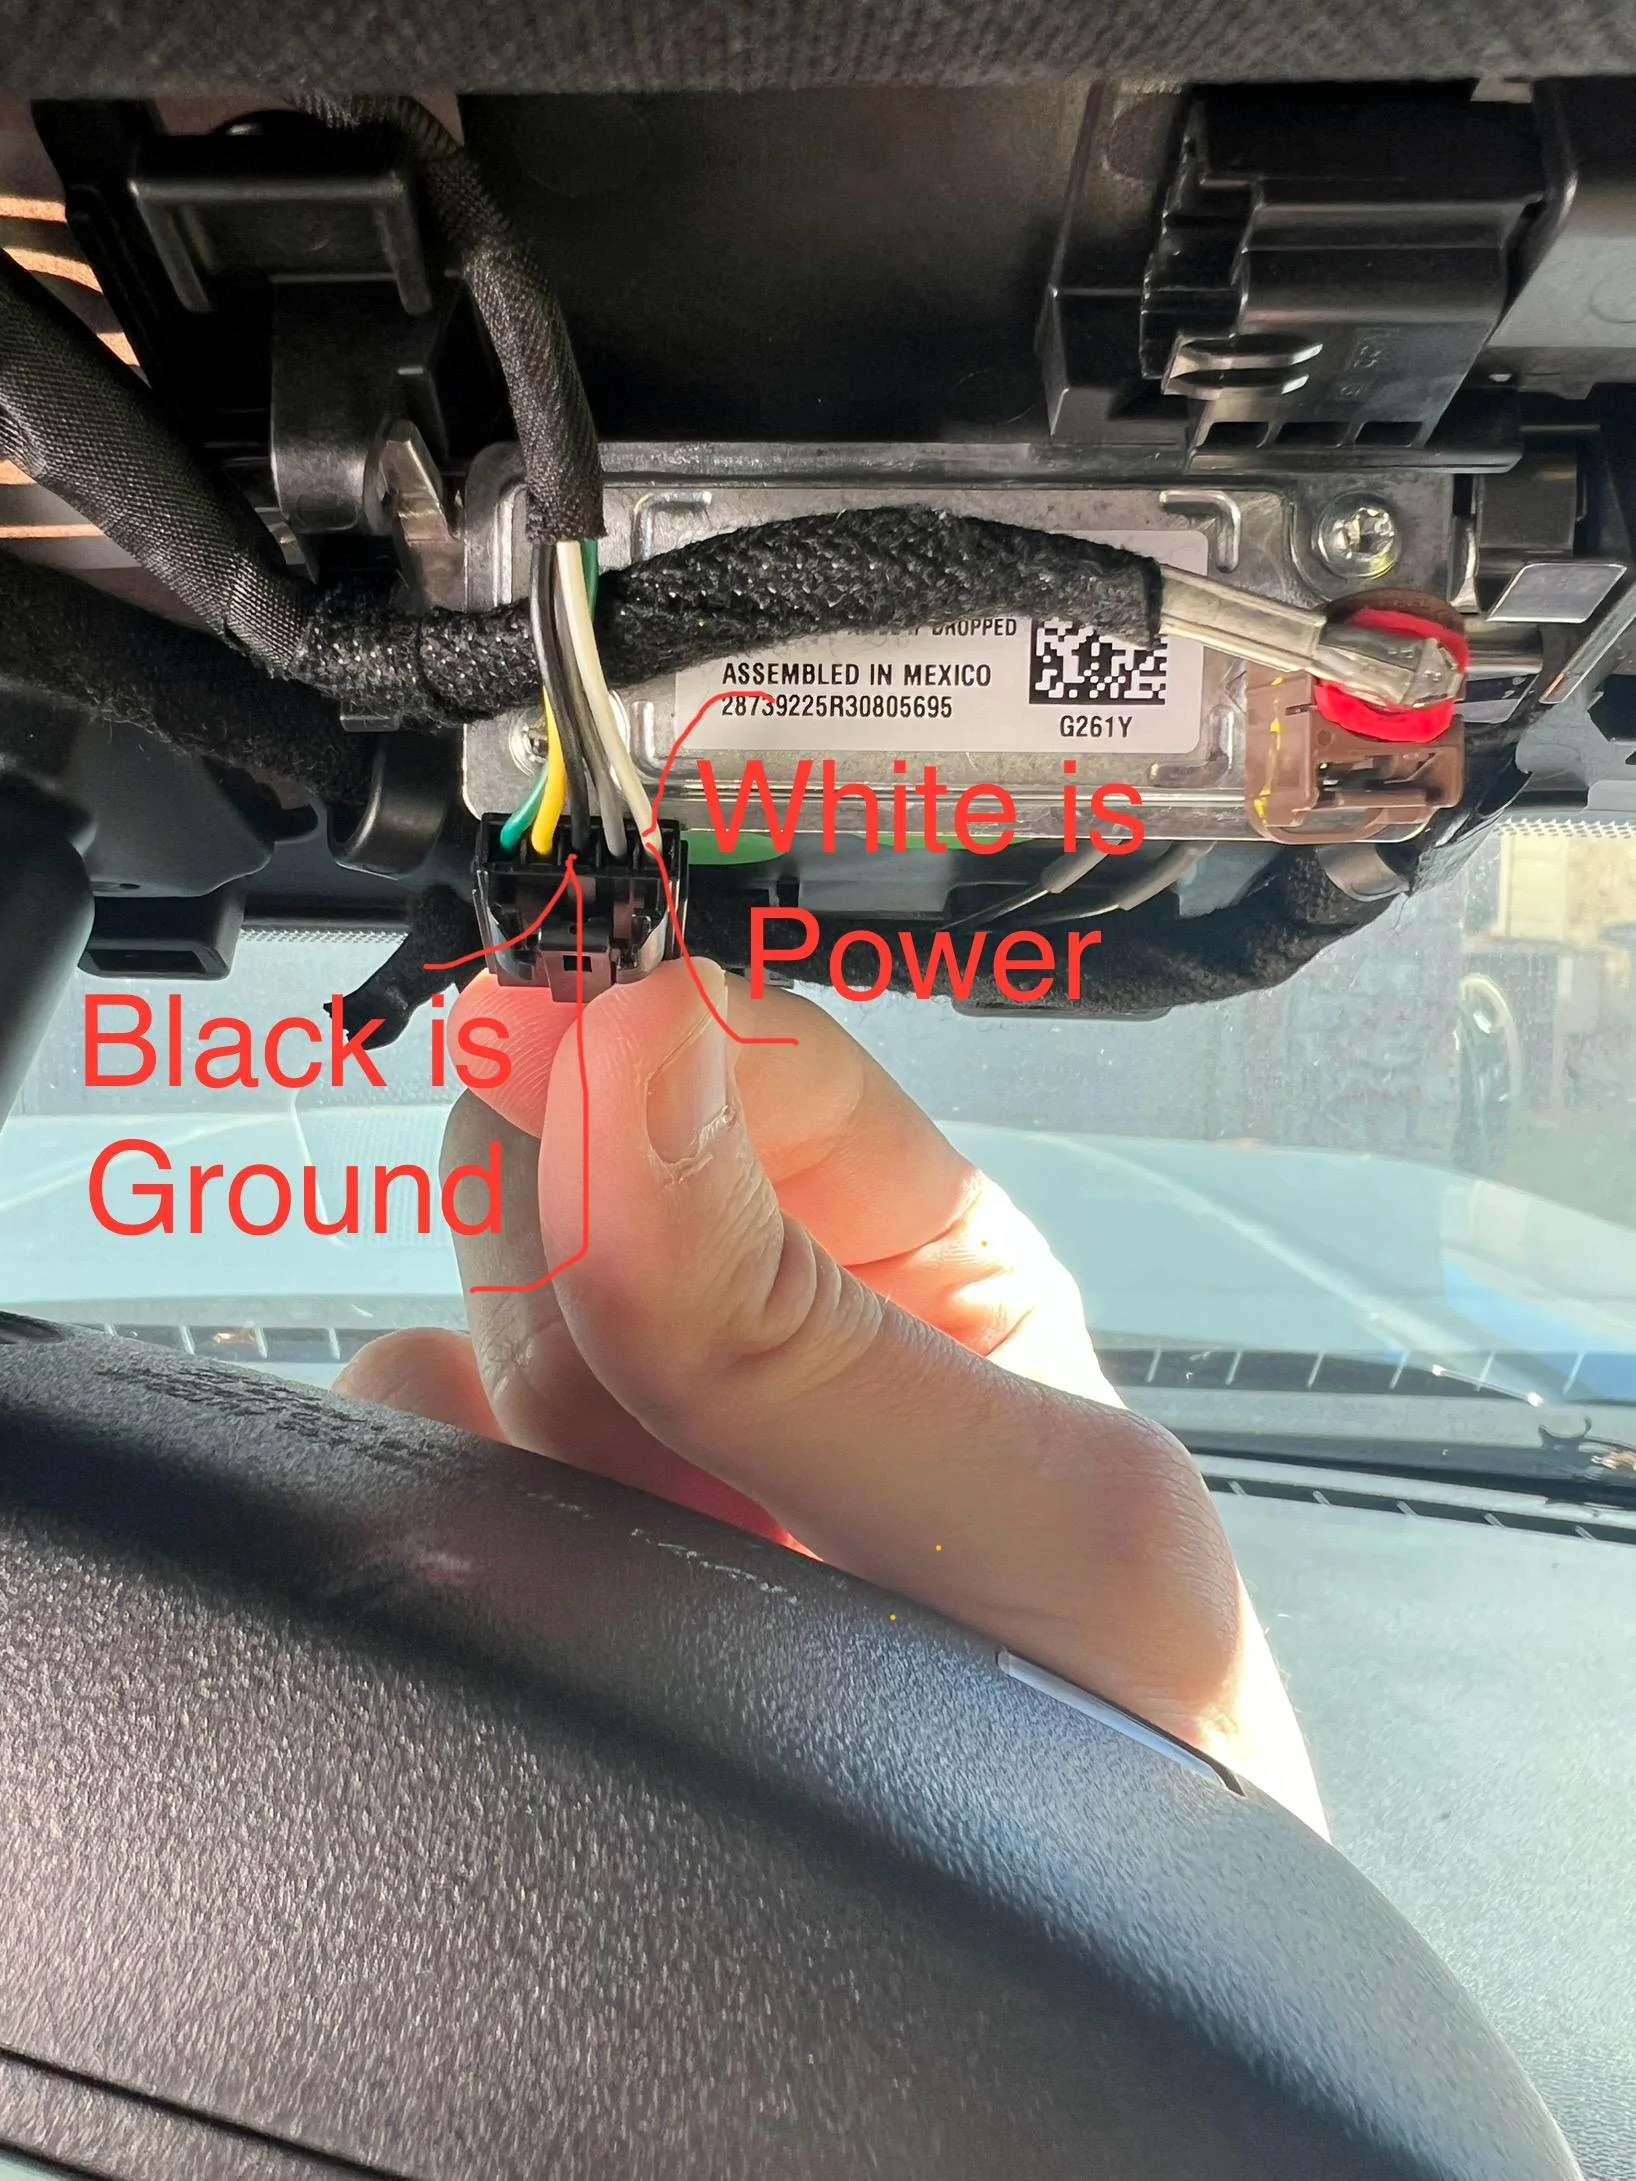
Unplug the sensor and look for the white and black wires. White is power and black is ground.

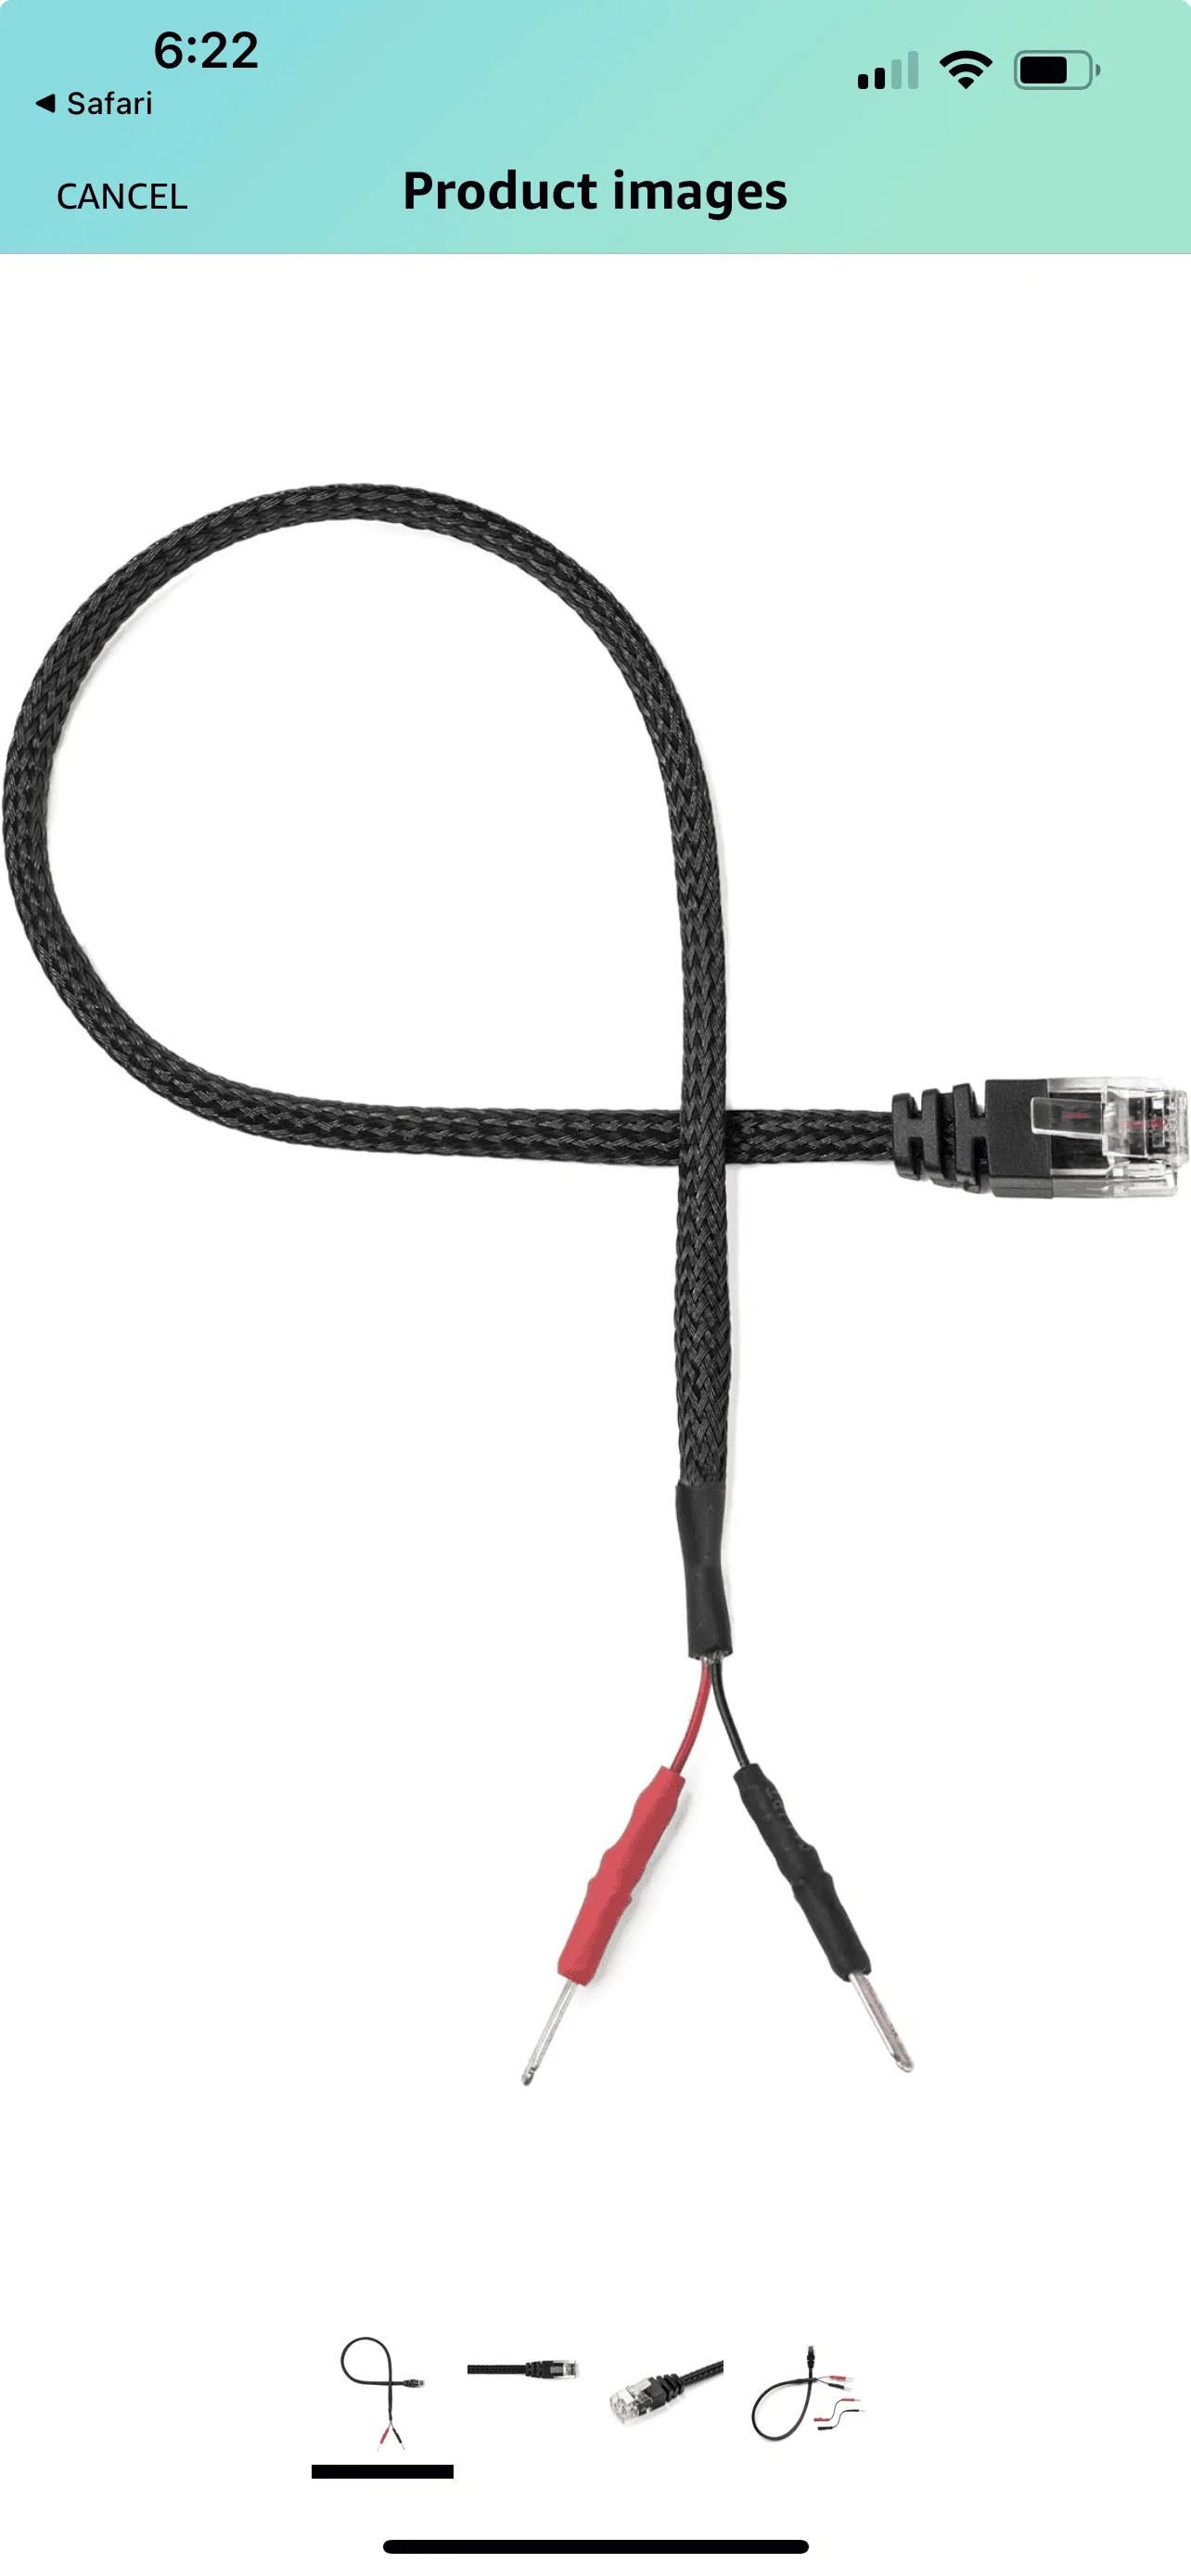
I used a simple tap in pin harness and just slid the pins into the holes where the wires go. No cutting or splicing needed. Something like this from Amazon

Once you insert the pins it will look like this!

I wrapped the wires with some electrical tape just so nothing comes loose and plugged the connector back in.
TO CHECK IF IT WORKS YOU HAVE TO PLUG THE CONNECTOR BACK IN. It will not work with the connector disconnected from the windshield.

Turn the car or accessory power on and your radar should now turn on and off with the car!
Now put everything back one. I routed the cord out the “back” of the housing, near the USB port. There’s actually a slot on the right side of the housing for a cable but 1. My cable was too short to do that and 2. The cable just looks dumb hanging out so much.
So I also got a BlendMount for Christmas. This is my second BlendMount and I highly recommend them. I will say though, install is a big pain in the ass since everything is so small and you have to tighten the screws with Allen keys.
The included instructions with the BlendMount are great, so I’m not gonna rewrite them but I do have 3 tips.
1. Step 7 talks about removing the middle spacer on the BlendMount if it hangs too low. I found that it did look like garbage with that middle piece so I removed it before I installed.
2. Since I wanted the radar as close to the mirror as possible, I had to mount the BlendMount as far up with mirror stem as possible. I.e as close to the plastic housing as possible. It’s a pain in the ass, see #3
3. Once you have it in position and lined up semi snug on the stem, it’s going to seem impossible to tighten the final screw. Move the entire stem out and sideways and you’ll have some more room which seems obvious but I struggled for a bit.
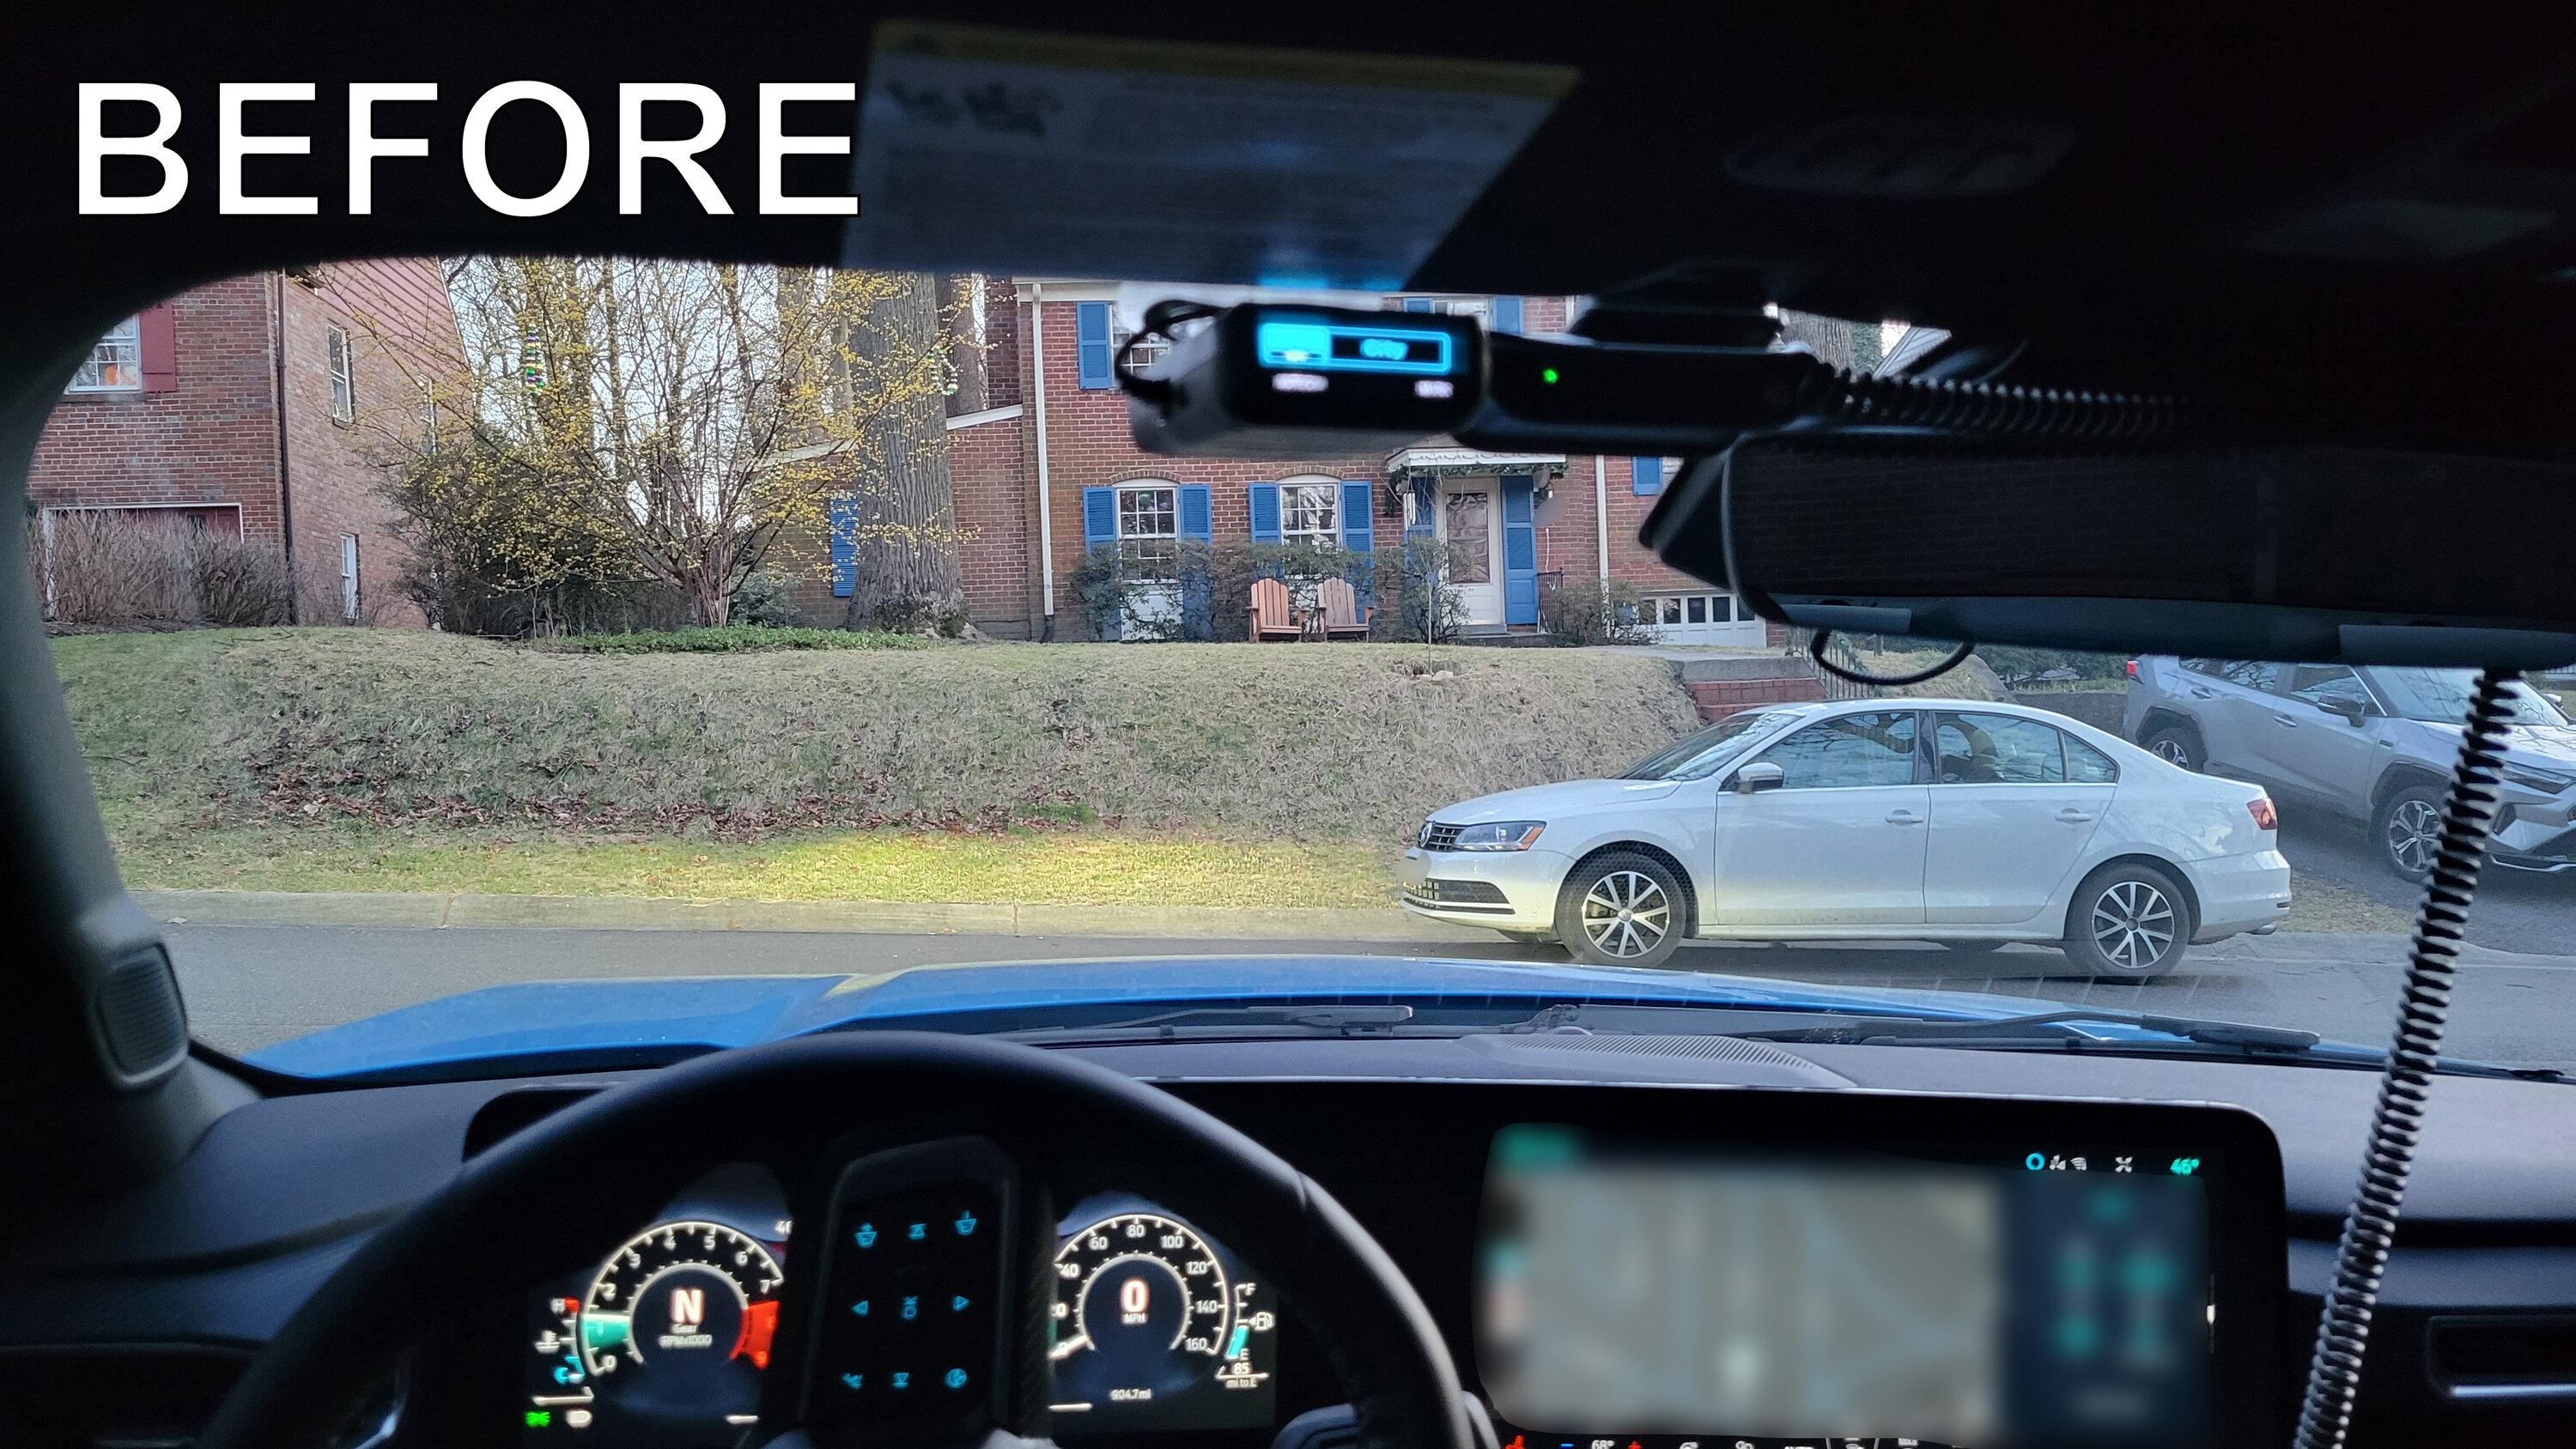
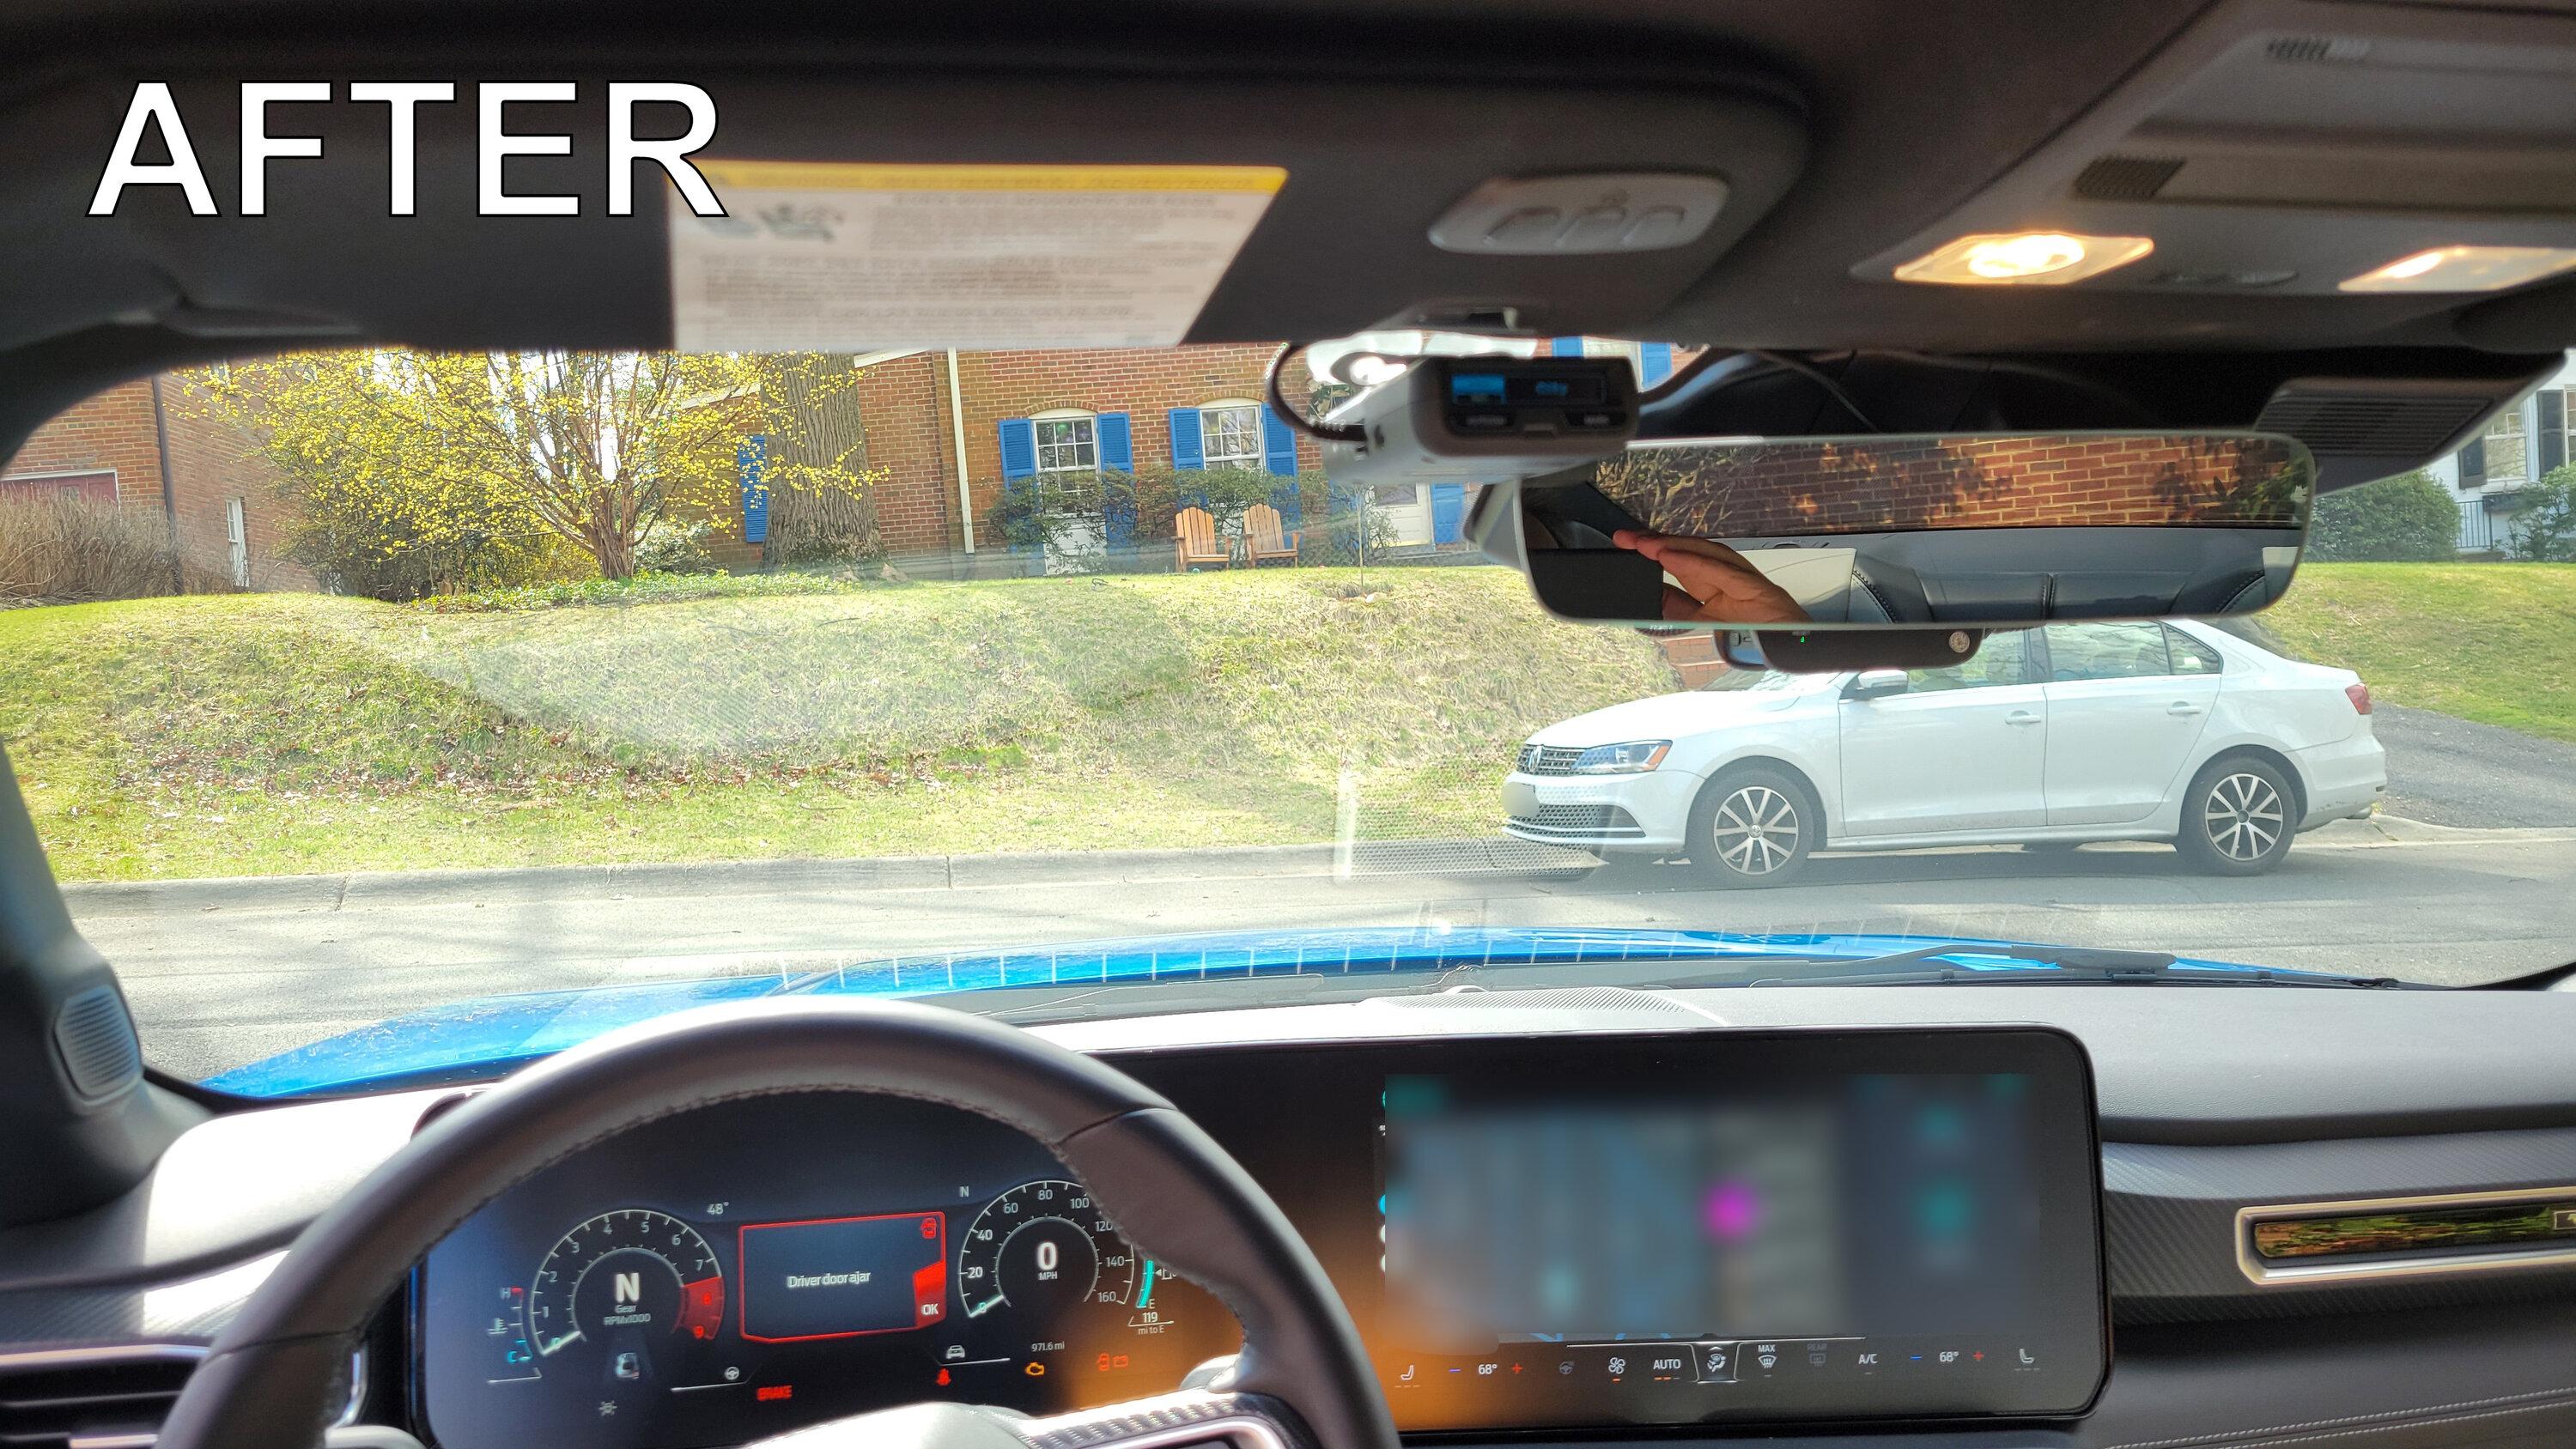
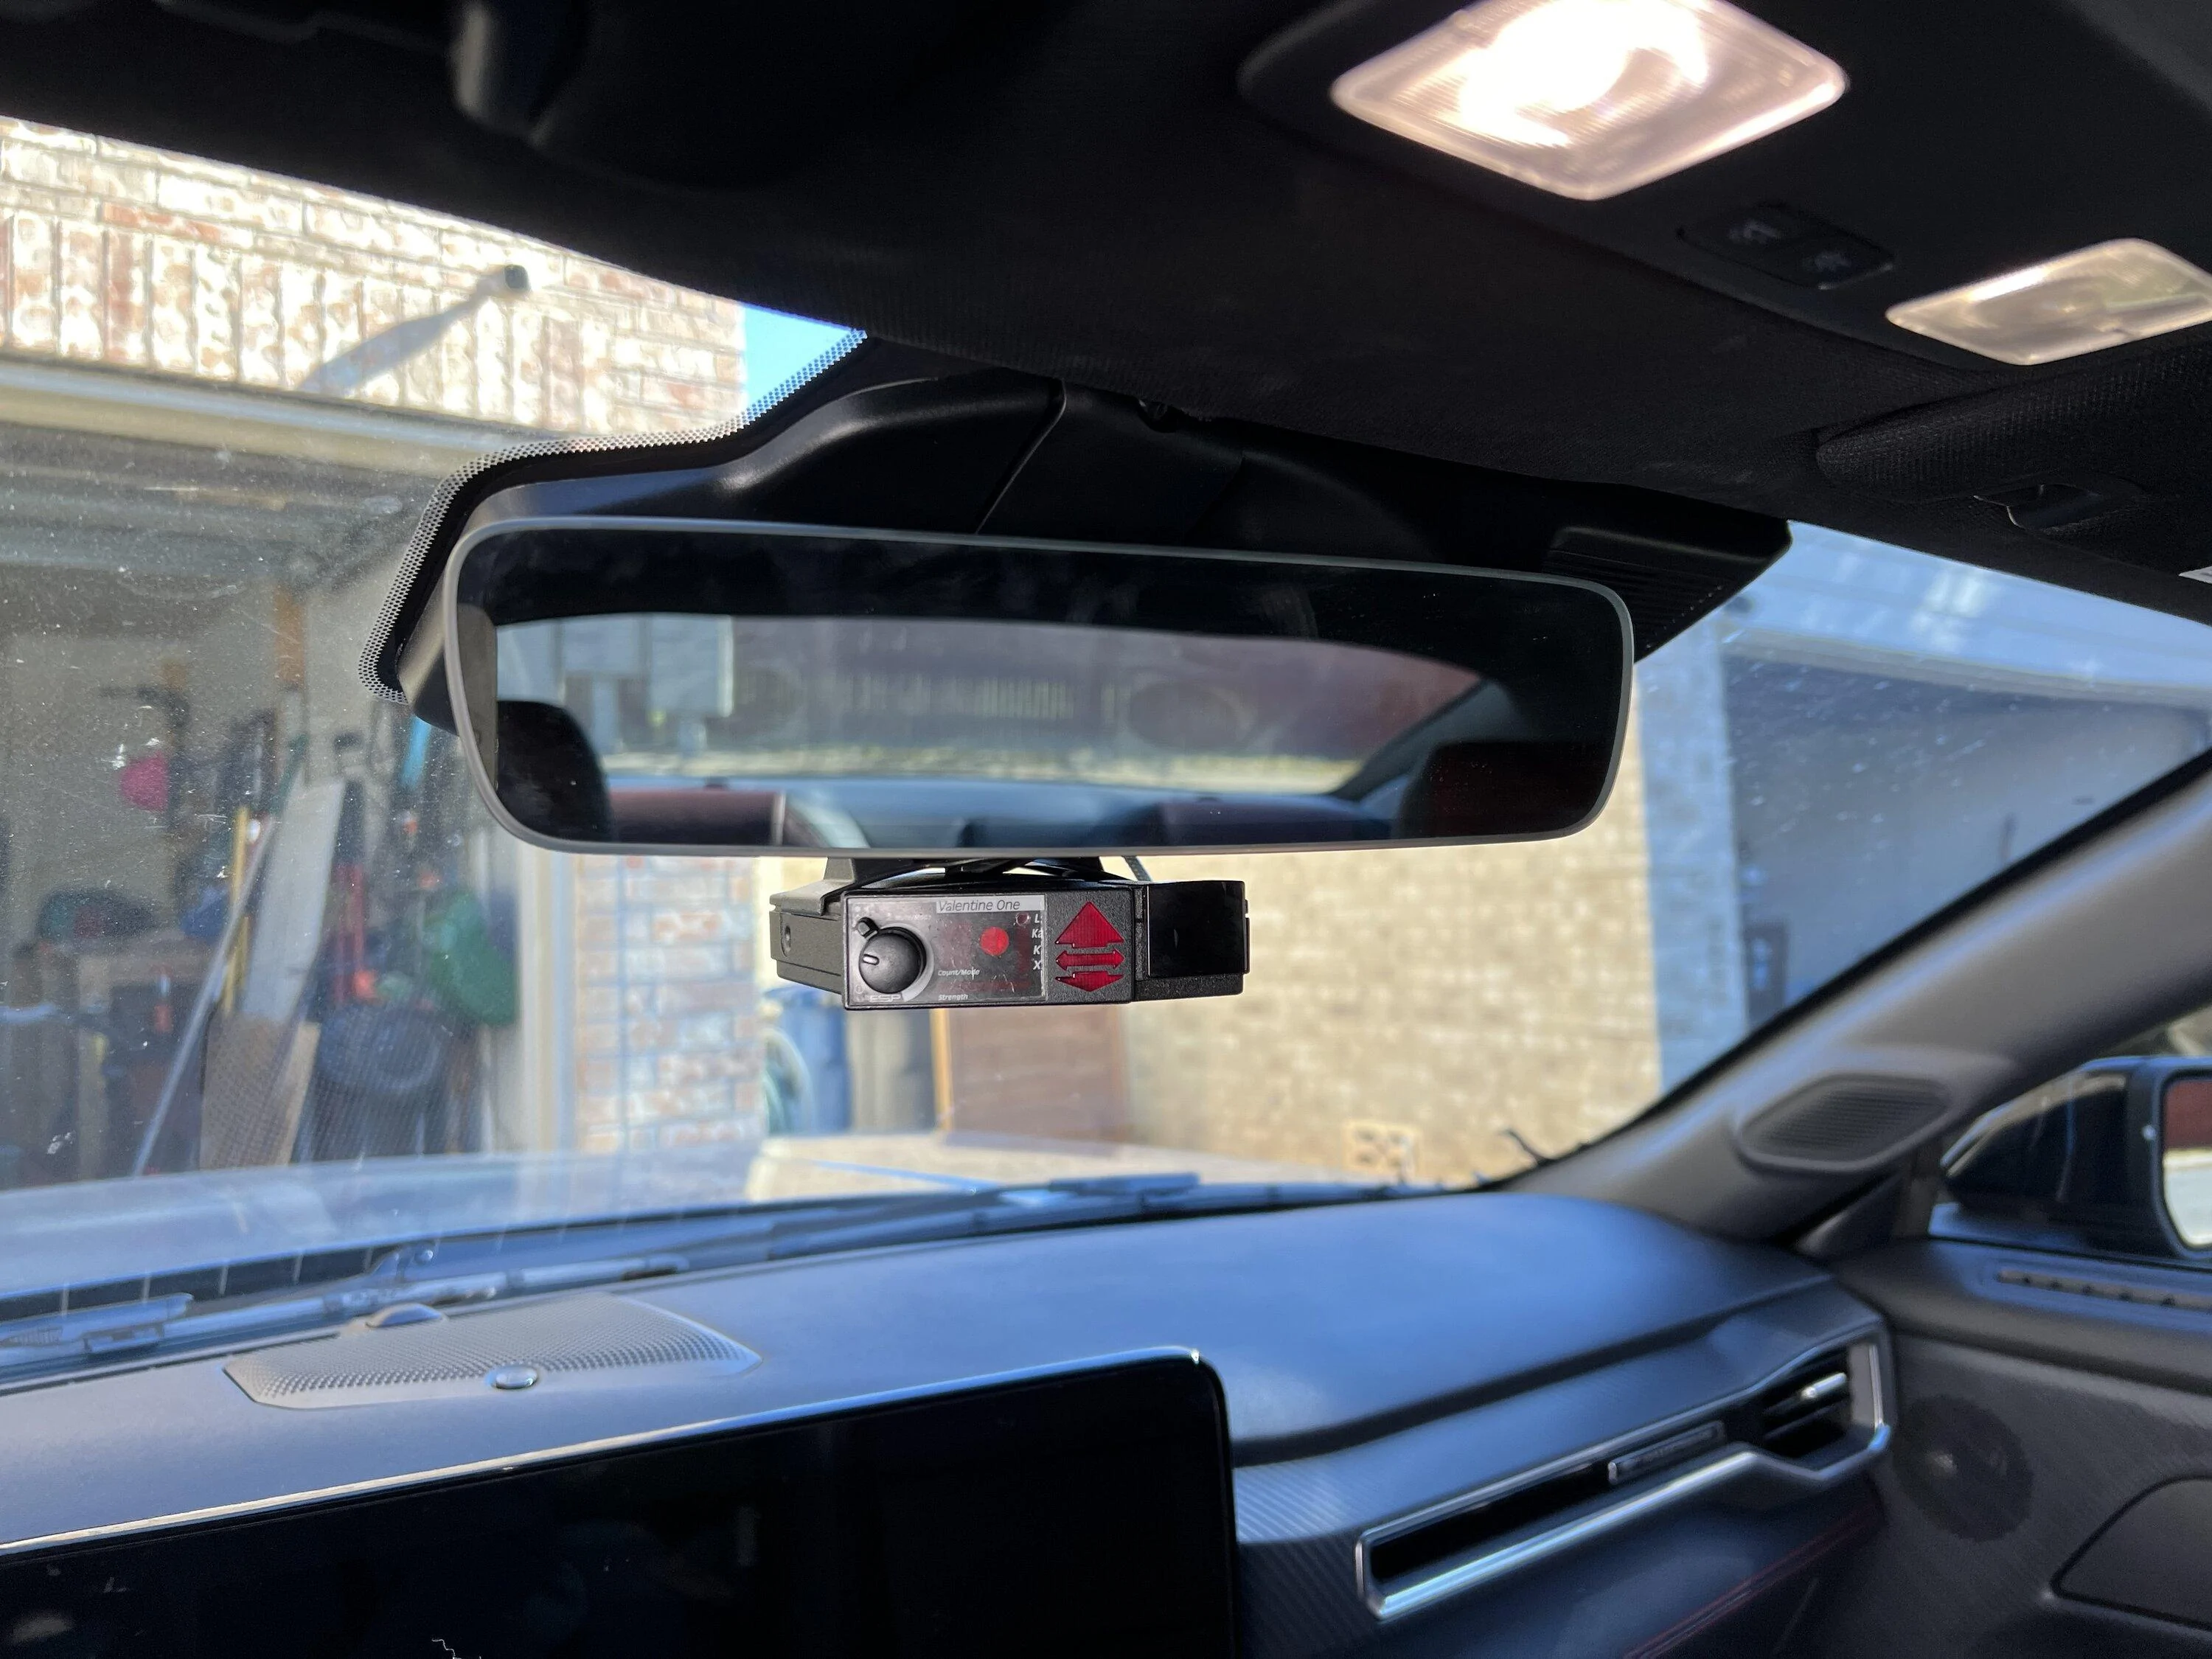
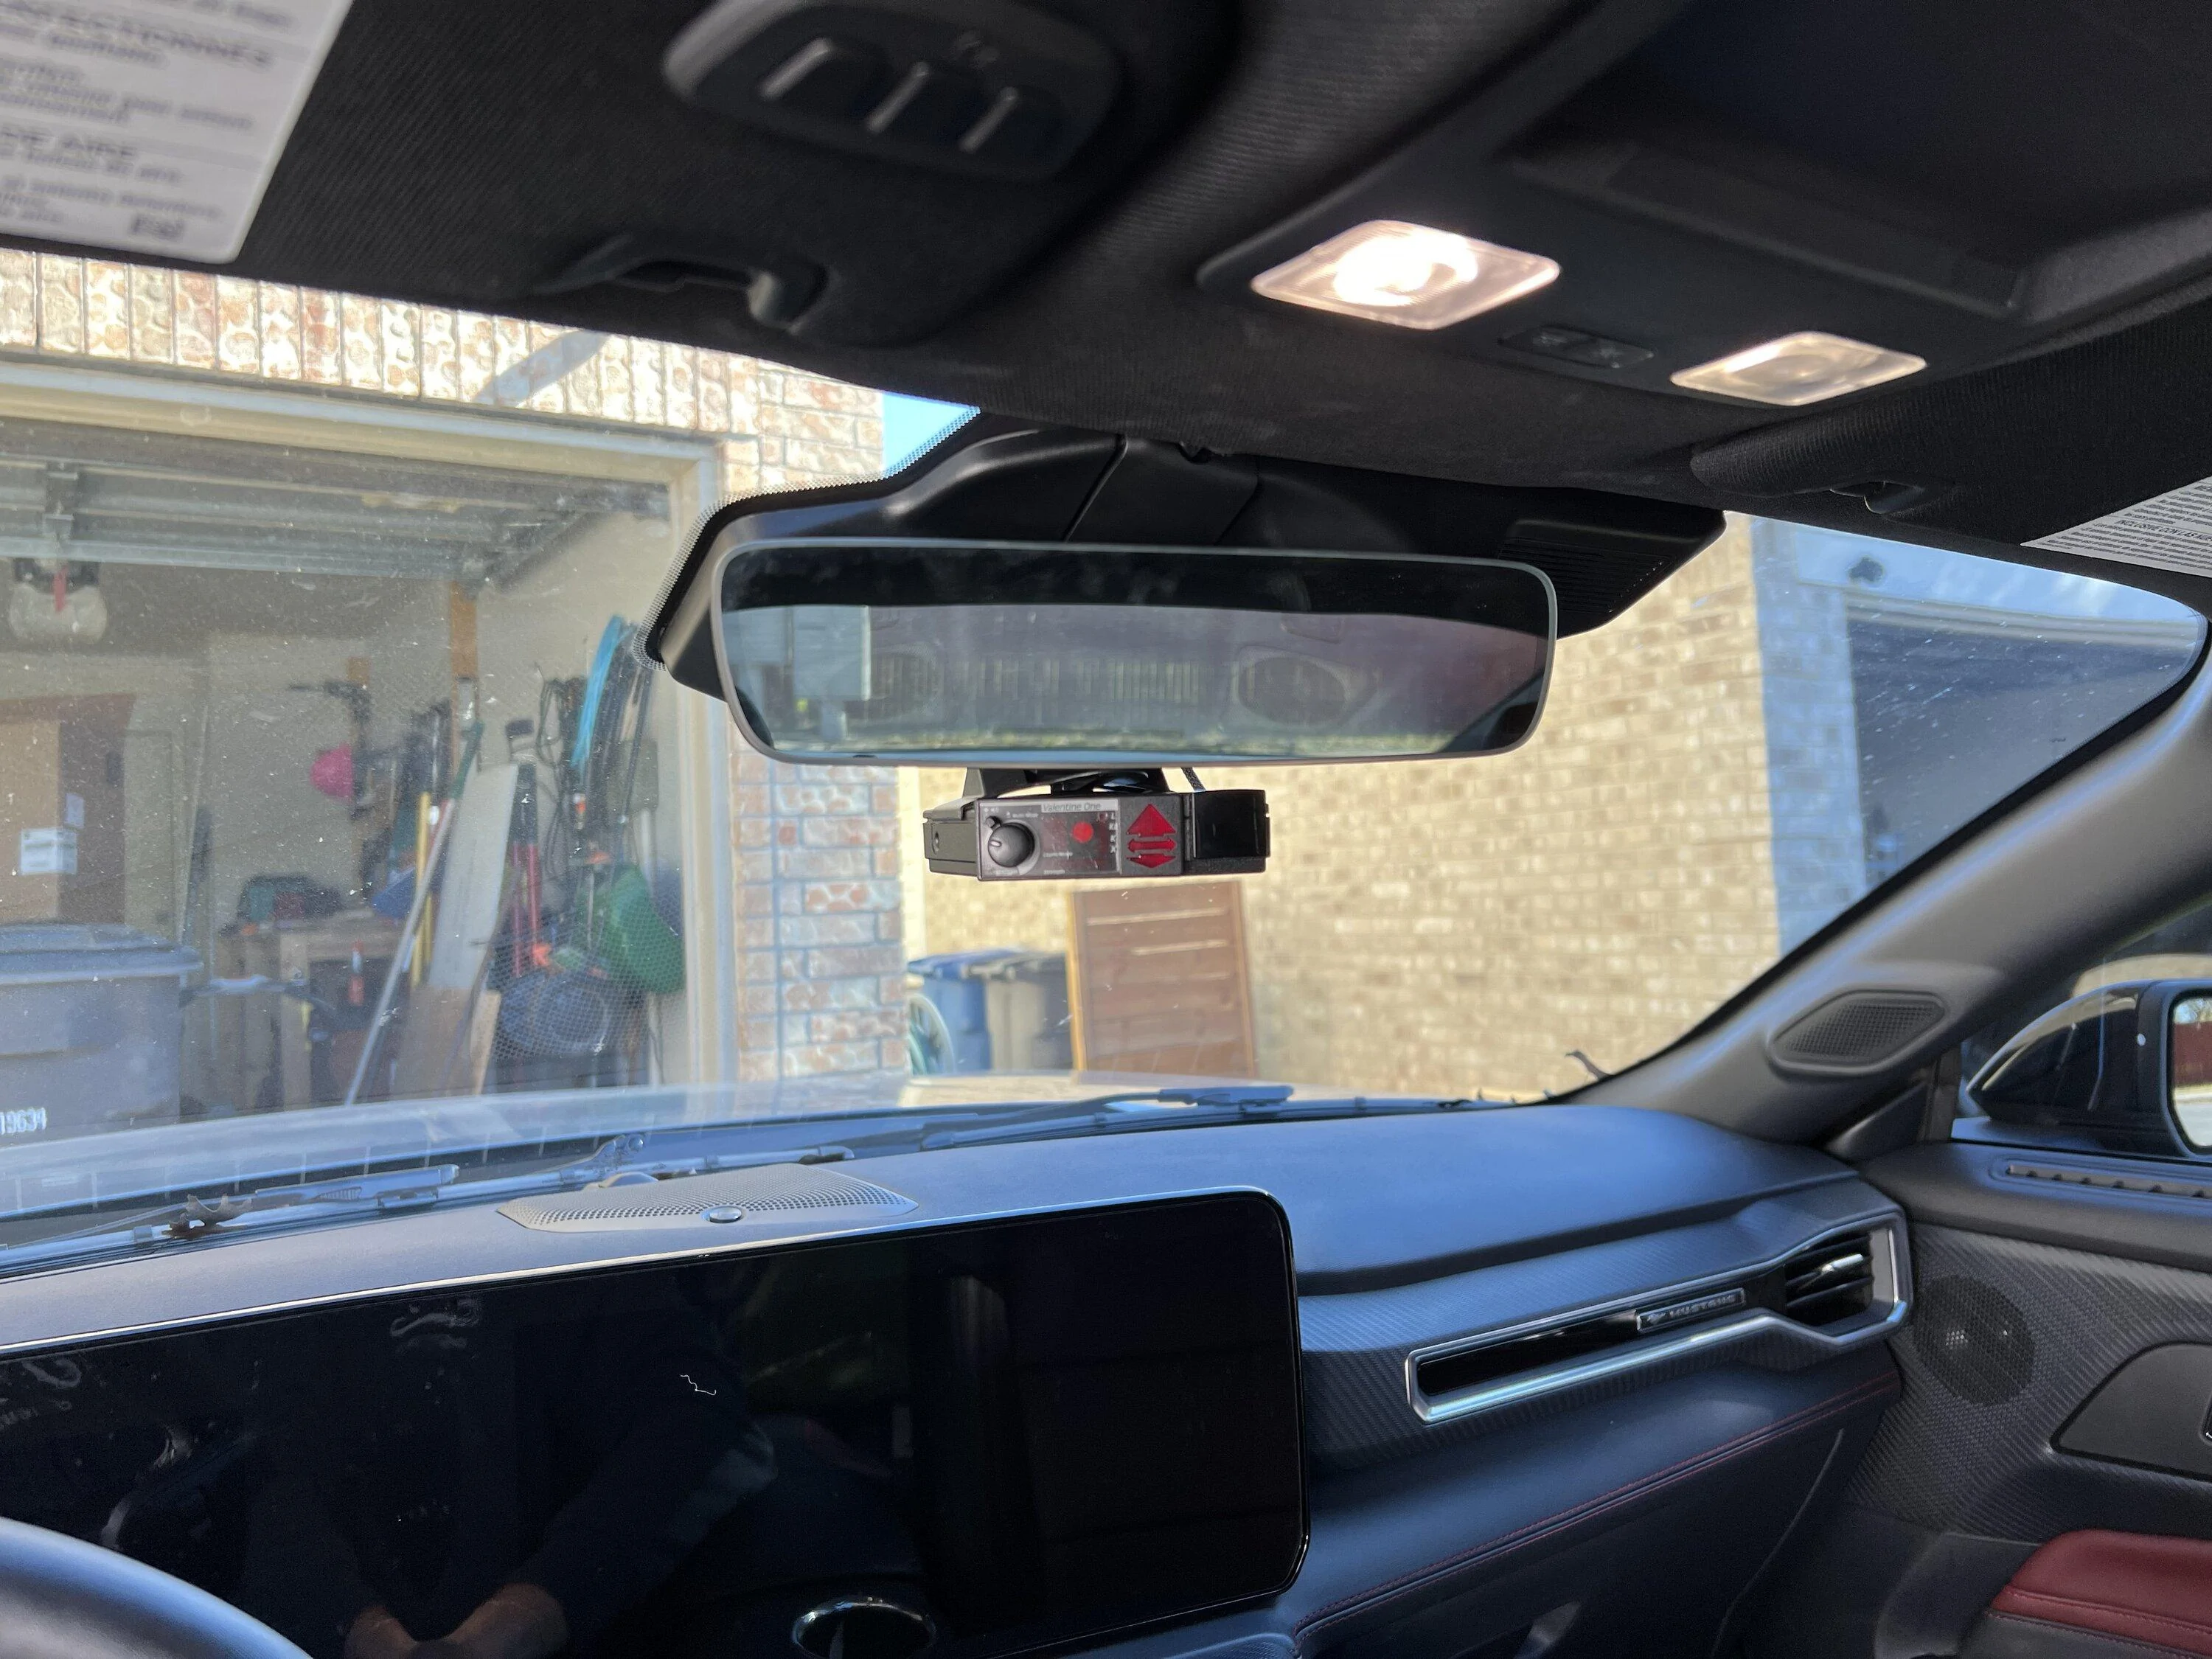
Congrats!! After about an hour or so you’ll have a real nice looking and sturdy mount with a radar that turns on and off with the car and no wire routing or splicing needed. I hate the suction cups and like a clean look. Here is my final install picture.
Saw a previous thread regarding hard wiring a radar detector but wanted to create a how to thread since it’s pretty simple but not very self explanatory if you don’t know what you’re looking for. With this, your radar will turn on and off with the car
First off, grab your mirror and the mirror stem and pull it out and down to give good access to the giant plastic housing behind the mirror. The black housing has two pieces, the first is directly above the mirror stem and comes off with a little bit of force. You don’t have to remove this piece just yet and I found it easier to first take off the giant plastic piece then take off the smaller one.
To take off the big housing, I started on the driver’s side with just my fingers (a trim removal tool would be great here). Start at the top and slowly pull down with your fingers running across the edge. There are only 4 tabs, and once you get the left tab loose, it’s much easier to do the rest. The tabs are circled in red below.
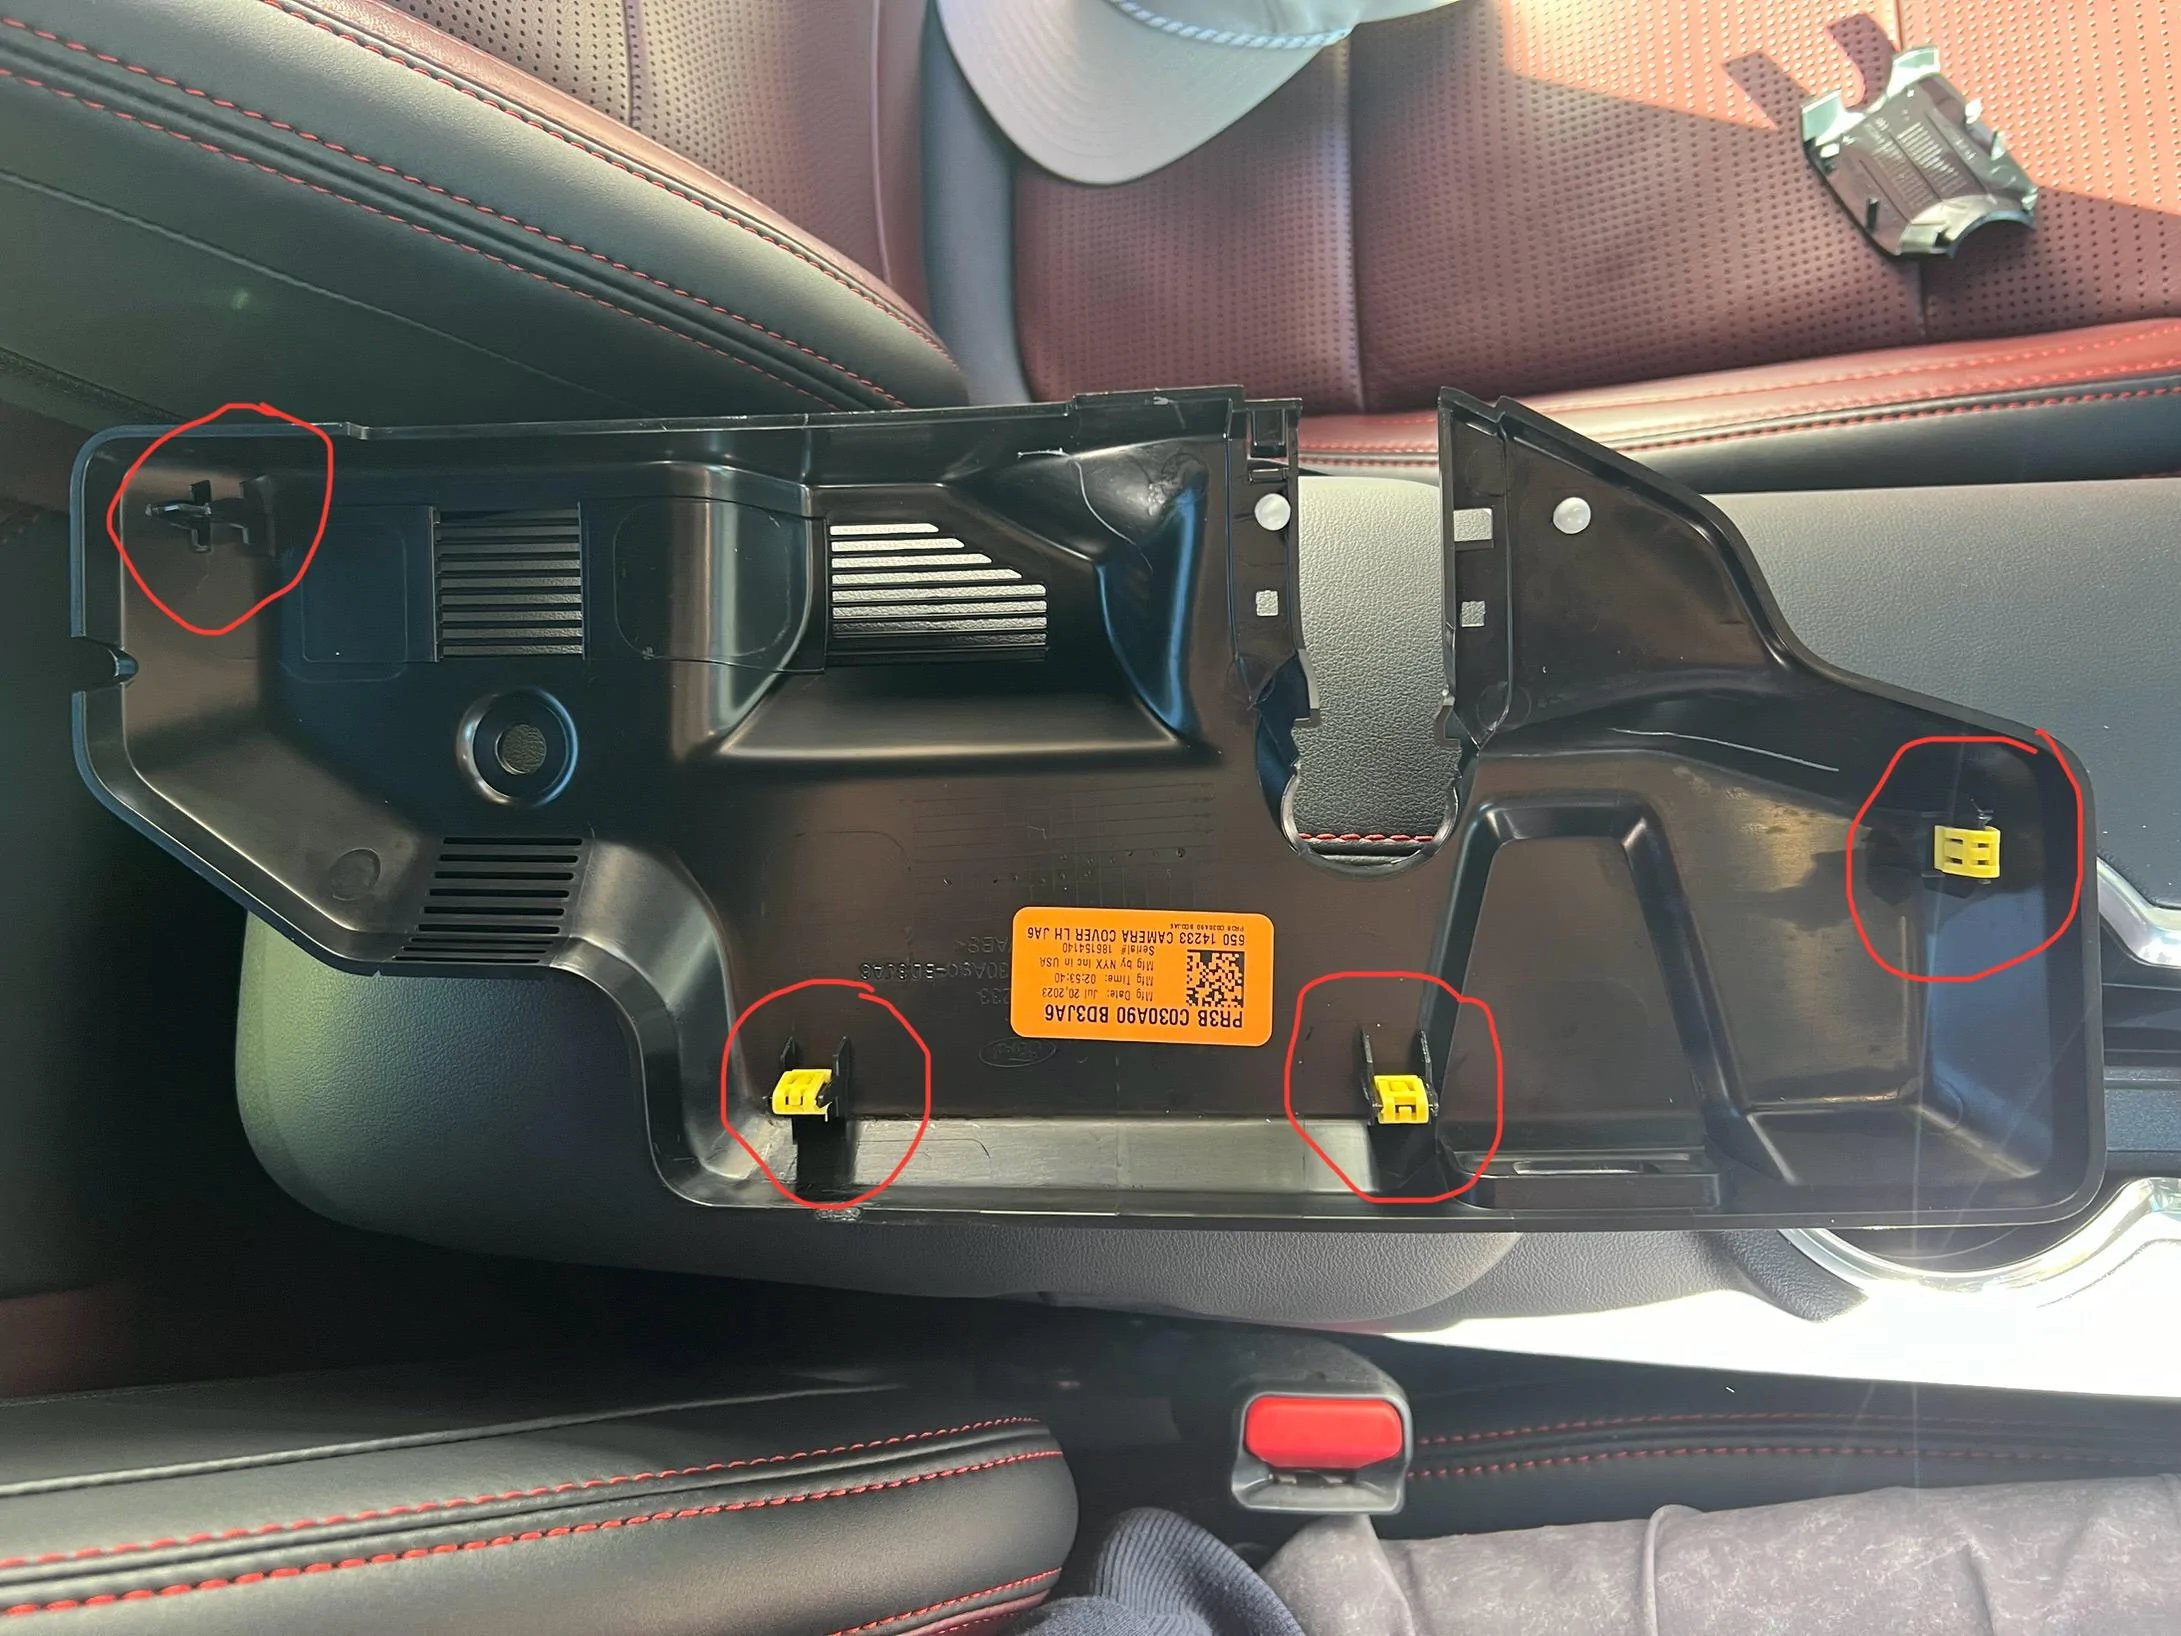
The tab on the far passenger side gave me some trouble. First off I think the plastic tab was not made properly because it’s all twisted. When I got the housing off the yellow clip stayed on the window. Hasn’t caused me any issues but just be careful even if I wasn’t. It’s sturdy but I’m sure you can break something.
With the housing off, your mirror will now look like this. 12V switched power can be drawn from the rain sensing wipers which is circled in red below.
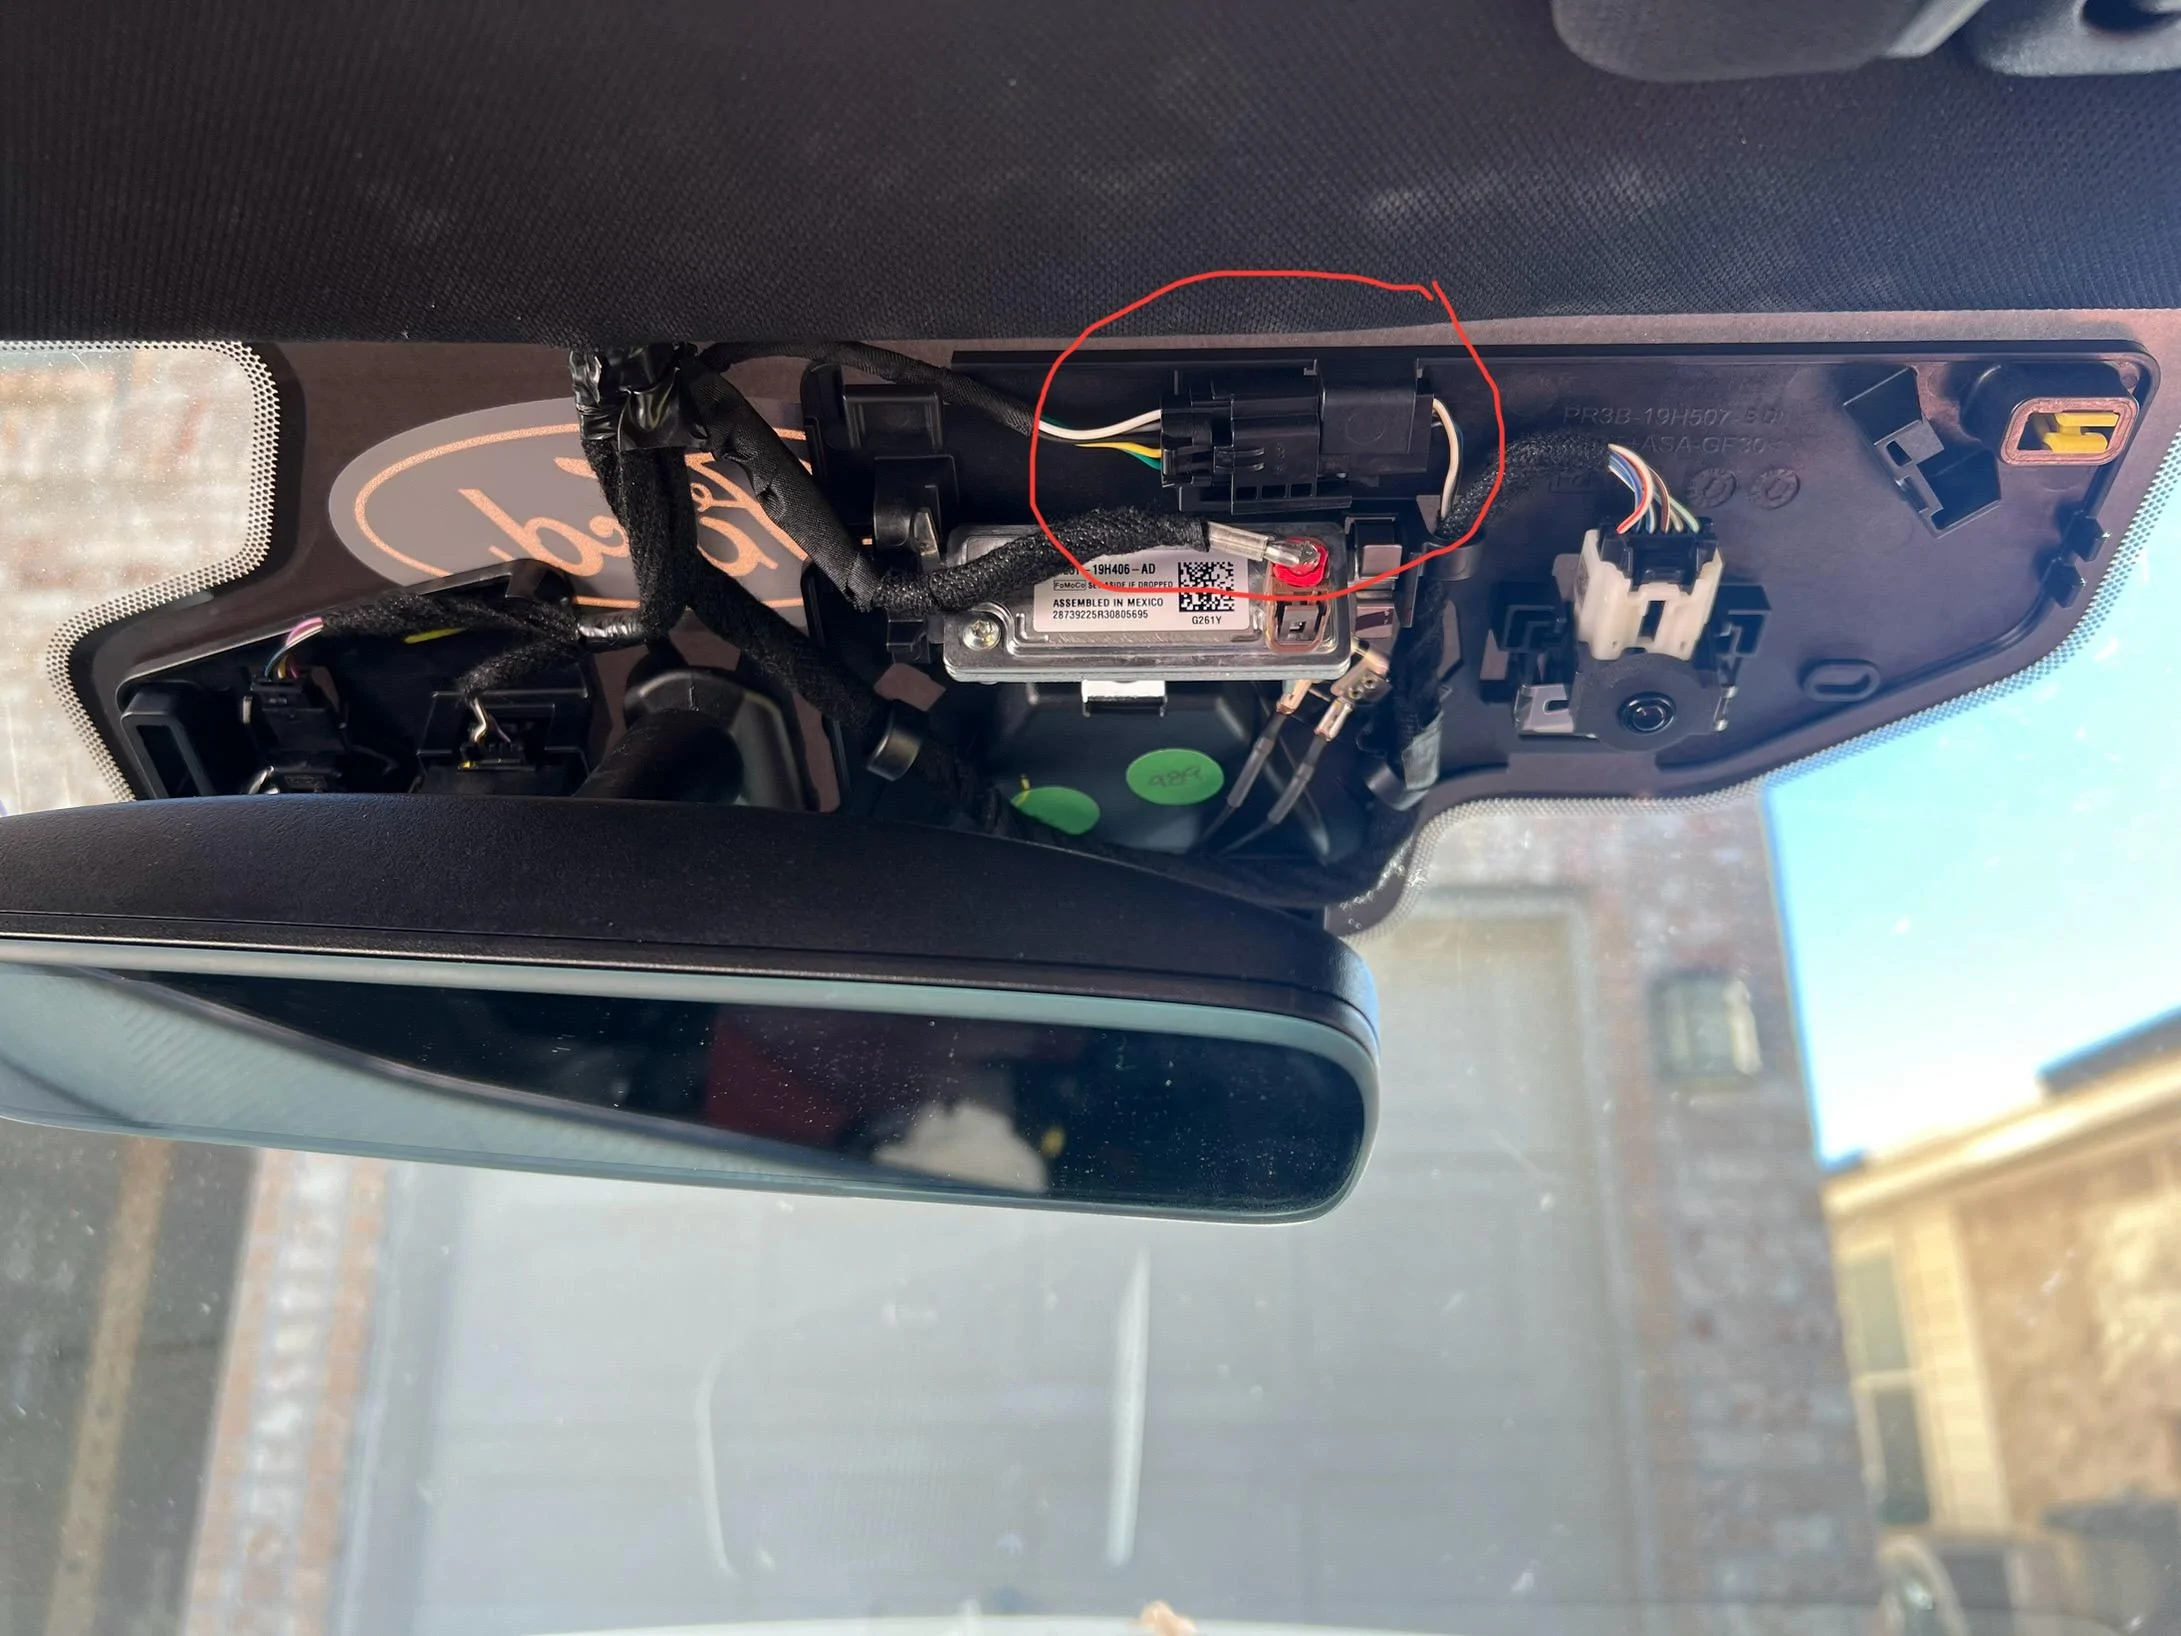
Unplug the sensor and look for the white and black wires. White is power and black is ground.
I used a simple tap in pin harness and just slid the pins into the holes where the wires go. No cutting or splicing needed. Something like this from Amazon
Once you insert the pins it will look like this!
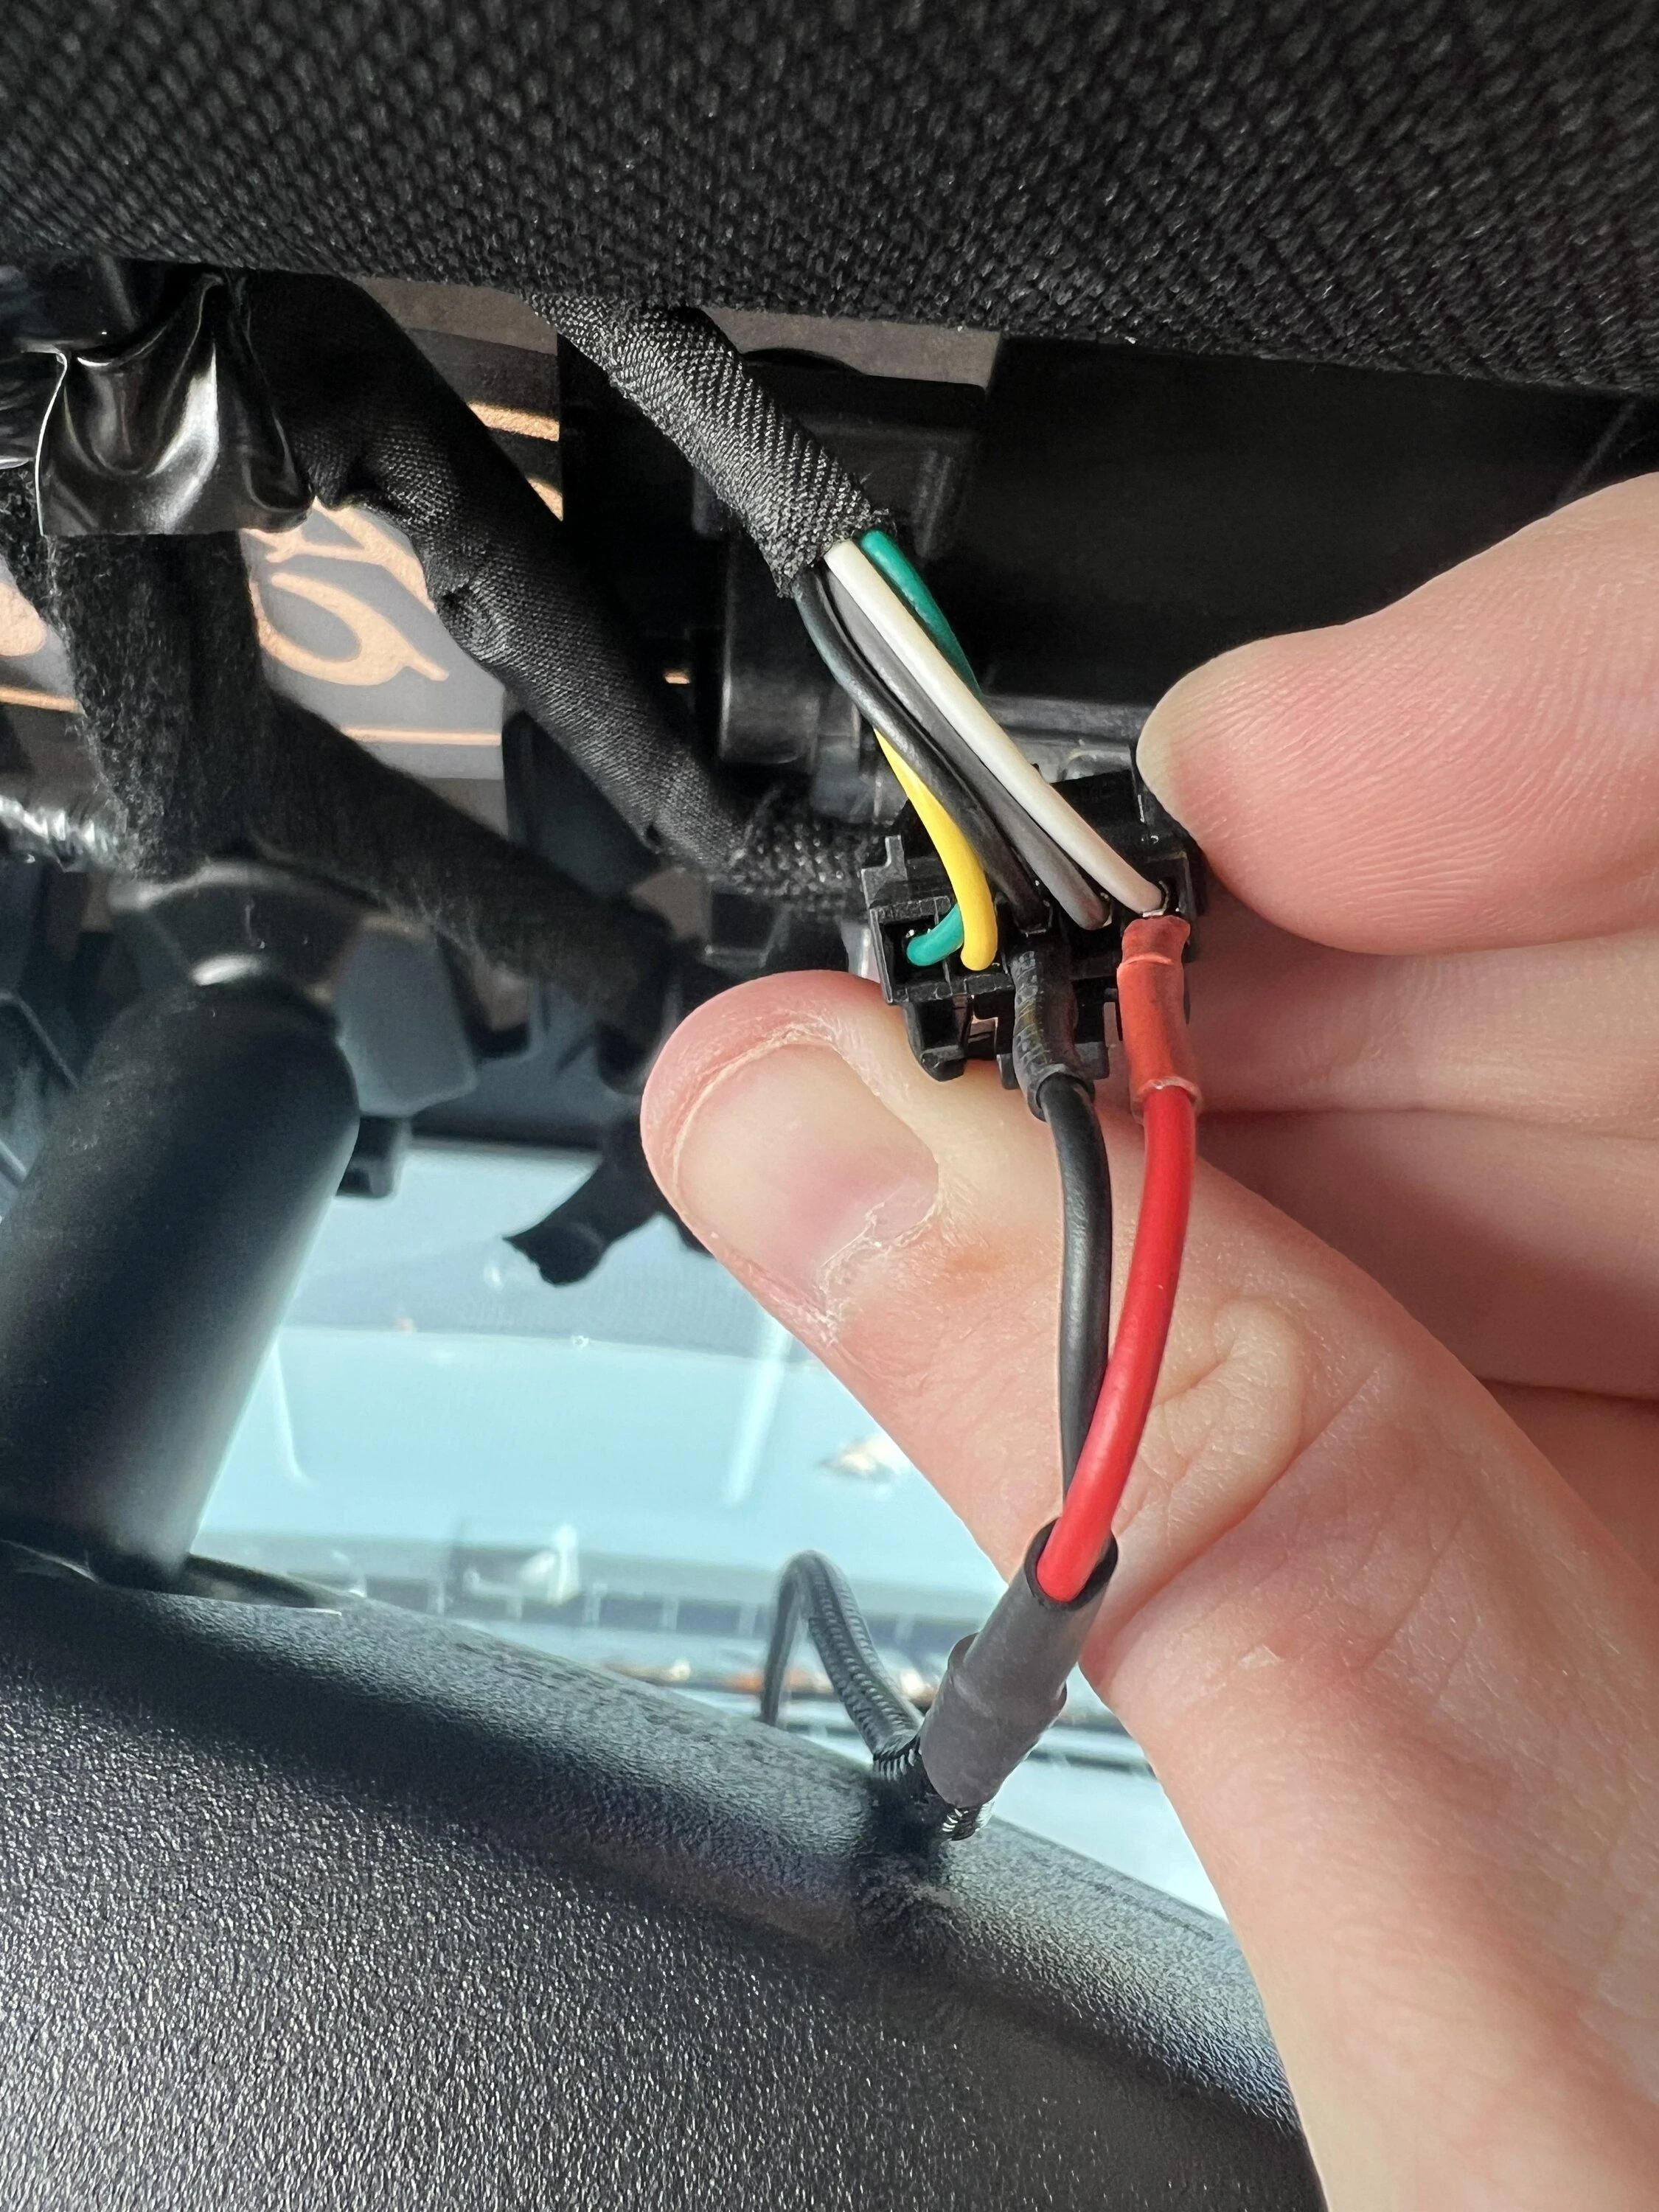
I wrapped the wires with some electrical tape just so nothing comes loose and plugged the connector back in.
TO CHECK IF IT WORKS YOU HAVE TO PLUG THE CONNECTOR BACK IN. It will not work with the connector disconnected from the windshield.
Turn the car or accessory power on and your radar should now turn on and off with the car!
Now put everything back one. I routed the cord out the “back” of the housing, near the USB port. There’s actually a slot on the right side of the housing for a cable but 1. My cable was too short to do that and 2. The cable just looks dumb hanging out so much.
So I also got a BlendMount for Christmas. This is my second BlendMount and I highly recommend them. I will say though, install is a big pain in the ass since everything is so small and you have to tighten the screws with Allen keys.
The included instructions with the BlendMount are great, so I’m not gonna rewrite them but I do have 3 tips.
1. Step 7 talks about removing the middle spacer on the BlendMount if it hangs too low. I found that it did look like garbage with that middle piece so I removed it before I installed.
2. Since I wanted the radar as close to the mirror as possible, I had to mount the BlendMount as far up with mirror stem as possible. I.e as close to the plastic housing as possible. It’s a pain in the ass, see #3
3. Once you have it in position and lined up semi snug on the stem, it’s going to seem impossible to tighten the final screw. Move the entire stem out and sideways and you’ll have some more room which seems obvious but I struggled for a bit.
Congrats!! After about an hour or so you’ll have a real nice looking and sturdy mount with a radar that turns on and off with the car and no wire routing or splicing needed. I hate the suction cups and like a clean look. Here is my final install picture.
Sponsored