ValhallaNitePony
Active Member
- Thread starter
- #1
Hello all. My last Mustang was a Premium, but when I was shopping for my new 2025, I wanted a black Nite Pony and the price difference between base and Premium in local inventory was $9k out the door, so I opted to go for poverty-spec and install leather myself since that is the only feature of the Premium I actually wanted. I picked up a set of new takeoff OEM leather from a seller on ebay for 300 bucks, and I recommend them for anyone else considering it. It was all brand new and was packed nicely to avoid any unusual creasing in the leather. Their listing always shows "only 1 left" but I realized after I bought it that they just add another each time it sells to make it look like they're about to run out. Kind of shady but what they sent was perfect, no tears or damage and installed great.
I found the video HERE on the process of re-covering OEM seats with factory leather, and it goes over pretty much everything you need to know **EXCEPT** I recommend anyone doing this to completely ignore every word he says about hog rings and follow these instructions instead: go on Amazon and buy a new pair of small diagonal cutters, a pair of spring-loaded hog ring pliers, and a bag of 100 or more 3/4 inch round hog rings (that is the factory size ring used on these seats). ****In the name of all that is holy, do not attempt to bend the old hog rings out with pliers, or try to bend and re-use the old hog rings.**** Why someone would go to all this effort and then cheap out on what amounts to ~$20 for the right tools and supplies is beyond me. Hog rings are not meant to be reused, and you will waste an enormous amount of time, and possibly damage your seats and new leather in the process, trying to do that. CUT OUT the old rings in a split second with the cutters - don't try to bend them out - and install NEW rings in 2 seconds with the RIGHT TOOL. Using a set of hog ring pliers is a breeze. Trying to re-bend used hog rings with various sets of needlenose pliers has to be one of the dumbest ways to save $20 that I can imagine. Others in the comments of the video have said they'd just used zip ties instead of hog rings, I guess because they are scared of hog rings, but zip ties will be more difficult in the very cramped space between the leather and the foam, and if you don't get them pointed in the right direction, a sharp plastic end might end up pointing upwards, jabbing you in the ass or back while you sit on it and tearing your leather. There is a reason auto upholstery has been using hog rings forever - they're the right thing for this application. If you want to make this job as easy on yourself as you can, I can't stress enough - get a cheap pair of hog ring pliers and new hog rings. By the time you've put in two or three rings you'll be asking yourself why anyone thought they were hard - they aren't, if you use the right tool. You load the ring into the tool, it holds it for you, you hook one end of the ring onto the seat cover, pull it down to the seat base and hook the other end on, then squeeze. Easy peasy.
Installation is the reverse of removal so if you don't have a great memory or don't work on stuff like this a lot already, take pictures of everything as you are taking it apart to refer to later in terms of how things clip on and where. For the most part it is obvious.
All of this said, the entire project is pretty tedious. Everything has to be removed from the vehicle. There are clips on clips on clips, christmas tree fasteners (not a bad idea to order some of these for any you break), Velcro, air bags to take out and put back, hog rings, and a variety of hardware and plastics to deal with. For the most part, you don't have to work particularly hard to stretch or pull the leather but in a few places it is a bit tight. Really not bad though. They obviously designed these for mass production. If a low paid factory worker can put them in you definitely can too. Just expect every bit of 6 hours total work. I saw someone had an auto upholsterer do the job for $600 and that's pretty reasonable I think considering the amount of work, but I am both a cheapskate, and someone who doesn't trust others to do a job I can do myself and make sure is done right.
Here are the tools needed for anyone looking to tackle it.
T55 torx bit (for removing front seats from vehicle)
T50 torx bit (for separating upper and lower halves of front seats)
T20 torx bit (for removing plastics on front seats)
15mm wrench (for removing rear seat backs, a ratcheting wrench makes this easier, a socket won't fit without a swivel)
10mm DEEP SOCKET (for removing side air bag from seat frame - ONLY a deep socket will work - a wrench won't fit, and a non-deep socket won't clear. Nut is too tight for pliers or anything else. It's deep socket or nothing, period.)
Trim removal tools (for removing Christmas tree clips, also useful for wangling various other clips in/out of position as needed)
Small diagnonal cutters (for removing hog rings - do yourself a favor and get a new sharp pair for $10 on Amazon)
Hog Ring Pliers (make sure they are the spring loaded kind, makes installation a breeze, again, $10 on Amazon)
3/4 inch round hog rings (get 100+ of them, each seat takes at least 20. The angular kind will work too but they won't pinch together in a rounded way like OEM does)
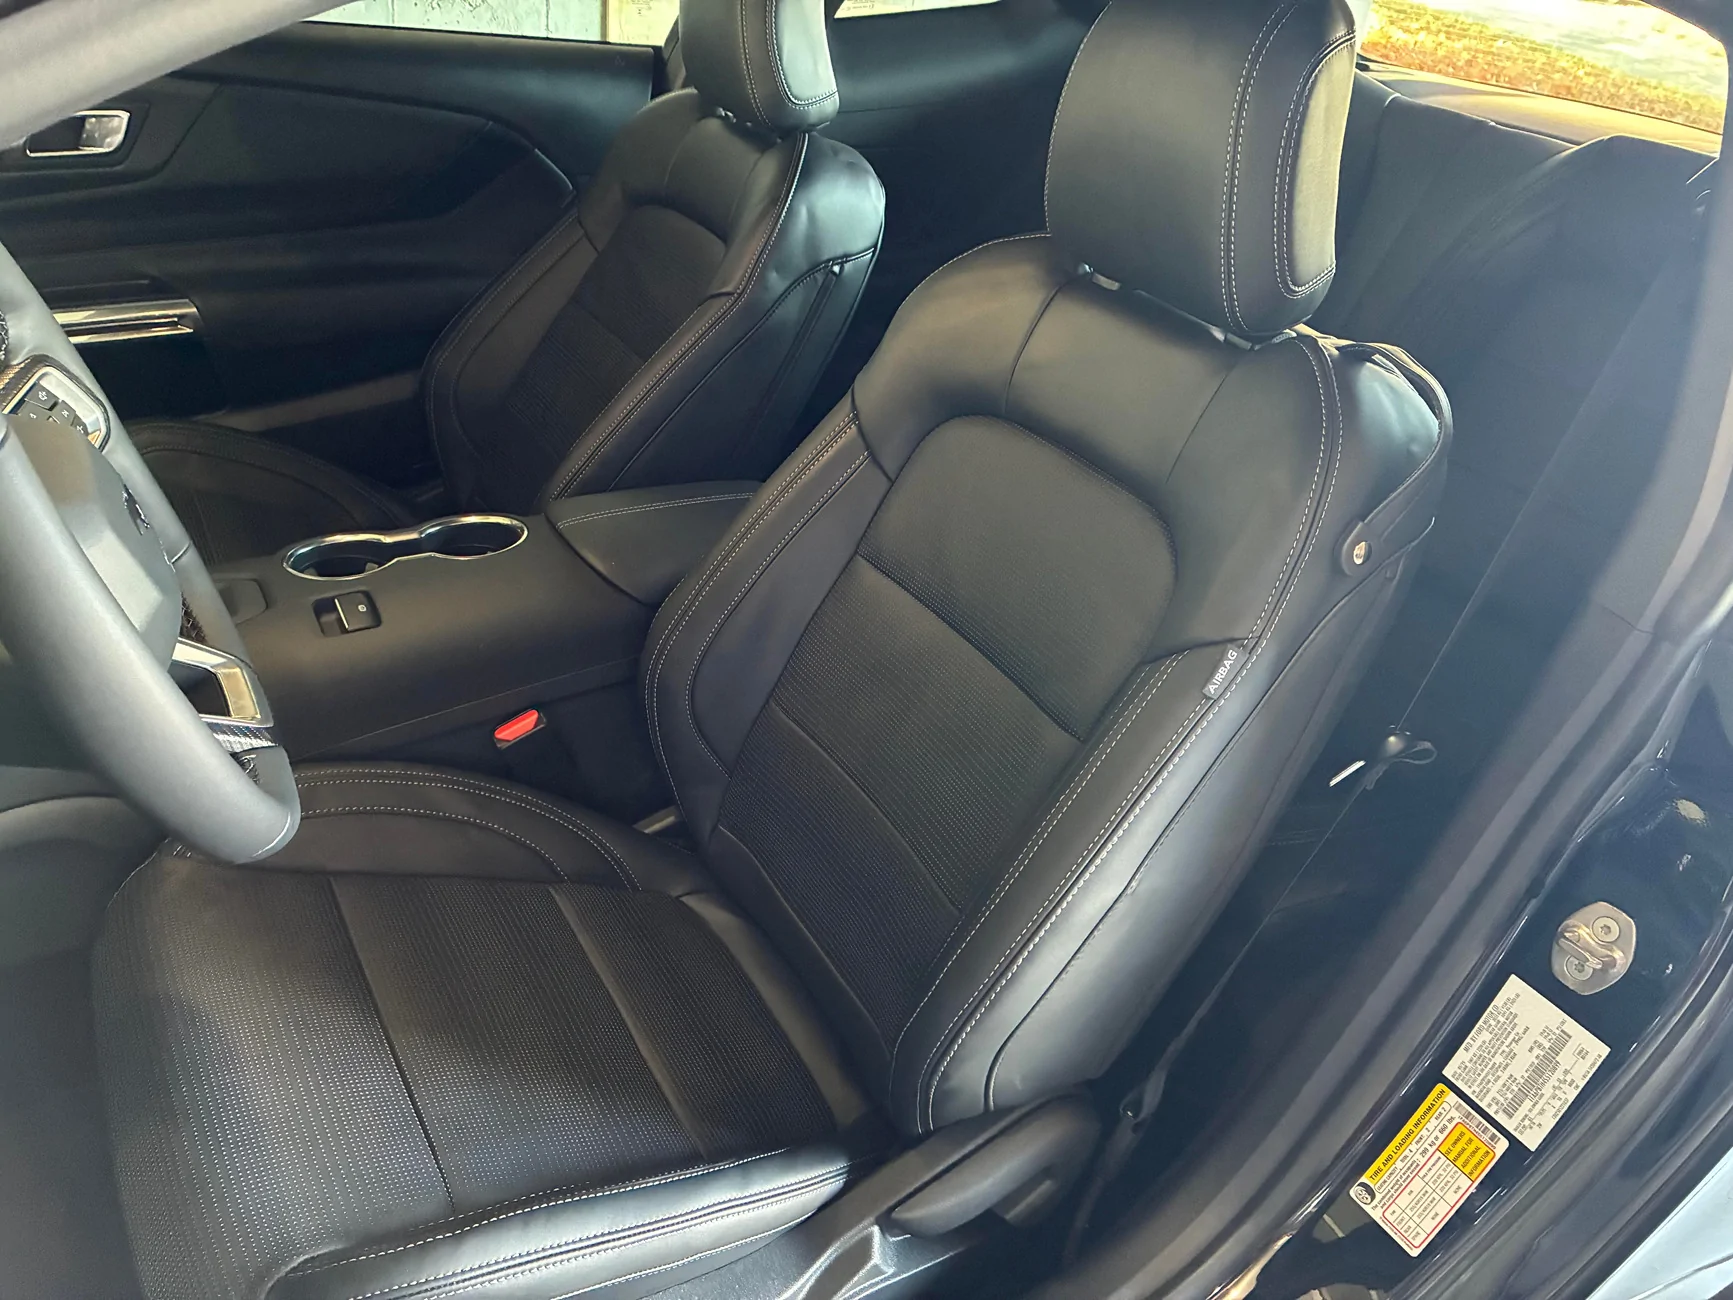
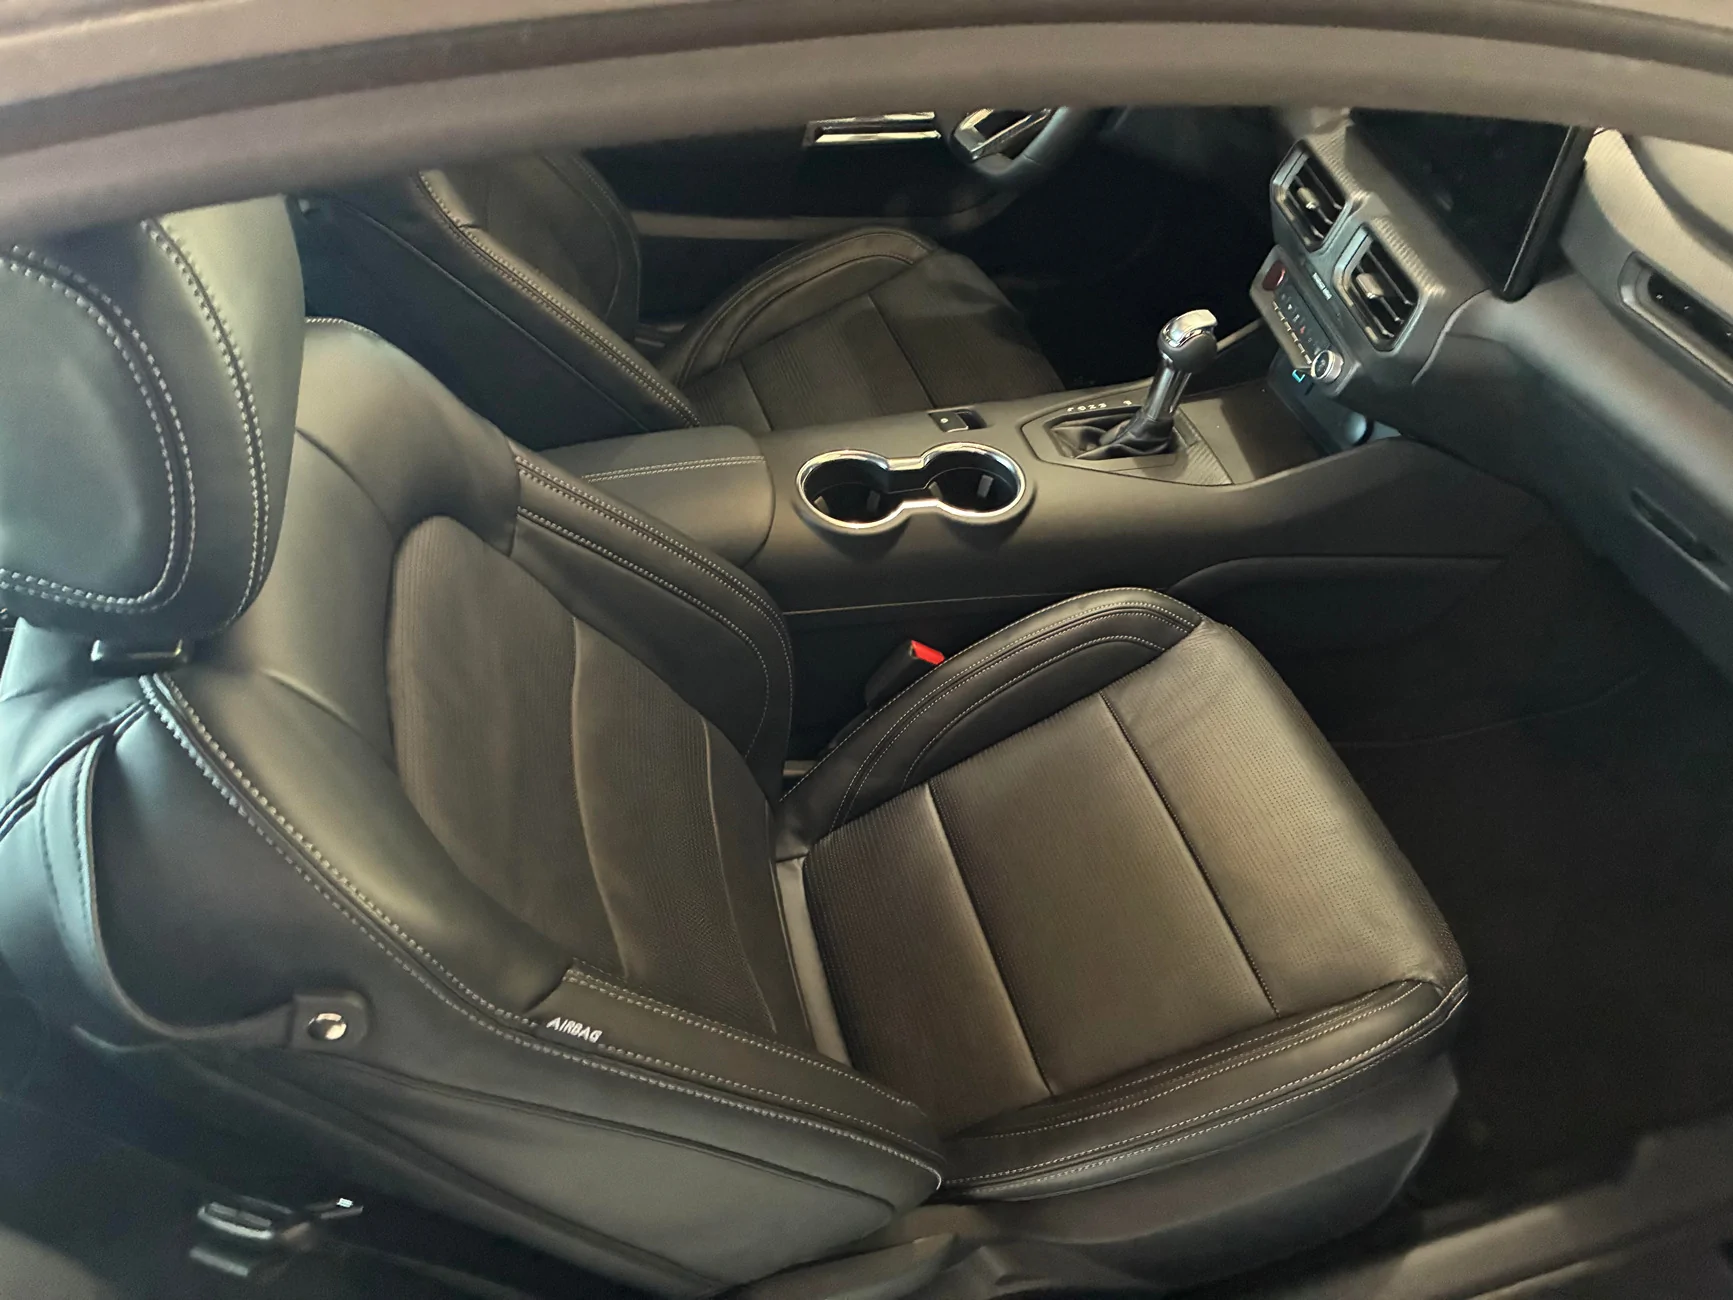
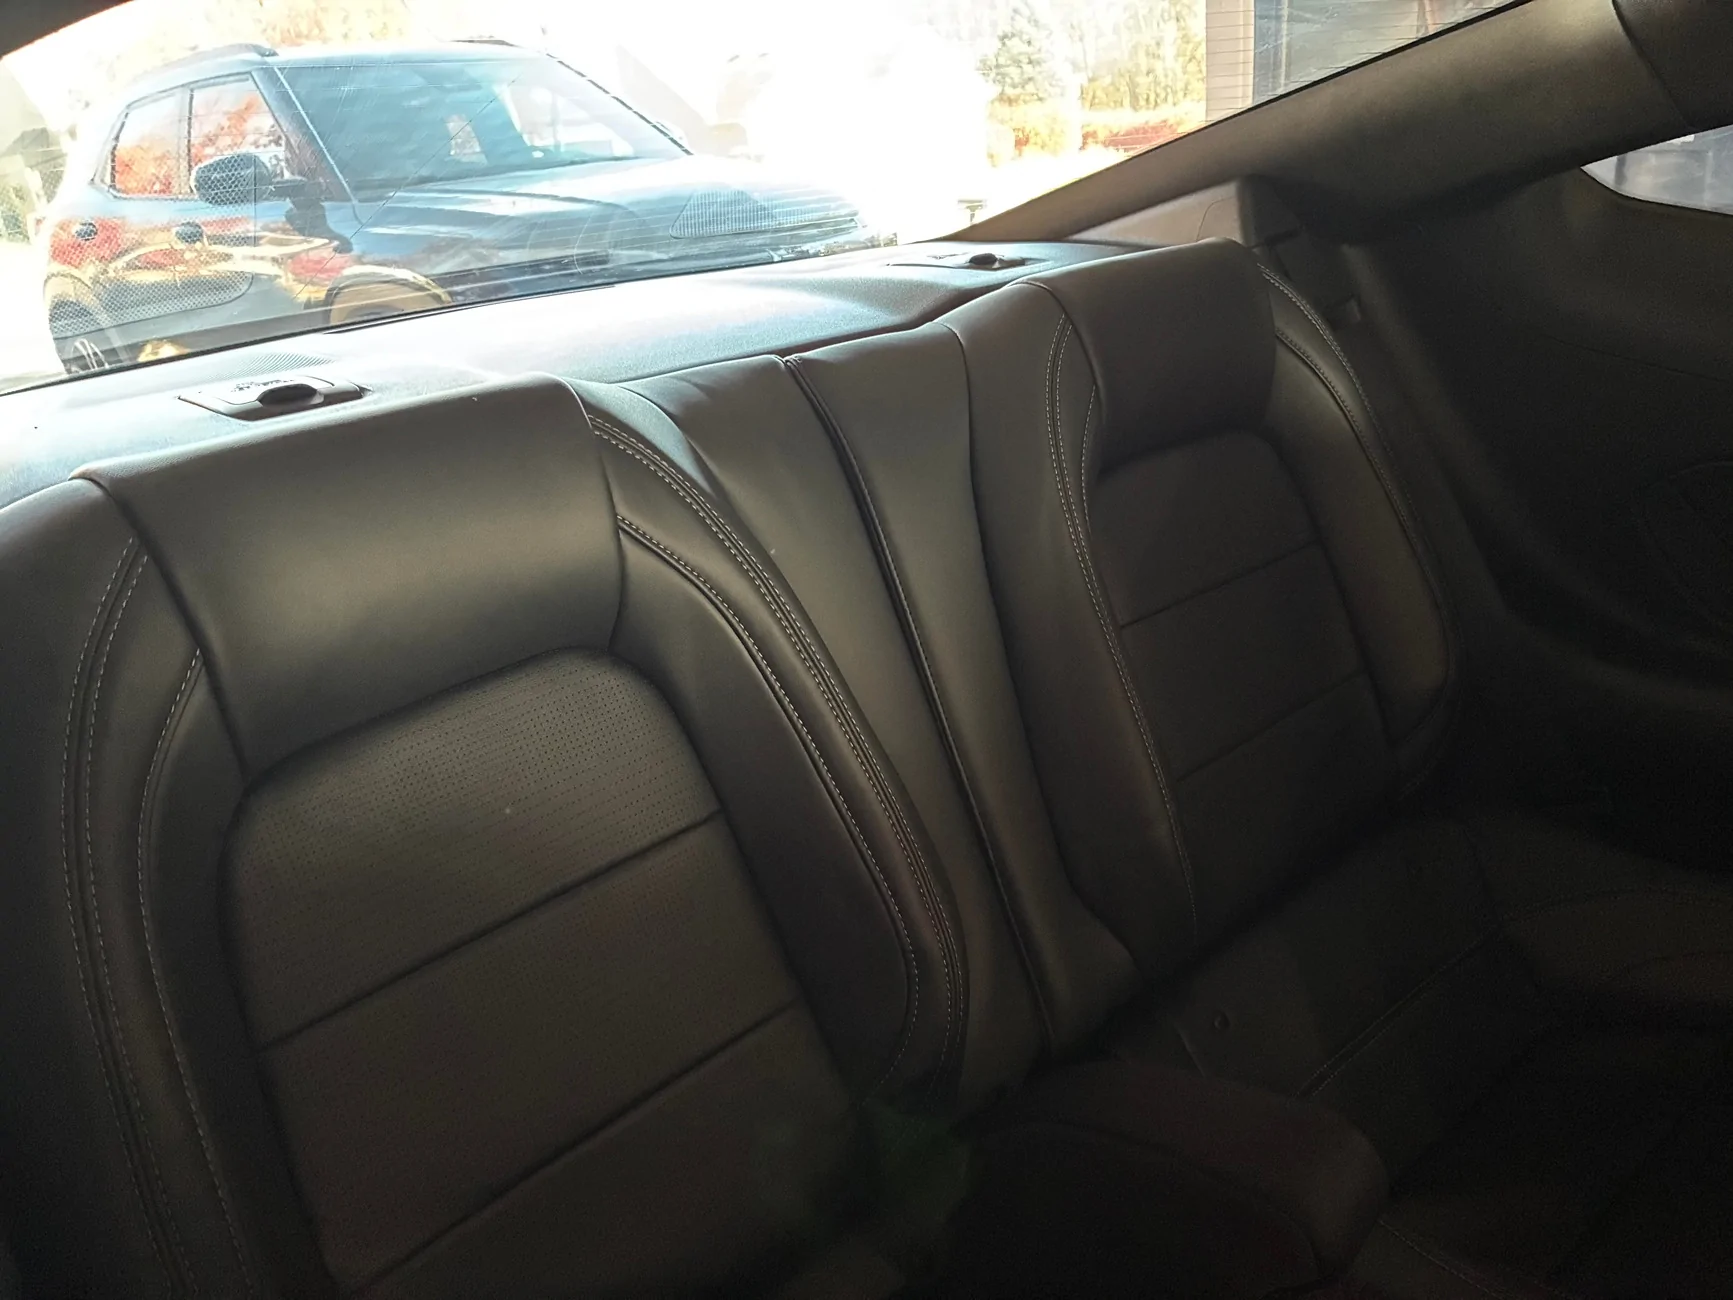
Here it is installed in my car. It is very cold out so the few wrinkles in the leather will probably take a while to relax out of it but it should get there. The important areas where there is velcro or hog rings are already nice and tight but the looser areas without those like the sides will I'm sure take time.

I found the video HERE on the process of re-covering OEM seats with factory leather, and it goes over pretty much everything you need to know **EXCEPT** I recommend anyone doing this to completely ignore every word he says about hog rings and follow these instructions instead: go on Amazon and buy a new pair of small diagonal cutters, a pair of spring-loaded hog ring pliers, and a bag of 100 or more 3/4 inch round hog rings (that is the factory size ring used on these seats). ****In the name of all that is holy, do not attempt to bend the old hog rings out with pliers, or try to bend and re-use the old hog rings.**** Why someone would go to all this effort and then cheap out on what amounts to ~$20 for the right tools and supplies is beyond me. Hog rings are not meant to be reused, and you will waste an enormous amount of time, and possibly damage your seats and new leather in the process, trying to do that. CUT OUT the old rings in a split second with the cutters - don't try to bend them out - and install NEW rings in 2 seconds with the RIGHT TOOL. Using a set of hog ring pliers is a breeze. Trying to re-bend used hog rings with various sets of needlenose pliers has to be one of the dumbest ways to save $20 that I can imagine. Others in the comments of the video have said they'd just used zip ties instead of hog rings, I guess because they are scared of hog rings, but zip ties will be more difficult in the very cramped space between the leather and the foam, and if you don't get them pointed in the right direction, a sharp plastic end might end up pointing upwards, jabbing you in the ass or back while you sit on it and tearing your leather. There is a reason auto upholstery has been using hog rings forever - they're the right thing for this application. If you want to make this job as easy on yourself as you can, I can't stress enough - get a cheap pair of hog ring pliers and new hog rings. By the time you've put in two or three rings you'll be asking yourself why anyone thought they were hard - they aren't, if you use the right tool. You load the ring into the tool, it holds it for you, you hook one end of the ring onto the seat cover, pull it down to the seat base and hook the other end on, then squeeze. Easy peasy.
Installation is the reverse of removal so if you don't have a great memory or don't work on stuff like this a lot already, take pictures of everything as you are taking it apart to refer to later in terms of how things clip on and where. For the most part it is obvious.
All of this said, the entire project is pretty tedious. Everything has to be removed from the vehicle. There are clips on clips on clips, christmas tree fasteners (not a bad idea to order some of these for any you break), Velcro, air bags to take out and put back, hog rings, and a variety of hardware and plastics to deal with. For the most part, you don't have to work particularly hard to stretch or pull the leather but in a few places it is a bit tight. Really not bad though. They obviously designed these for mass production. If a low paid factory worker can put them in you definitely can too. Just expect every bit of 6 hours total work. I saw someone had an auto upholsterer do the job for $600 and that's pretty reasonable I think considering the amount of work, but I am both a cheapskate, and someone who doesn't trust others to do a job I can do myself and make sure is done right.
Here are the tools needed for anyone looking to tackle it.
T55 torx bit (for removing front seats from vehicle)
T50 torx bit (for separating upper and lower halves of front seats)
T20 torx bit (for removing plastics on front seats)
15mm wrench (for removing rear seat backs, a ratcheting wrench makes this easier, a socket won't fit without a swivel)
10mm DEEP SOCKET (for removing side air bag from seat frame - ONLY a deep socket will work - a wrench won't fit, and a non-deep socket won't clear. Nut is too tight for pliers or anything else. It's deep socket or nothing, period.)
Trim removal tools (for removing Christmas tree clips, also useful for wangling various other clips in/out of position as needed)
Small diagnonal cutters (for removing hog rings - do yourself a favor and get a new sharp pair for $10 on Amazon)
Hog Ring Pliers (make sure they are the spring loaded kind, makes installation a breeze, again, $10 on Amazon)
3/4 inch round hog rings (get 100+ of them, each seat takes at least 20. The angular kind will work too but they won't pinch together in a rounded way like OEM does)
Here it is installed in my car. It is very cold out so the few wrinkles in the leather will probably take a while to relax out of it but it should get there. The important areas where there is velcro or hog rings are already nice and tight but the looser areas without those like the sides will I'm sure take time.
Sponsored
 awesome job