• Welcome to Mustang7G!

    If you're joining us from Mustang6G, then you may already have an account here!

    As long as you were registered on Mustang6G as of March 10, 2021 or earlier, then you can simply login here with the same username and password!

DFB's Detailing Garage

5.0ALM

Well-Known Member
Joined
Oct 31, 2022
Threads
75
Messages
904
Reaction score
1,439
Location
Brisbane
Vehicle(s)
2016 RAV4 Cruiser, 2024 GT
I have both the Ultra Wheel Mitt and Ultra Wool Mitt, I like both for different reasons.

The microfiber Ultra Wheel Mitt is noticeable larger, its what I would call a hand mitt, whereas the wool version is a finger mitt. Personally, I like the wool version as its more ergonomic on such an intricate wheel design.

Microfiber -

IMG-7599.jpg


IMG-7825.jpg


Wool -

IMG-0384.jpg
Great, thank you.
It was difficult to do a size comparison from the individual product shots, but these hands-on images shows the difference.
Yes, the smaller wool mitt will provide the most advantage into getting tight spots.

As for the barrel brush, these are the ones you need -
Noted!
Sponsored

 
OP
OP
DFB5.0

DFB5.0

Well-Known Member
Joined
Mar 15, 2017
Threads
16
Messages
726
Reaction score
878
Location
Australia
Vehicle(s)
Mustang GT Fastback
Inner Workings!

Most detailers hate doing interiors! And trust me, I can totally get that. Dealing with neglected interiors is time consuming and tedious, compounded by being cramped up within a confined space. My worst nightmare? Dealing with the cheap and nasty carpet the Japanese and Korean car companies use for their interiors. That stuff just hangs onto every grain of sand and debris, even after using every tool and method under the sun, it still doesn't look clean.

Having said all of that, I don't mind maintaining an interior, that I find cathartic. Maintaining a state of cleanliness means you don't need to reach for the sledgehammers such as heavy-duty interior cleaners and all-purpose cleaners. And while I typically use an interior quick detailer, to perfectly honest, all you need to maintain a clean interior is a damp microfiber.

Now, I know what you are going to say..............."why are you cleaning a brand-new interior".........................because that's what I do! :giggle: Seriously though, the initial clean is about hitting the reset button, albeit very early on. As mentioned during the first wash, these cars sit out in the open for months, all the while the interior is left to bake and outgas. The most obvious here will be the glass, often witnessed by a fine haze when looking out into the light. The interior in general sees many hands as its assembled, driven off the line, prepared for shipping, moved from Ford's holding yard to the dock, onto the vessel, off the vessel, into a holding yard, driven onto and off the truck, then many dealerships personal as its prepared for sale. Think of like buying a used car, you replace all of the fluids to start from fresh. Same concept here.

S650 Mustang DFB's Detailing Garage IMG-2140


I decided to get the rear accommodation sorted first, which means moving the seat back and base all the way forward, then folding yourself into the back seat. The first thing I noticed, Ford have changed from a carpeted parcel shelf to a hard plastic. The natural reaction to that would be, wow how cheap. But actually, vacuuming that carpeted parcel shelf was difficult, so a simple wipe going forward will be much easier and convenient.

S650 Mustang DFB's Detailing Garage IMG-2149


S650 Mustang DFB's Detailing Garage IMG-2146


First, cleaning the rear glass. Every S550 and S650 Mustang owner needs one of these, the Stoner Reach & Clean Tool. This might seem like a gimmick, but it makes the job much easier, especially reaching right down to the very base of the screen that would ordinarily be missed. This applies to the front screen as well. I teamed this with the classic Invisible Glass.

S650 Mustang DFB's Detailing Garage IMG-2151


I then used Griot's Interior Cleaner to wipe down the leather seats and plastics. Why Griot's? Because it's not scented..................you only get that new car scent for so long. :wink: Because the rear seats will never have been used, I didn't feel the need for a more intensive leather cleaning back there. After the wipe down with Griot's, I applied ColourLock Leather Shield, including the back of the front seats. A quick vacuum on the carpet, it was time to move to the front row seats.

S650 Mustang DFB's Detailing Garage IMG-2153


Again, the Griots was used for a quick wipe down of the console, dashboard and door trims. The front screen and door glass given the same treatment as the rear. For the seats and steering wheel, I used the ColourLock brush and Mild Leather Cleaner. Again, this was more of a reset procedure, so only light pressure was used.

S650 Mustang DFB's Detailing Garage IMG-2156


S650 Mustang DFB's Detailing Garage IMG-2157


S650 Mustang DFB's Detailing Garage IMG-2161


Now clean and allowed to dry, I then applied ColourLock Leather Shield. For brand new leather, ColourLock recommend using Leather Shield up to the 3-year mark, from there you switch to Leather Protector. Leather Shield is an abrasion, discoloration and dye transfer blocker that also allows it breath. ColourLock suggest that signs of wear are most pronounced over the first three years, so Leather Shield was designed to prevent that. For best results, the driver's seat should have this applied every six months, once a year for rest of the interior.

S650 Mustang DFB's Detailing Garage IMG-2170


In my case, I applied Leather Shield to the aforementioned rear seats, the front seats, steering wheel, door trims, gear shifter and boot, drift brake, the center console and console lid. Yes, most of that is not real leather, but there is no harm applying it to artificial leather. Like the Leather Cleaner, Shield is unscented.

S650 Mustang DFB's Detailing Garage IMG-2165


S650 Mustang DFB's Detailing Garage IMG-2166


Leather Shield goes on quite shiny, but as it flashes away, the finished result is a soft, natural, matte finish. No greasiness, no shine. I have to say, afterwards, the leather took on a new dimension, it feeling softer and smoother than before.

Finally, a couple of additions to the boot.

First off, I repurposed the scuff guard and cargo net from my S550. Combined, these two are worth about $140 new.

Genuine Ford Pony Logo FLA Boot Scuff Guard
Genuine Ford Cargo Net Mesh Organiser Backer

S650 Mustang DFB's Detailing Garage IMG-2123


Next, a very generous gift from a fellow Mustang 6g/7g forum member after a trip to the USA. This item replaces the standard boot lock cover and provides a grab point to close the boot lid without fingerprinting your paint. Many thanks @5.0ALM , greatly appreciated. :like:

S650 Mustang DFB's Detailing Garage IMG-2129


S650 Mustang DFB's Detailing Garage IMG-2134


Not an addition per say, but new to me as my S550 didn't come with one, a sizeable subwoofer.

S650 Mustang DFB's Detailing Garage IMG-2126
 
OP
OP
DFB5.0

DFB5.0

Well-Known Member
Joined
Mar 15, 2017
Threads
16
Messages
726
Reaction score
878
Location
Australia
Vehicle(s)
Mustang GT Fastback
Marilyn Monaro!

This afternoon a very special visitor dropped by for a visit.

S650 Mustang DFB's Detailing Garage IMG-2182


This stunning Holden Monaro has been in the family since new! The car was originally my aunt's daily driver but sat unused on a farm for decades, it's only recently been given a restoration by her son. Don't ask me the model, it's not a GTS despite the front quarters, and they decided to keep the original inline 6-cylinder engine and manual transmission. The interior is stunning, that red is so rich! A complete contrast to the black dungeons that pass for car interiors these days.

S650 Mustang DFB's Detailing Garage IMG-2179


S650 Mustang DFB's Detailing Garage IMG-2177


S650 Mustang DFB's Detailing Garage IMG-2184


S650 Mustang DFB's Detailing Garage IMG-2186


The car has had a few teething issues on the way through town and onto Wangaratta for the 2024 Monaro Nationals. But that's old cars for you, and one of the reasons I decided not to pursue the restoration of a classic Falcon, something like an XL or XM, I just don't have the temperament for it.

Monaro Club of Victoria - 2024 Monaro Nationals

Despite the obvious Ford bias, I've always loved the Monaro, mainly the first and third generations. To me, I love how effortlessly good looking they are, that graceful sweep of the roof into the rear panels is subtle perfection. Naturally, there was some comparisons being made to my new Mustang, how things have progressed over the years. You know, things like power steering and powered brakes. :wink: Also in the same family is a red 1966 Mustang Coupe fitted with a modern fuel injected Windsor, which I've been lucky enough to ride in.

My aunt is a rev head, so having such a racy car at the time makes complete sense. Without fail, she attends the F1 Grand Prix in Melbourne every year, she's even traveled overseas to follow F1. She reminds me so much of my grandmother, who died in the late 90's from cancer and robbed me from getting to know her as I got older. The two of them are so remarkably alike, I find myself suppressing a lot of emotion every time we meet. After I had surgery a few years ago, as I came out of the anesthetic, she was the one holding my hand...............I will never, ever forget that.
 
OP
OP
DFB5.0

DFB5.0

Well-Known Member
Joined
Mar 15, 2017
Threads
16
Messages
726
Reaction score
878
Location
Australia
Vehicle(s)
Mustang GT Fastback
One of the things I had anticipated about my leave, the ability to just step out into the garage and tinker away without a time limit. With two next two days on back on the tools, I decided to just take the opportunity to just hang.

And in case you thought the poor old Falcon's were being ignored, no way! The XR8 was taken out yesterday for no other reason but to just drive it. Having just driven the Mustang, it gave me a chance to compare.

S650 Mustang DFB's Detailing Garage IMG-2218


Naturally, the Mustang is the better car. The last Falcon came off the line in 2016, which was based on a model that launched in 2008, which was based on a model that launched in 2002, then 1998, then 1988.......................you get the point. And while the S650 Mustang underpinnings are well proven by this stage, its superiority over the Falcon's is the result of a bigger budget and two generational changes.

However...............................there is a refreshing simplicity to driving a Falcon. While all the tech and customization of the Mustang is impressive, and fun to play with, it's also extremely distracting. And then there's the various drive modes, which can then be further customized to create your own favorite mode. Well, it gets to the point where you end up second guess if you chose the right mode, which then becomes another distraction.

In the Falcon's, you press the unlock button on the key, no keyless entry here, then put the key into the ignition to start the engine, no push button or remote start either. You then put it into gear and release the actual handbrake. Then you drive it. That's it. No modes, no endless screen menu's.

And engine wise, despite sharing parentage, they are very different animals (see what I did there). The S650 Mustang seems more endowed with torque compared to my early S550, but it's got nothing on the idle to redline torque characteristic of the Falcon's supercharged Miami V8. It's this complete contrast that I love so much about owning both.

Please Note - none of the above is me complaining or sh.tting on one or the other. I've always been analytical, this case is no different. I'm extremely fortunate to have both, which is not lost on me, I love them all for different reasons.

With that said, today was the XR6's turn for attention. Soap of choice here being the delightful Opti-Coat M-Wash, drying aid ADS Amplify, interior wiped down with the transcendent ADS Pilot. With the extra time on my hands, I went over all of the interior glass in addition to the exterior (I hate doing interior glass). The engine bay was wiped down with ECH20, switching back to Amplify for the wheels. Tyres dressed with an old favorite, NV Onyx.

S650 Mustang DFB's Detailing Garage IMG-2214


Back to spec, I then put the XR6 back into its position and covered up for the time being.
 
OP
OP
DFB5.0

DFB5.0

Well-Known Member
Joined
Mar 15, 2017
Threads
16
Messages
726
Reaction score
878
Location
Australia
Vehicle(s)
Mustang GT Fastback
Engine Bay!

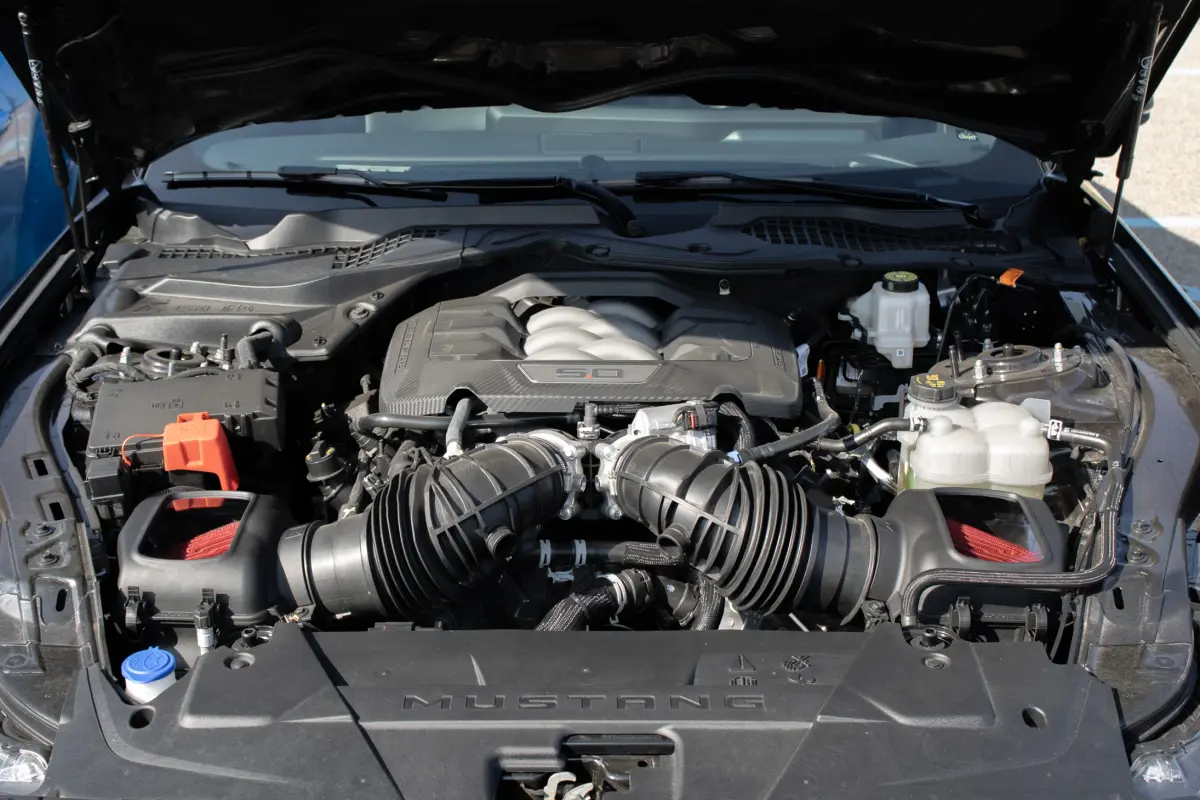
The engine bay on delivery was in ok condition, but needed some attention to bring it up to spec. At the first wash, I simply wiped it down using Carpro ECH20, but I could see a couple of areas that would need a little more work.

S650 Mustang DFB's Detailing Garage IMG_1924


The first thing you notice when opening a S650 hood is the prop rod is GONE! Finally, Ford are now installing gas struts on the production line. At $60,000 for my S550, that was a bit rude, so a prop rod on a $100k Ford would have been downright nasty.

In this case, there was no need for brushes and all-purpose cleaner, or even a dressing. So, a simple rinse down removed what I think was salt residue and any dust that had accumulated prior to shipment and delivery. And before you freak out, yes, I used the pressure washer.

S650 Mustang DFB's Detailing Garage IMG-2224


S650 Mustang DFB's Detailing Garage IMG-2227


After the rinse and while still wet, this would be where you would apply a water-based dressing such as Carpro Perl, KCx Motorplast or my favorite, Meguiar's Hyper Dressing. However, I decided to just blow dry and wipe over with more ECH20, which I find works really well on black plastics.

S650 Mustang DFB's Detailing Garage IMG-2231


The end result, a fresh engine bay.

S650 Mustang DFB's Detailing Garage IMG-2232


S650 Mustang DFB's Detailing Garage IMG-2235


For comparison, this was my S550 engine bay in standard and modified form. I wish Ford kept the coil covers, and I also note they have included a remote positive terminal post for battery charging. To make way for the dual intake system, the coolant bottle has moved from in front of the radiator to beside the strut tower. Otherwise, the engine bay panels are carried over from S550.

S650 Mustang DFB's Detailing Garage gt50102


S650 Mustang DFB's Detailing Garage gt50105


S650 Mustang DFB's Detailing Garage gt50103


Modifications to the engine? I do want to add the Ford Performance catch can when it becomes available. This and other parts I would have bought well in advance, but the usual Mustang aftermarket suppliers have been extremely slow in releasing parts for S650. I guess they have been waiting for cars to hit the ground, but they have been missing out on customers like me who would have got in early.

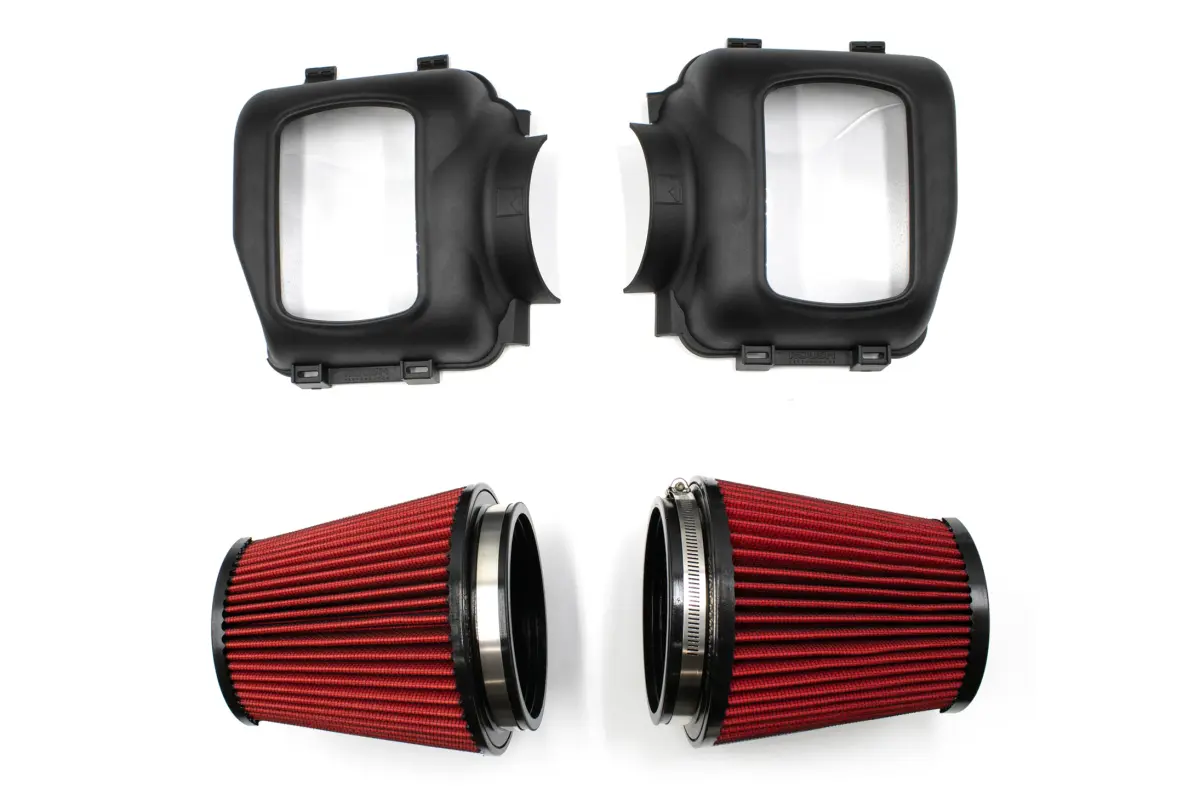
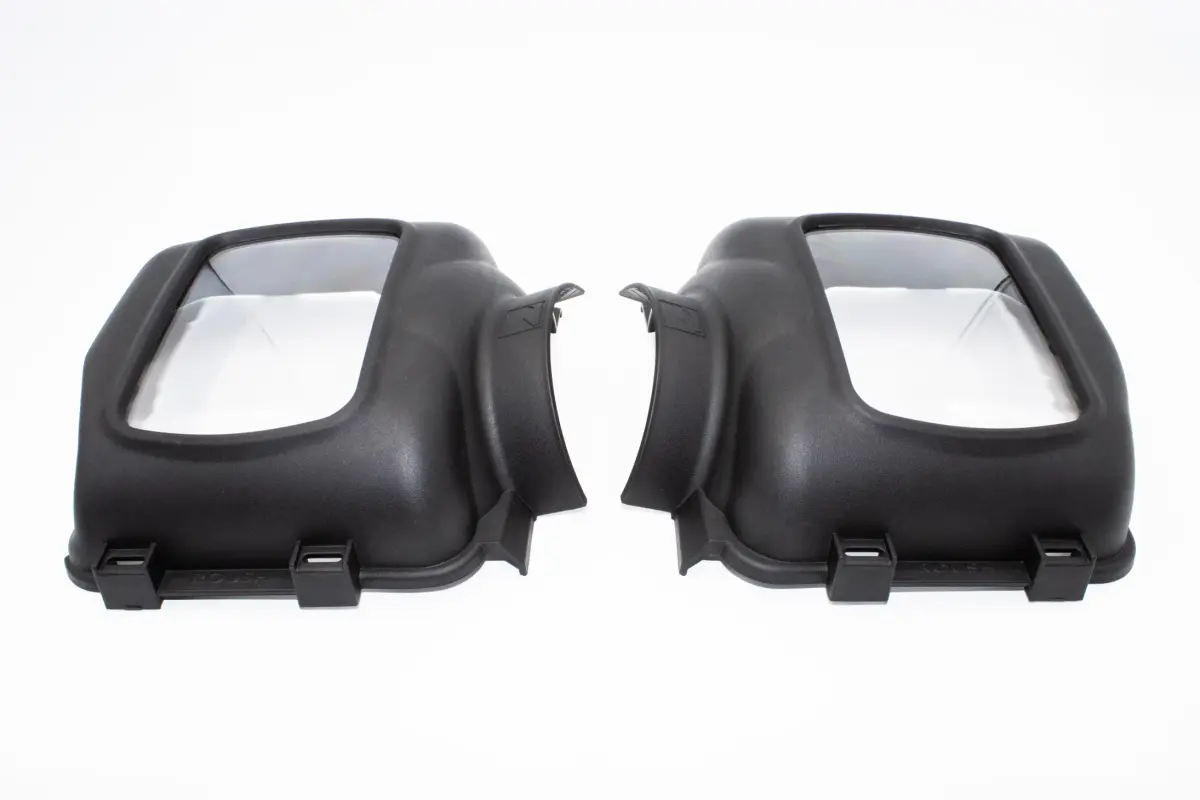
Also on the list, I want to get the Roush intake kit, which is basically two high-flow air filters with clear airbox lids. They say that it reduces intake restriction by 30 percent, in turn "increases throttle response, and enhances the sound of your engine—giving you an aggressive growl when you push the pedal". How true that is I don't know, I just like the look and if it boosts induction note, then I'll be happy.

https://www.tickfordperformance.com.au/mustang-products/my24+-roush-air-intake-system

S650 Mustang DFB's Detailing Garage rcai104


S650 Mustang DFB's Detailing Garage rcai104

S650 Mustang DFB's Detailing Garage rcai104

S650 Mustang DFB's Detailing Garage rcai104


Seeing as I had all the gear out, and the car being wet anyway, I decided to wash the car again. Why? Because why not!

S650 Mustang DFB's Detailing Garage IMG-2222


Carpro Reset was used on the wheels, also used on for the rest of the wash and teamed with the Microfiber Madness Deli-Pad. ADS Amplify was again the drying aid, Invisible glass on the windows, ADS Adapt on the wheels and OG Tire Dressing for the rubber.

Next up for the Mustang, next week will be about polishing and coating the exterior.
 
Last edited:


OP
OP
DFB5.0

DFB5.0

Well-Known Member
Joined
Mar 15, 2017
Threads
16
Messages
726
Reaction score
878
Location
Australia
Vehicle(s)
Mustang GT Fastback
Polishing!

I have been planning this for more than two years now, how will I be polishing and protecting this new car. And after countless hours of procrastination, I finally arrive at this moment where I immerse myself in getting this car to look the best I can possibly achieve.

In the past, today would have been a very intensive endeavor. Typically, I will wash and decontaminate the car, including iron removal and clay. Drying and taping up would follow, then polishing. This would evidently lead to an element of rush and corners cut. Yes, you read right. Not this time, I wanted to do this at a relaxed pace.

The decontamination took place last week, including iron removal, high pH soap, low pH soap then claying.

S650 Mustang DFB's Detailing Garage IMG-1996


S650 Mustang DFB's Detailing Garage IMG-2070


After its last wash on Saturday, the car had sat unused while I carried on with my normal schedule of gardening work. So, to start today, all that was needed was a quick rinse-less wash to remove any dust that had settled. Product of choice being the surfactant-based McKee’s N-914, followed by Carpro Eraser to dry the car. I then removed the number plates.

S650 Mustang DFB's Detailing Garage IMG-2332


You will notice I have covered up the wheels. After umming and ahhing about buying a set of those for about two years, but I finally pulled the pin. Many detailing companies have a version of these, but to me the Gyeon ones appeared to be better quality compared to the fabric Gtechniq and Maxshine. These simply slip over and hook over the tyre, the base cut straight to line up with the floor. The concept here is to keep polishing dust or splatter off freshly cleaned/detailed wheels. Overall, they proved their worth.

Gyeon Q2M Wheel Covers (4 pack) | Detailing Shed

S650 Mustang DFB's Detailing Garage IMG-2330


S650 Mustang DFB's Detailing Garage IMG-2328


Then it was time for that time consuming and tedious task of taping up all the trim, badges and headlights. For this car, I took longer than I ever have doing this job.

Get CarPro Masking Tape | 4 Sizes | Waxit – Waxit Car Care

S650 Mustang DFB's Detailing Garage IMG-2334


S650 Mustang DFB's Detailing Garage IMG-2336


You will see I also placed towels at the base of the windscreen to collect the polishing dust.

S650 Mustang DFB's Detailing Garage IMG-2340


S650 Mustang DFB's Detailing Garage IMG-2346


In terms of paint condition, it's a mixed bag. It's funny, when you get this up close and personal with a car, you start to notice things. Overall, there were very few scratches, only a couple on the driver's side A-pillar that were easily removed. The gloss black hood vent is atrocious, it being hazed out quite badly, but that's part of the deal with gloss trim. I could also see some mild isolated water spots on the hood and a dust nib on the roof. The main concern for me though is the alarmingly thin paint on the edge of the doors. All of these can be dealt with or ignored, you have to reach a point where you understand that this is a mass-produced car.

In terms of pad and polish, I started with a proven combo of Sonax Perfect Finish on an ShineMate blue intermediate foam pad. After a test spot, I felt I needed just a little more, so switched to the firmer yellow ShineMate cutting pad. I then did the front quarter panels and decided to try a second set of passes with Carpro Relfect and the orange ShineMate polishing pad. Winner! So yeah, I'm effectively two stepping this car.

S650 Mustang DFB's Detailing Garage IMG-2343


S650 Mustang DFB's Detailing Garage IMG-2353


S650 Mustang DFB's Detailing Garage IMG-2355


Now, you might question why I'm two stepping with finishing compounds? Well, Perfect Finish can do some decent cutting, especially teamed with a cutting pad like I did, but then "finish" down acceptably. In my case, adding the super fine Reflect on a softer polishing pad was purely for refinement and extra gloss. I mean, I could have swapped the Perfect Finish for something more aggressive like CutMax of DA Coarse, but why remove more paint when it wasn't needed. I will probably have this car for a while, I want to leave something in the bag for later down the track.

Adding that extra step, I was glad I decided to keep my old ShineMate EB351's, no pad swapping between steps! This also gave me a chance to use both my new Rupes and ShineMate side by side. For the Perfect Finish, I used the Rupes HLR 15 5-inch and the ShineMate 3-inch. I was initially apprehensive about how the new Rupes would perform with the ShineMate pads, there has been suggestion that the HLR doesn't like non-Rupes pads. However, the two worked well together, probably due to the Rupes and ShineMate pads being similar thickness, which helps with regard to the wafer thing backing plate of the HLR.

Switching to the ShineMate 5-inch for the Reflect, you certainly notice how much smoother than Rupes is, but the difference is not the gap you would think. I find the ShineMate's run slower in every position but seems to have a slight edge in torque. The Rupes spins faster and has more speed headroom, but pad stall seems a little more prevalent. And yes, you do need to be mindful of the battery placement on the Rupes, but it's not the issue many would have you believe.

S650 Mustang DFB's Detailing Garage IMG-2349


And this is where I started to zone into the job at hand and the photo's stopped. In my ears today, the always entertaining Smoking Tire Podcast. Compared to my usual approach, I started on the vertical panels for this car instead of the usual hood, roof and boot. I worked several panels before calling time for today. The car was then covered up and I'll resume proceedings in the morning.

S650 Mustang DFB's Detailing Garage IMG-2356


S650 Mustang DFB's Detailing Garage IMG-2358


I still have plenty left to do, including the glass. I'm still un-decided on what to do with the wheels, but the factory items need to be coated before they get too much brake dust exposure. I think I'll get the polishing done, coat the paint, glass and trim, then pull the wheels off and replace them with the HP items off my S550. I can then coat the S650 wheels at my leisure while I make my decision which set will stay on the car.
 

Alan Applegate

Well-Known Member
Joined
Sep 25, 2024
Threads
12
Messages
245
Reaction score
194
Location
Roswell, NM
Vehicle(s)
2024 Mustang Eco-Boost Premium
Whoa! Seeing so many cleaning supplies in one place (other tan an auto parts store) makes me think there is some OCD going on!

One comment... DO NOT wash your engine with a high pressure washer! Especially one (Eco-Boost?) where water can be forced into the spark plug housings!
 
OP
OP
DFB5.0

DFB5.0

Well-Known Member
Joined
Mar 15, 2017
Threads
16
Messages
726
Reaction score
878
Location
Australia
Vehicle(s)
Mustang GT Fastback
Polishing Continued...............................

Back on the polishers today as I continue working around the car. Today, I started on the hood, in particular the gloss black hood vent. I knew this would test my patience, so starting on it while I was still fresh made the most sense. While this part of the car looked ok from a distance, it was hazed out and dull when viewed up close. I tell someone had a go at polishing it, the dried compound the giveaway.

S650 Mustang DFB's Detailing Garage IMG-2361


I'm going to be honest here, I did my best but I just couldn't get it corrected like I wanted. First, I started with Reflect on the yellow Rupes, but the marring was still present. I then tried Perfect Finish on the same pad, again, no dice. I then tried a microfiber pad with Perfect Finish, no luck there either. So, after another pass with Reflect with barely any pressure, I concluded that I was both removing and installing the marring. In the end, I gave it one last polish by hand using Carpro Essence and walked away. The black roof in comparison was easy.

S650 Mustang DFB's Detailing Garage IMG-2365


This hood vent reminds me of the gloss black trunk panel on my S550, which would scratch by just looking at it. Because these gloss black trims are not actually painted, I think the only real solution for this would be to have it painted and clear-coated. It's an easy removal, so I'll have to think about it. In the meantime, I'll just coat it and try to ignore it.

S650 Mustang DFB's Detailing Garage IMG_1848


I also got the glass polished today using P&S Clarity Creme. To avoid plastering glass polish all over the rubber trims, I went around the edges with a Carpro glass hand polishing block, which uses the same rayon material as their normal glass pads. I then put a Lake Country SDO Blue pad on my 3-inch ShineMate and took care of the inner sections. I really like this product, its so easy to use and does not require micromanagement like CeriGlass does, or require a sledgehammer to remove the residue afterwards. That 473ml bottle will last you the rest of your life, negating its cost.

S650 Mustang DFB's Detailing Garage IMG-2369


From here, I removed the tape and began cleaning up polish residue and dust out of the cracks and crevices by using compressed air, rinse-less wash and Carpro Eraser. I also had to break out the Meguiar's M39 to remove some residue from the rear GT badge and 5.0 fender badges.

S650 Mustang DFB's Detailing Garage IMG-2375


S650 Mustang DFB's Detailing Garage IMG-2378


S650 Mustang DFB's Detailing Garage IMG-2385


Am I 100% happy? Probably not, mainly because of that hood vent and a couple of imperfections that I will need to address. But overall, the car has taken on a much deeper, crisper tone to its paint. This is something that was noted by the guys at the dealer last week, that despite both being Race Red, they looked different side by side. That would be down to the polishing and ceramic coating that my old car got before trade, that work bringing out a more defined glass-like depth to the paint.

Up next, a thorough wipe down with a prep spray, then coating the paint, trim and glass. I then have two sets of wheels to coat. No rest for the wicked!
 
OP
OP
DFB5.0

DFB5.0

Well-Known Member
Joined
Mar 15, 2017
Threads
16
Messages
726
Reaction score
878
Location
Australia
Vehicle(s)
Mustang GT Fastback
My 5-liter Trace-less and Touch-less v2 arrived today.

Bilt Hamber Trace-Less
Bilt Hamber Trace-Less Super Wetting Glass Cleaner - Detailing Shed
Bilt Hamber Trace-Less | Streak Free Glass Cleaning | Obsessed Garage

Bilt Hamber Touch-Less Pre-Wash
Bilt Hamber Touch-Less V2 Snow Foam Pre Wash - Detailing Shed
Bilt Hamber Touch-Less | Snow Foam | Car Wash Soap | Obsessed Garage

S650 Mustang DFB's Detailing Garage IMG-2390


I gave Trace-less a quick whirl, it certainly has a strong solvent aroma peppered with a scent, and it flashes away to a streak free finish with minimal towel effort.

Use on interior and exterior glass plus acrylic, and infotainment screens. Safe on tinted glass, mirrors, spectacles and hard glazed surfaces. Only use clean lint-free cloths free of detergents and fabric conditioners – these will cause smearing.
For Touch-less v2, its double the concentration and will require me to recalculate the panel impact ratio match my pressure washer and foam cannon outputs.
 
OP
OP
DFB5.0

DFB5.0

Well-Known Member
Joined
Mar 15, 2017
Threads
16
Messages
726
Reaction score
878
Location
Australia
Vehicle(s)
Mustang GT Fastback
Ceramic Coating!

For the last two years, the thing I procrastinated over the most was what I would put on the paint of this car. My first thought was to go with Gyeon Mohs EVO. After using Pure EVO on my Ranger and Jaguar, I wanted something that was naturally slick, which Mohs addressed over Pure. I then changed my mind and decided to just put a wax on it, Collinte 845 the likely candidate, or perhaps Wolfgang Deep Gloss Paint Sealant...........both favorites of mine for their gloss and slickness. But that all changed at the 11th hour.

After feeling like a wax wouldn't do the car justice, I went ahead and ordered Armour Detail Supply Quartz. The main attraction here being the natural slickness it was said to possess, backed by the claims of superior real-world durability.

ARMOUR Detail Supply Armour Quartz Coating (3+year coating) - Detailing Shed

S650 Mustang DFB's Detailing Garage IMG-2396


The car had sat covered overnight to limit dust settlement. The first step was to go over the whole car with ADS Panel Prep. I wouldn't say this is my favorite panel prep, but that centers around the pure joy I get from using Carpro Eraser, that scent is so distinctively pleasant.

S650 Mustang DFB's Detailing Garage IMG-2394


It was then time for the coating. To start, I applied the coating to the horizontal surfaces, trunk lid, roof and hood. The ADS coating lays down rather thickly, feeling quite sticky under the applicator. After it has "sweated", it's then leveled down with a towel, then buffed with a second towel to remove any residual. Rinse, repeat. Because of how this coating cures and hardens, you will need to swap out your applicator halfway.

S650 Mustang DFB's Detailing Garage IMG-2397


I have said this before, but I always feel nervous applying coatings, they just aren't as forgiving to use. After that first panel, I was reminded of this. The ADS coating is very grabby on the initial wipe, actually I felt like I had to fight it, which is very disconcerting. However, after those initial wipes, the surface turns to a lovely slickness. This is a unique characteristic of the ADS coatings, something I have come across with their wheel coating. So, I was prepared for that.

The coating went on the paint, lower unpainted black plastics and the window trims. Afterwards, I then applied Gyeon Quick View to the glass.

I'm not sure if this is obvious, but I was a little stressed out applying this coating. I'm sort of conflicted if I should have just done wax as planned. However, after applying Amplify (after 4 hours), I'm feeling much better about the end result.

S650 Mustang DFB's Detailing Garage IMG-2413


S650 Mustang DFB's Detailing Garage IMG-2416


Next in line, the wheels.
 
OP
OP
DFB5.0

DFB5.0

Well-Known Member
Joined
Mar 15, 2017
Threads
16
Messages
726
Reaction score
878
Location
Australia
Vehicle(s)
Mustang GT Fastback
Wheels!

Prior to the sale of my old S550, I removed the Ford Performance HP Performance wheels from the car. I didn't necessarily do this with the intention of fitting them to the S650, rather they are worth more than the original gloss black Performance Pack items that came on the car. The same with the solid black lug nuts.

S650 Mustang DFB's Detailing Garage IMG-1434


S650 Mustang DFB's Detailing Garage IMG-1436


Like the S550 Performance Pack wheels, I'm not in love with the standard S650 versions. Actually, they look pretty good, especially in the graphite colouring rather than the satin black that my car came with. I have two main gripes with both S550 and S650 PP wheels, they hide the brake calipers and......................they take forever to clean.

And so, curiosity has got the better of me, I've decided to trial the HP wheels on my new car. With two sets of wheels to choose from, I have effectively doubled my wheel workload. :rolleyes:

I bought these wheels new in mid 2021, effectively addressing three key factors. First and second being the above-mentioned caliper visibility and cleaning ease. The third being a functional aspect, ridding the car of the diabolically bad Pirelli P-Zero's. For a performance tyre, these couldn't have been worse if Pirelli tried. For a powerful rear drive car, the lack of traction you would understand in performance orientated driving, but not low-speed driving in residential areas. Replacing them for Michelin PS4S transformed the car. Having said that, the latest P-Zero Ford is currently using are apparently a marked improvement.

S650 Mustang DFB's Detailing Garage IMG-9418


S650 Mustang DFB's Detailing Garage IMG_9598


Being a brand-new set of wheels, I wanted to go all out in keeping them looking good. At the time, apart from applying DLUX to plastic trim, these wheels would be the first time I had used a ceramic coating on a painted surface. After looking at a few coatings, I settled on NV Wheel. Considering how nervous I was, the coating went down well, and I learned a new skill.

S650 Mustang DFB's Detailing Garage IMG_9645


S650 Mustang DFB's Detailing Garage IMG_9649


I never really loved that coating, it just didn't exhibit the sort of hydrophobic qualities I was expecting. From what I can tell, to get the durability needed on wheels, the slickness and water behavior tends to suffer on wheel-specific coatings. For me, both of those aspects matter to me just as much as the actual protection.

NV Wheel did provide decent longevity and was still mildly present when the wheels were removed, however, I wanted to start fresh with a new coating. The problem here being the satin/matte finish, you can't simply polish off the remainder of the previous coating, unless you want a gloss finish. So, I needed to do the best I could working with that constraint.

First up, I applied Gyeon Iron Remover to each wheel and left them to soak.

S650 Mustang DFB's Detailing Garage IMG-2419


From here, I rinsed off the iron remover and used undiluted brake buster to get them clean. I then clayed using a traditional clay bar and Gyeon Clay Lube. After this, I grabbed the Big Boi to get the wheels and tyres dry.

Next, onto one of my favorite detailing tasks, refreshing tyre sidewalls with Stoners Tarminator. Both front and back sidewalls were done...................yes, I know. :crazy:

S650 Mustang DFB's Detailing Garage IMG-2425


I then did three rounds of prep spray, starting with Carpro Eraser, then Rupes Reveal Strong, then ADS Panel Prep.

S650 Mustang DFB's Detailing Garage IMG-2428


The choice of coating wasn't really a choice, rather a mere formality. After first applying ADS High Temp Wheel Coating to the XR6 this time last year, I couldn't be happier with this product. It goes on quite thick, and has some grabbiness during the first wipe off, but it transforms to a lovely slick finish. Water behavior is exceptional and cleaning stupid easy. I may not be 100% sold on paint coatings in general, but on wheels, this coating is a must.

S650 Mustang DFB's Detailing Garage IMG-2430


The ADS wheel coating is a single layer product, but it can be layered if desired. Considering how matte wheels are somewhat porous, I decided to apply two layers. The barrels in particular soaked it up, to the point where leveling was pretty pointless. After four hours, I applied ADS Ceramic Sealant to protect the coating as it fully cures.

S650 Mustang DFB's Detailing Garage IMG-2434


S650 Mustang DFB's Detailing Garage IMG-2441


S650 Mustang DFB's Detailing Garage IMG-2437


Overall, I'm very happy with how these came up, the coating has brought additional depth and richness to the finish. I'll keep you in suspense a little longer though, I'll be swapping the wheels over tomorrow, coating the calipers as I go.
 
Last edited:
OP
OP
DFB5.0

DFB5.0

Well-Known Member
Joined
Mar 15, 2017
Threads
16
Messages
726
Reaction score
878
Location
Australia
Vehicle(s)
Mustang GT Fastback
Took the XR8 out for a spin today. This car will turn 10-years old in a few days, still smells like new as well!

S650 Mustang DFB's Detailing Garage IMG-E2445
 
OP
OP
DFB5.0

DFB5.0

Well-Known Member
Joined
Mar 15, 2017
Threads
16
Messages
726
Reaction score
878
Location
Australia
Vehicle(s)
Mustang GT Fastback
Caliper Coating & Wheel Change!

I have to confess, I'm a bit of a brake nerd! There is something about a big set of brakes that gets me fired up. Obviously, there are practical benefits to having big brakes, but I also love geeking out over how they look. On a performance car, those two things are equally important.

On the S550, all Australian-market Mustang GT's came with meaty 6-piston front calipers acting on 380mm vented rotors. At the rear, a single piston sliding caliper on 330mm vented rotors. I never found a situation where I felt the need for more brakes, not something I could say about my two Falcon's. The only drawback? That Ford chose not to paint the calipers, instead going for a grey anodized finish. I did ceramic coat them, but they sort of blended into the background, especially with the Performance Pack wheels.

S650 Mustang DFB's Detailing Garage IMG-9677


S650 Mustang DFB's Detailing Garage IMG-9680


S650 Mustang DFB's Detailing Garage IMG-1280


S650 Mustang DFB's Detailing Garage IMG-1480


For S650, Ford made some sizable improvements to the braking package. Firstly, this helps offset the weight increase over the S550, but it also has visual benefits. The front calipers are still 6-piston Brembo's, but they are considerably larger than before and includes brake cooling ducts. At the rear, Ford ditched the single piston caliper for a 4-piston Brembo caliper. Rotor sizes have increased to 390mm front and 355mm on the rear. Also on the rear, a separate caliper for the electric handbrake, this change necessitated the inclusion of GT350/GT500 suspension components.

Aesthetically, Ford are also now painting the calipers in blue, red or black depending on model and options chosen. In the US, there are several brake colour configurations, be that bundled with an option package, or via a standalone option for $600. In Australia, it's a little more straight forward. The default colour for Mustang EcoBoost and GT is gloss black with white lettering. For Darkhorse, Ford uses Notorious Blue with Grabber Blue lettering.

There is one exception to the above, when Magneride is ordered, Ford also includes red painted calipers with white lettering. Magneride will set you back $2950, which is something I wanted regardless, so the painted calipers are a rather handy side benefit.

S650 Mustang DFB's Detailing Garage IMG-2453


S650 Mustang DFB's Detailing Garage IMG-2452


With my old HP wheels coated, today was about swapping them onto the car, while also taking the opportunity to ceramic coat the calipers while I was in there. Working corner to corner, I removed the PP wheel and cleaned the caliper using a brush and N-914. Typically, you would use an iron remover as well, but I skipped this today as they are virtually brand new, not to mention using an ADS Wheel Cleaner on them during the decon wash.

S650 Mustang DFB's Detailing Garage IMG-2481


After rinsing with water, I hosed down the caliper with Carpro Eraser, wiped dry, then went over it with compressed air to remove any trapped moisture. I then followed with Rupes Reveal Strong for just before the coating went down. Coating here was again ADS High Temp Wheel Coating.

S650 Mustang DFB's Detailing Garage IMG-2464


Coating the calipers can be a bit fiddly, but I decided to use up some Gtechniq AP2 finger applicators I had in stock, this made it really easy to apply.

S650 Mustang DFB's Detailing Garage IMG-2466


I'm sorry, but these things are pure pornography! 🤤

S650 Mustang DFB's Detailing Garage IMG-2486


S650 Mustang DFB's Detailing Garage IMG-2485


Take note of the anodized hand brake caliper on the rear.

S650 Mustang DFB's Detailing Garage IMG-2477


As each caliper was coated, I then offered up the HP wheels and secured them in place with the solid black lug nuts I took off the S550. Mustang's use a crazy high torque value on the lugs, 150 ft-lbs or 204 Nm. I then dressed the tyres with OG Tire Dressing, buffed down after 30-minutes.

S650 Mustang DFB's Detailing Garage IMG-2473


S650 Mustang DFB's Detailing Garage IMG-2501


S650 Mustang DFB's Detailing Garage IMG-2494


And so, here are the finished results. In some ways, these wheels make the car look like my S550. But then, they also show off those sexy calipers. Actually, I love them! :sunglasses:

S650 Mustang DFB's Detailing Garage IMG-2513


S650 Mustang DFB's Detailing Garage IMG-2526


S650 Mustang DFB's Detailing Garage IMG-2514


But there is a problem, one that burst my bubble. Of all the parts that Ford carried over from S550, for some unknown reason, they changed the TPMS sensors from 315 MHz to 433 MHz. This means they don't talk to the car, throwing a pressure warning. They can't be coded or reprogrammed either, so of course, the only way to fix that is to remove the tyres and replace the TPMS. Now I have yet to see the warning light, I haven't actually driven the car as I'm waiting for the caliper coating to cure. Also, the PP wheels are in the garage and still talking to the car. :facepalm:

Bugger bugger bugger! Ford kept certain highly visible parts on the new model, but decided to change something that is not seen. This will annoy a lot of people in the US where Mustang owners often have a separate set of wheels with winter tyres, probably transferred from a S550 as well. :facepalm:

I was feeling so good about this wheel change. Apparently the TPMS light doesn't flash, so its a case of just ignoring it, or pulling them back off and have them swapped. I was going to coat the PP wheels I took off the car today anyway, so they will have to go back on if I have the TPMS changed. Not the end of the world, just an unexpected roadblock. Cars!
 

20ducks

Well-Known Member
Joined
Jun 6, 2020
Threads
21
Messages
220
Reaction score
53
Location
Originally South Side Chicago
Vehicle(s)
2024 Mustang GT Premium Convertible Shadow Black
1). Is 20H a recommended quality of ceramic coating?

2). Pan has started his own brand of detailing products, opinions?
 
OP
OP
DFB5.0

DFB5.0

Well-Known Member
Joined
Mar 15, 2017
Threads
16
Messages
726
Reaction score
878
Location
Australia
Vehicle(s)
Mustang GT Fastback
1). Is 20H a recommended quality of ceramic coating?

2). Pan has started his own brand of detailing products, opinions?
1) I don't really pay much attention to H ratings, I just chose the coating that speaks to me, as in how slick is it and what does it look like.

2) I have no doubt his products will be good, but put it this way, I unsubscribed to his channel about a week after he launched the brand. His comments and actions since justified that decision. Rather than tell the whole story, have a read through the link below.

(1) Pan the Organizer product line...let's discuss@ | Auto Geek Online Auto Detailing Forum

Long story short, he cooked his own goose awarding all of his products 1st place in his yearly awards video, then wondered why people called him out on that. I get that he would say his products are the best, he "designed" or spec'd them for his own tastes after all, but the products hadn't even shipped, so how would anyone know or verify that they were the best? He should have withheld that video to at least allow the products to settle on the market. Instead, he oversold and got called out for it.
Sponsored


Top