OP
OP
DFB5.0
Well-Known Member
- Thread starter
- #181
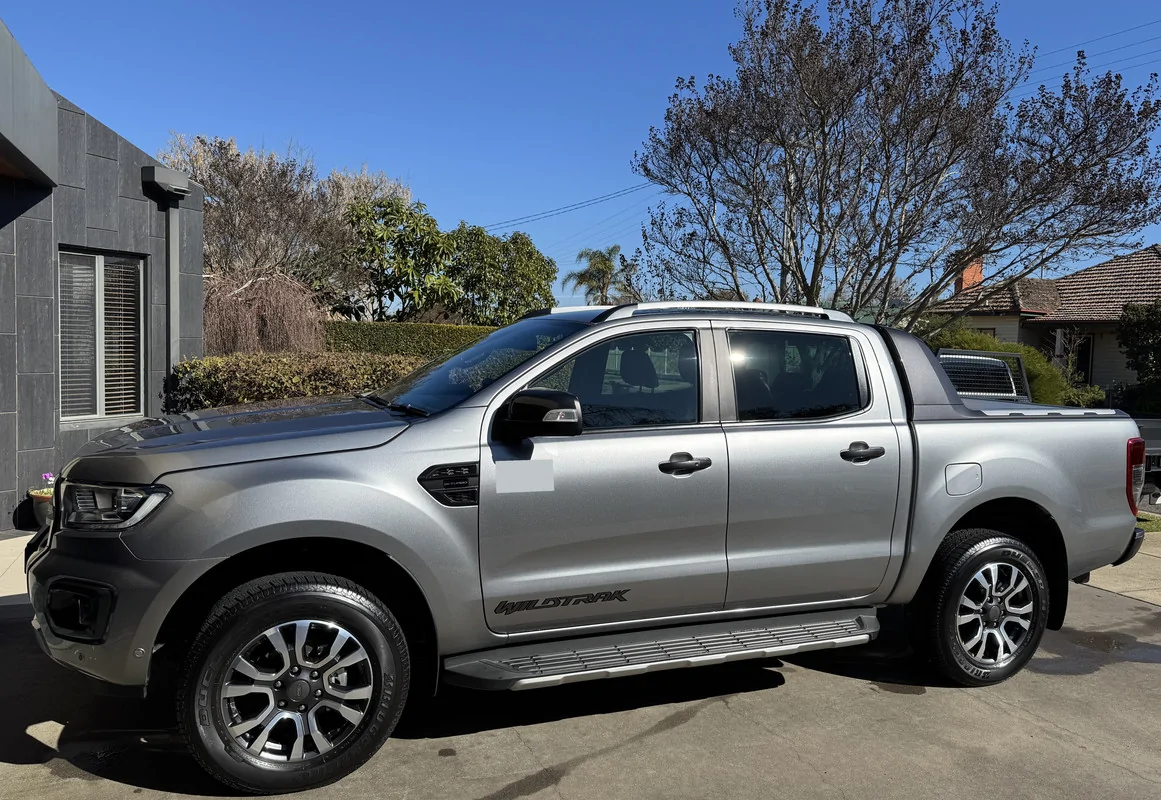
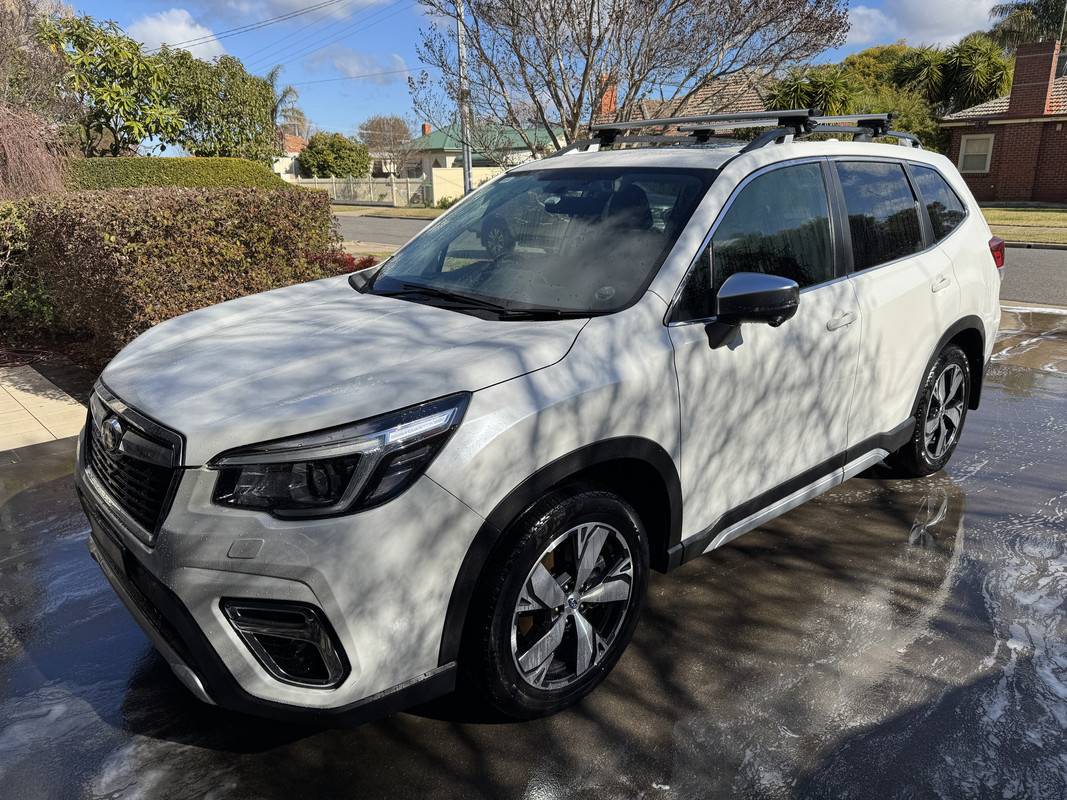
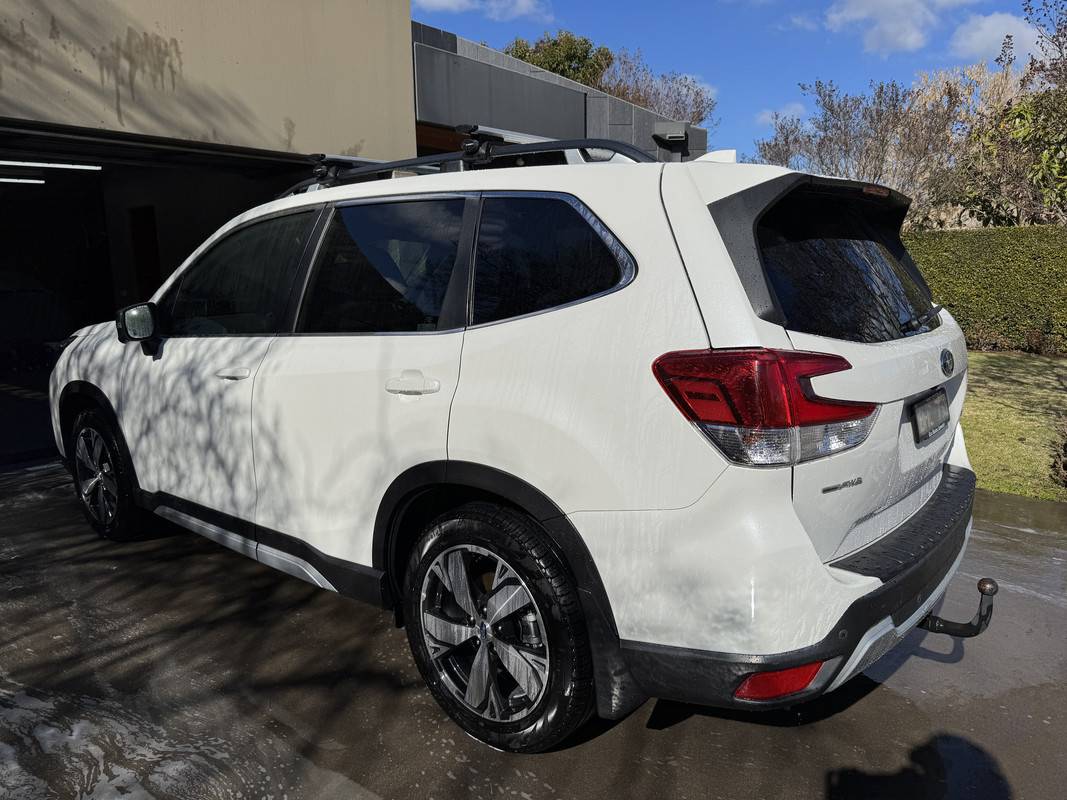
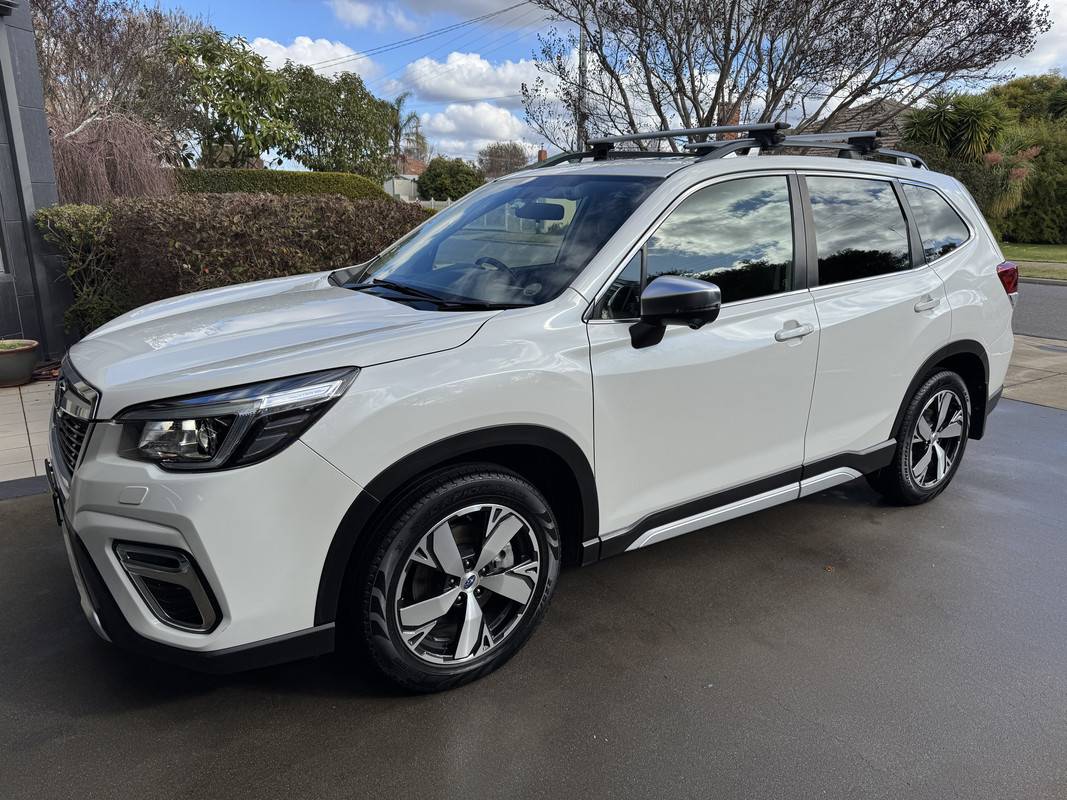
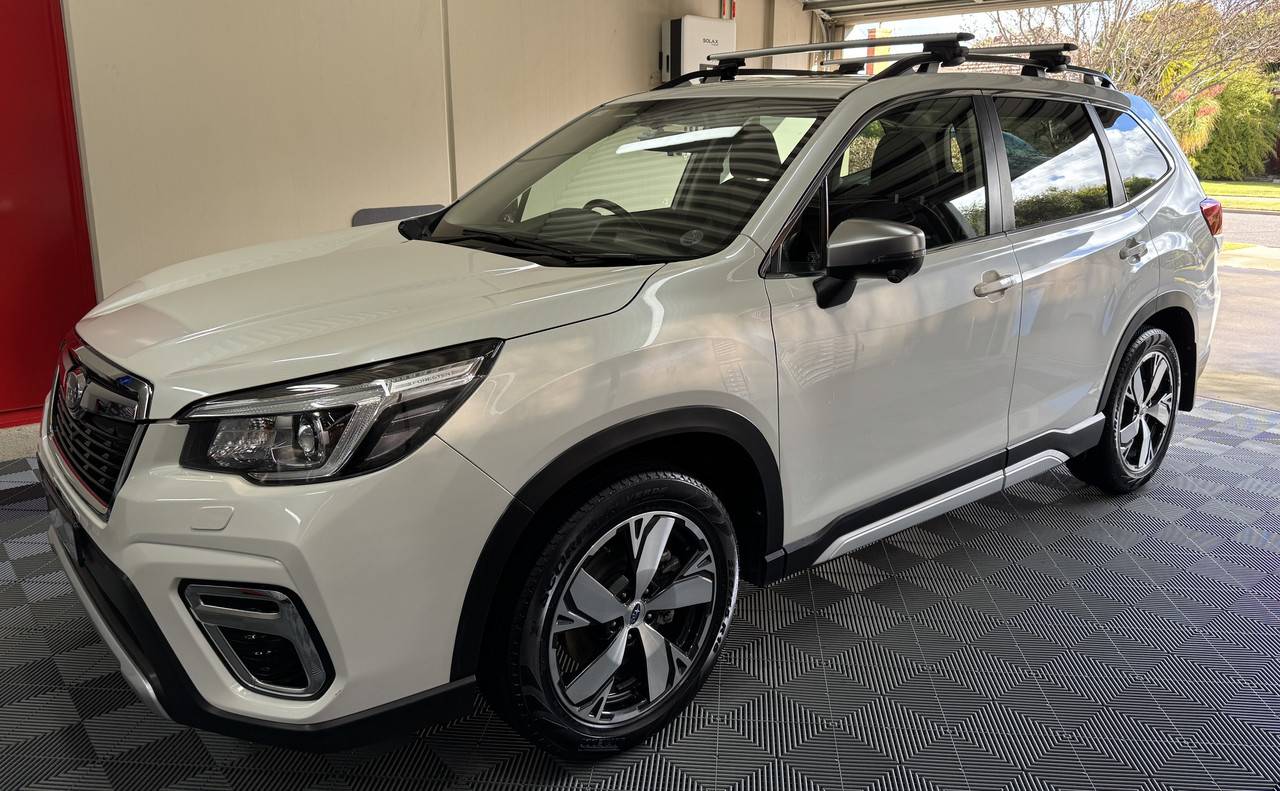
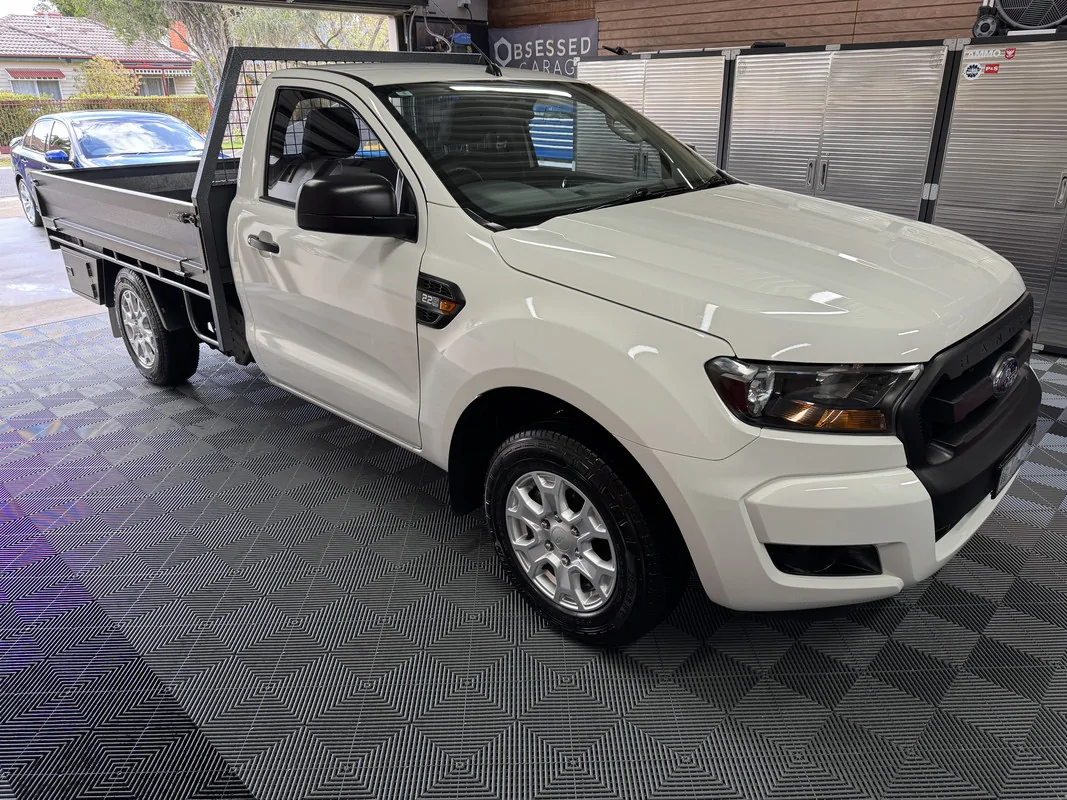
Subaru Forrester Refresh
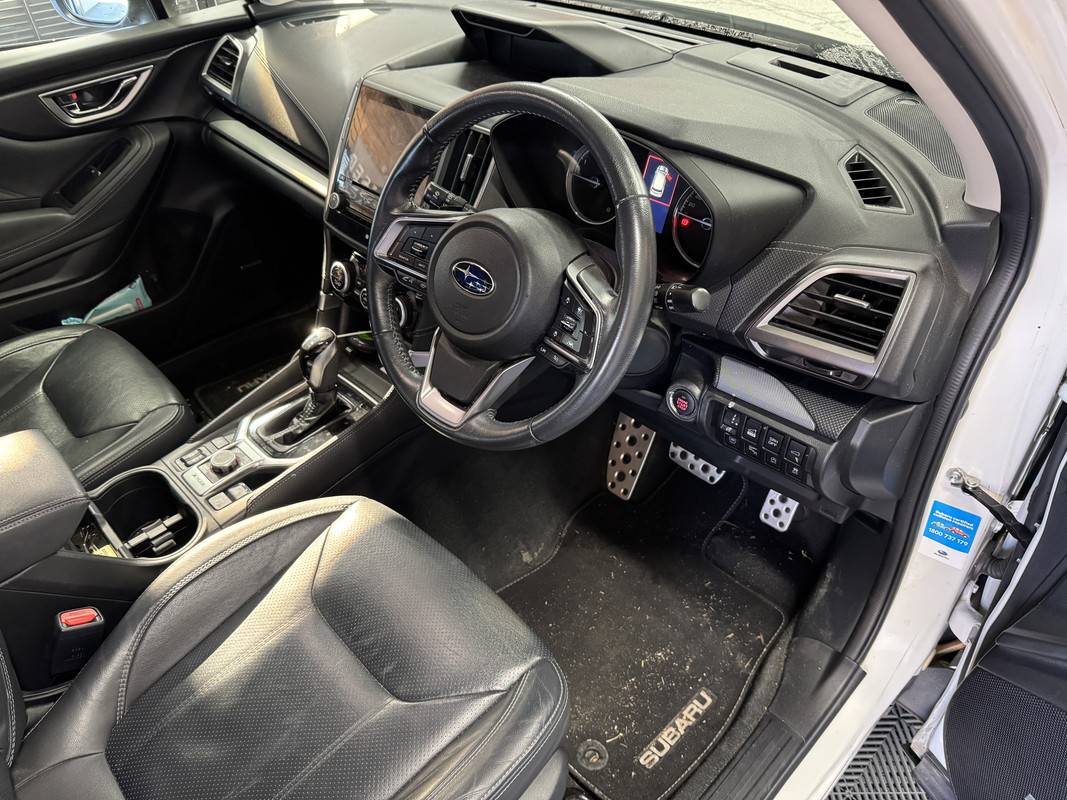
This vehicle is owned by one of my gardening clients. I’ve detailed this car many times, but it's been quite a while since I’ve touched it. I’m currently house sitting for them, so I thought I’d treat the Subaru to a refresh. With 108,000 km on the clock, there is some wear and tear starting to appear, but it mostly just needed a dam good clean, especially the interior.
I ended up splitting this detail into two parts, the interior was first last week, and the exterior this week. And I’m glad I did because the interior required far more time than I had expected…………………………………………..
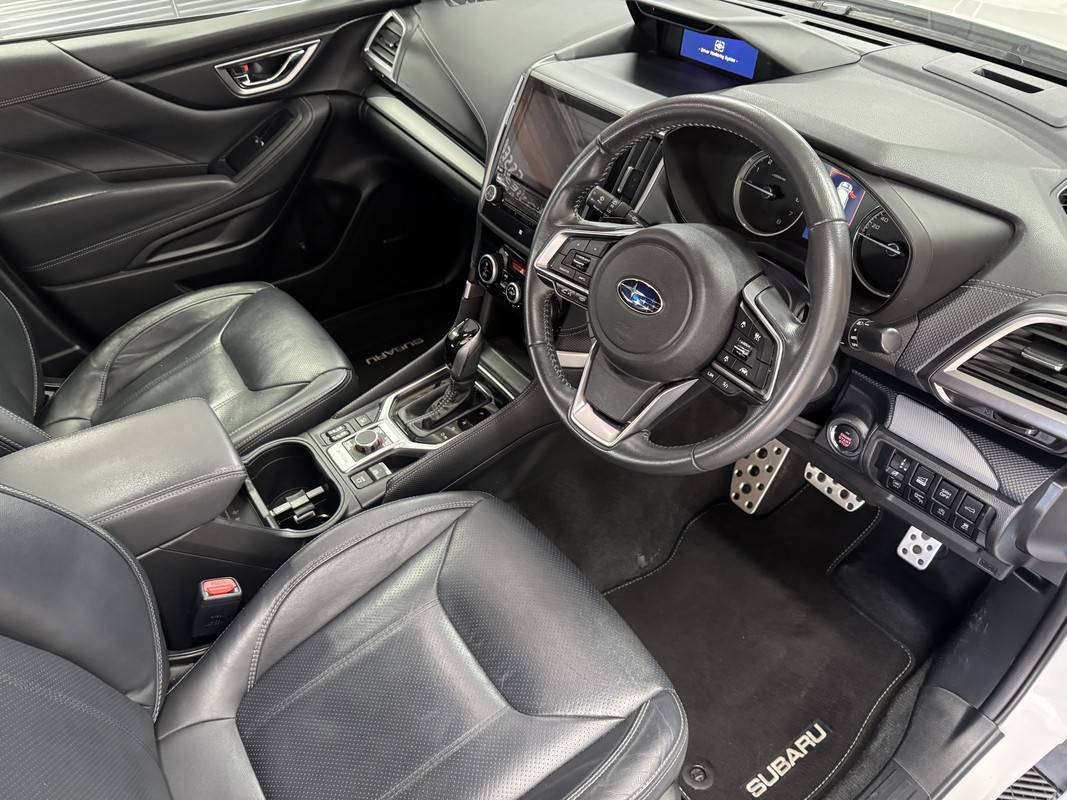
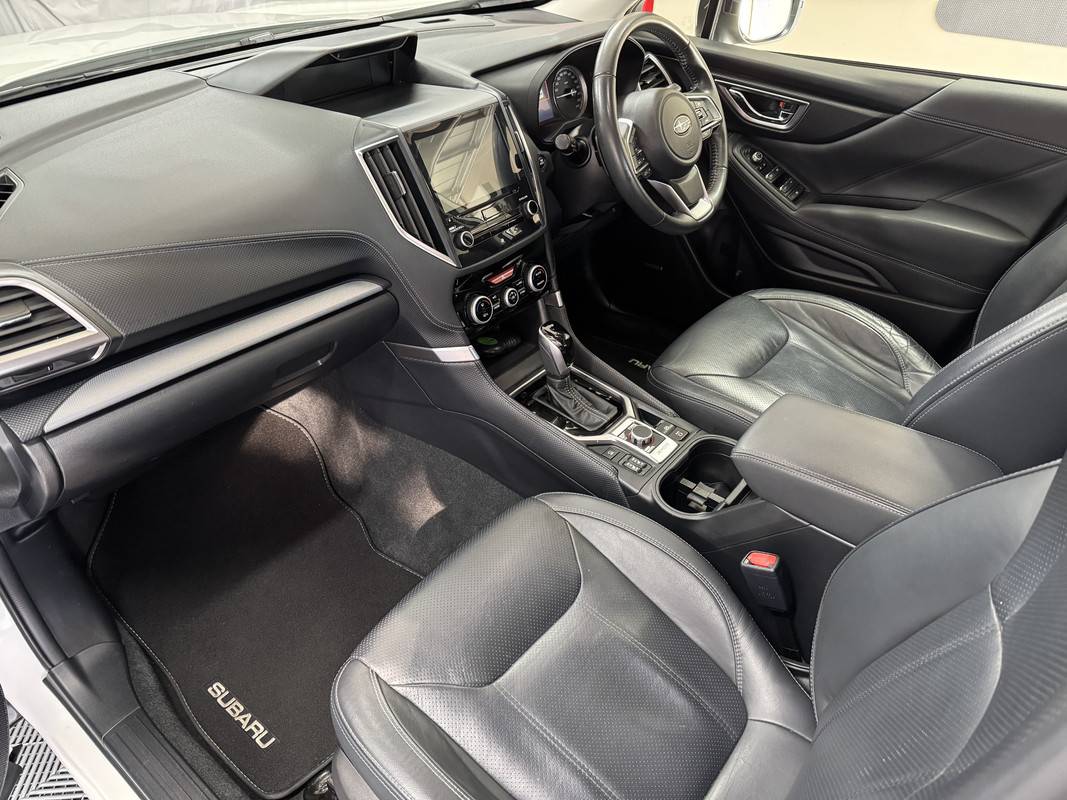
Interior Detail –
I hate doing interiors like this! And with two golden retrievers frequently riding in the back, I knew I was up for a fight!

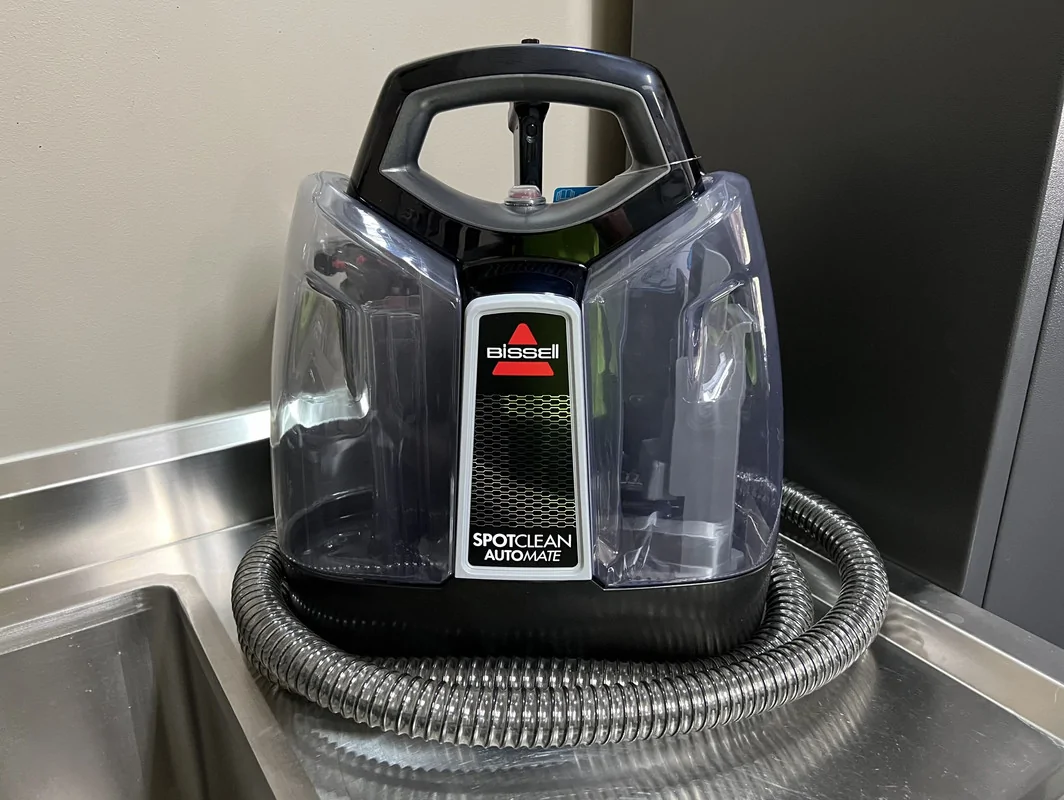
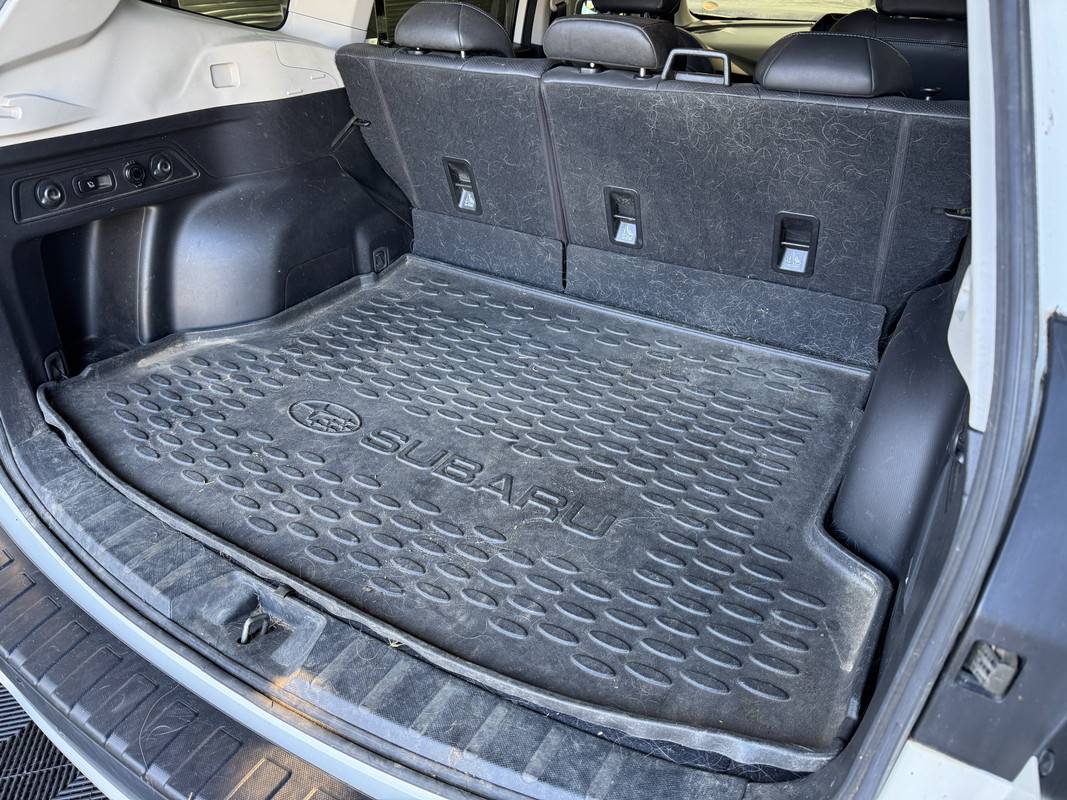
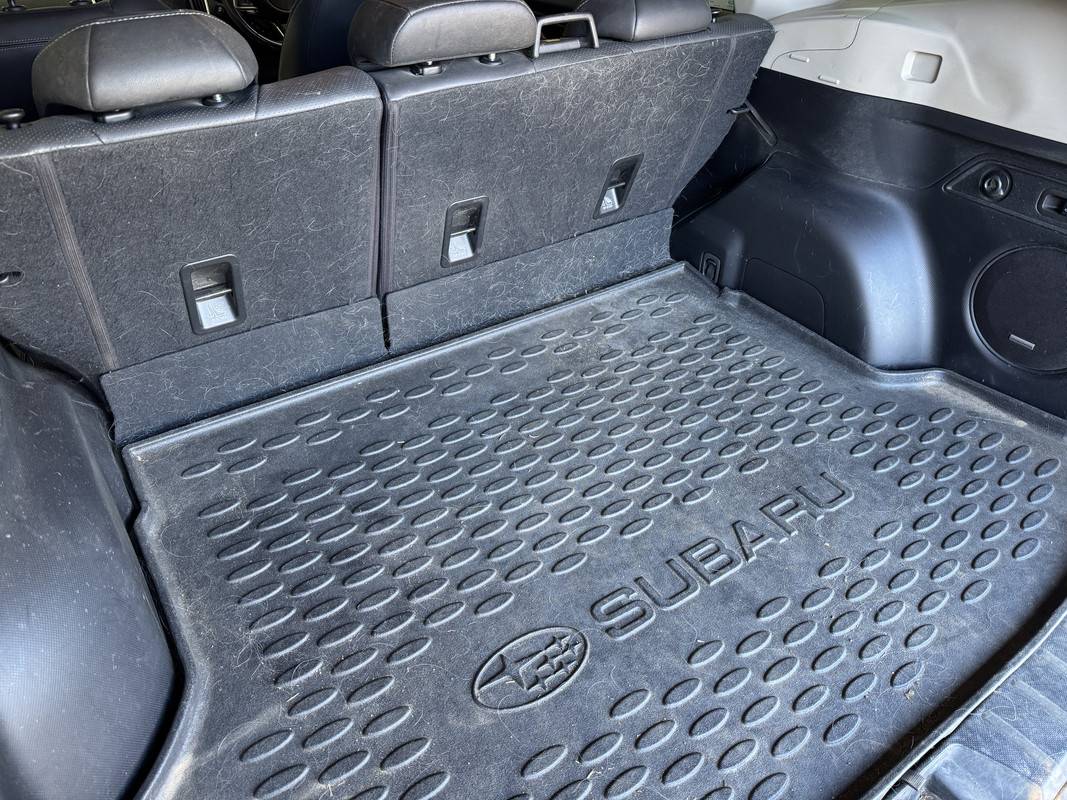
Vacuuming – I’m one of those people who likes to tackle the hardest task first, be that in detailing or for anything I do. On this Subaru, the carpet in the boot was clearly that task. I spent at least an hour attempting to remove the dog hair from the boot carpet and seat backs, I even removed the lift-up floor panel so that I could vac underneath. With cheap carpet throughout, this fought me all the way, and even then, I wasn’t happy with the result. I threw everything at it, including a Lily Brush, Fur-Eel vacuum attachment, the Tornador, even P&S Paint Gloss as a vacuum static aid. Eventually, I knew I had reached the limit of what I could achieve and decided to move on.
For the rest of the interior, I teamed the vacuum with the Tornador and Paint Gloss to address the carpets, seats, door trims and centre console. When using the Tornador, you always make more mess before it gets better. However, this tool is so handy to have, allowing you to dislodge debris from the carpet, console, door trims, air vents, and between the seats, in turn allowing easier removal via the vacuum.
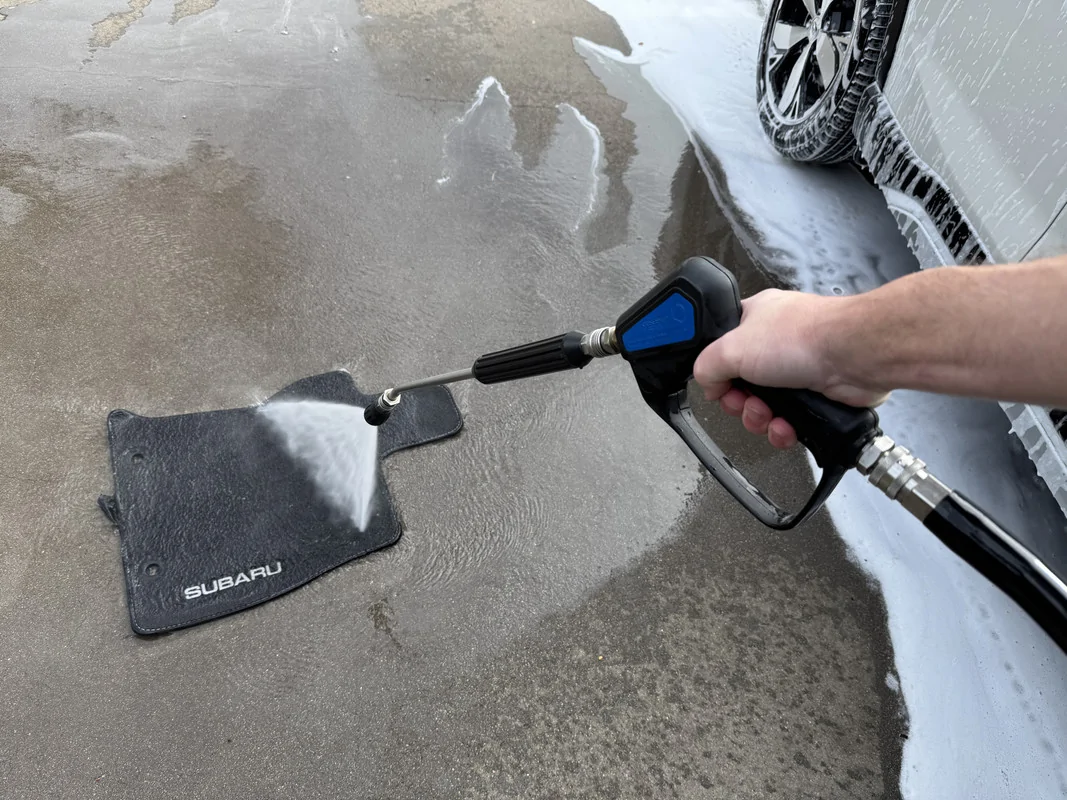
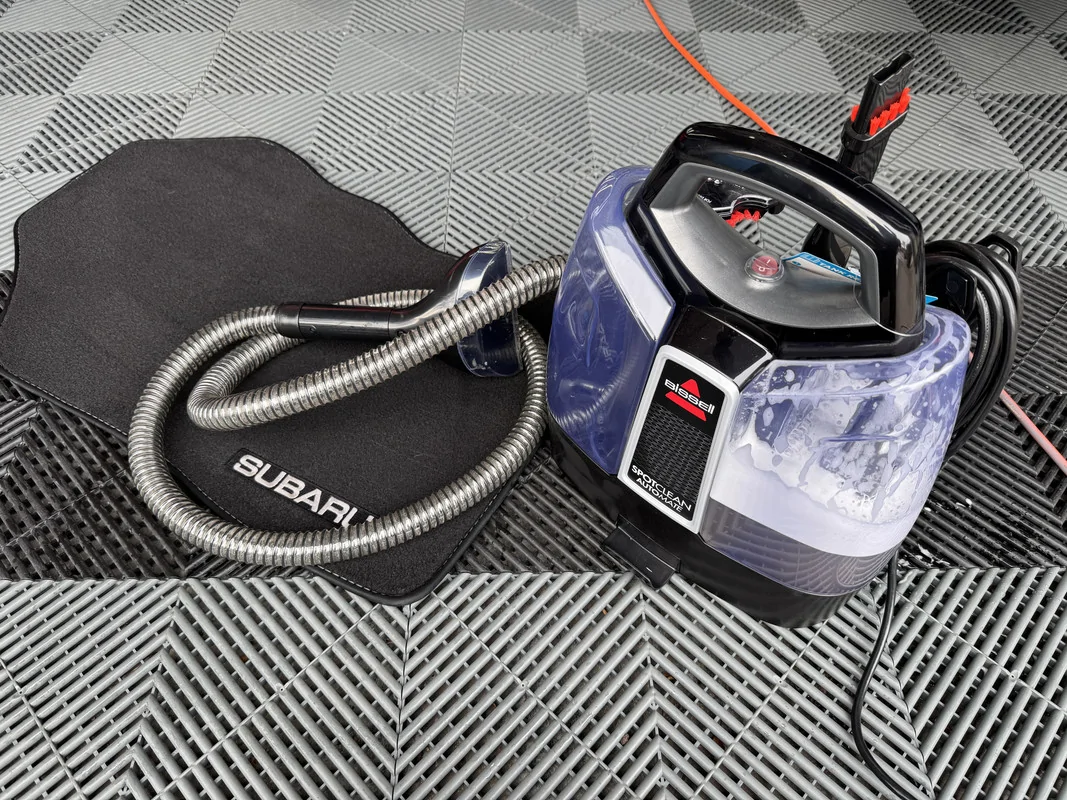
The floor mats were given an initial blast with the Tornador, then misted with Pol Star and scrubbed with a carpet brush. From there, I used the Tornador and the vacuum turbo attachment in tandem to remove the Pol Star and remaining debris. To finish, I then misted with KCx Fresh Up before being put in the sun to dry. I also sprayed the carpets with Fresh Up, which is not just an interior scent, rather an odour neutralizer. And with being home to two dogs, and the little surprise I found later, there was some neutralizing to be done!
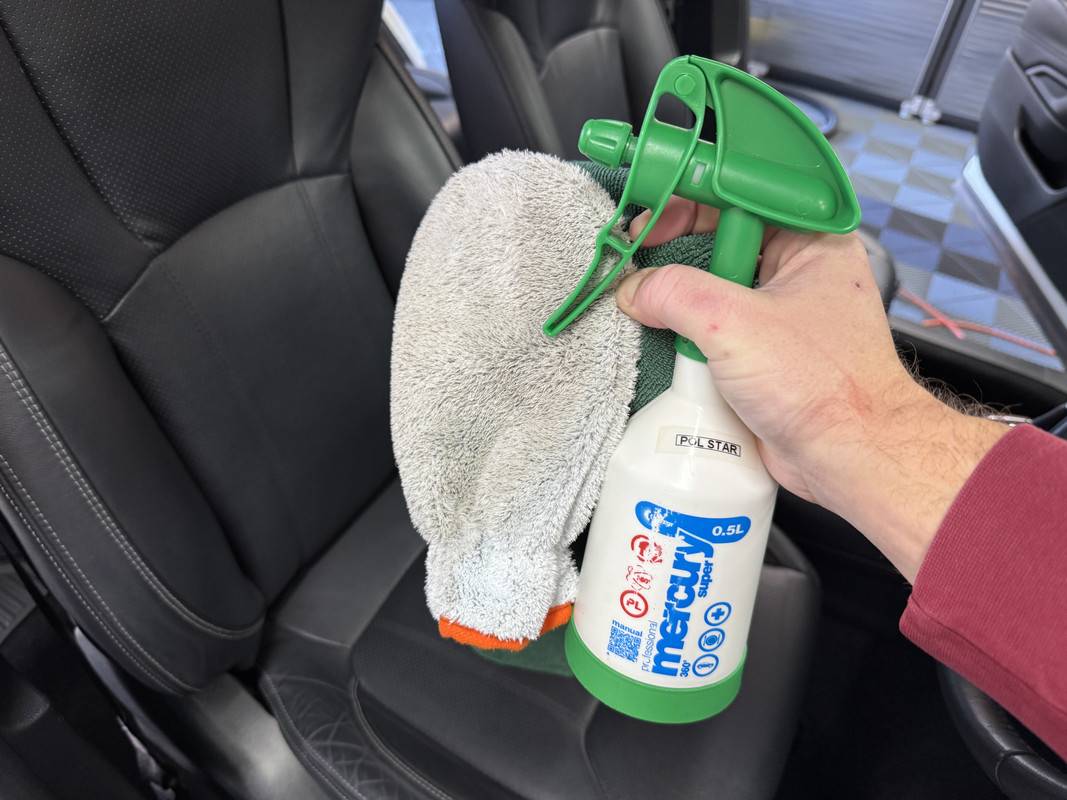
Cleaning – Following the vacuuming, I directed attention to the initial cleaning. First, the rubber cargo mat was pressure rinsed, then scrubbed with McKee’s and a tyre brush. It was then generously misted with P&S Swift and allowed to dry and self-level in the sun.
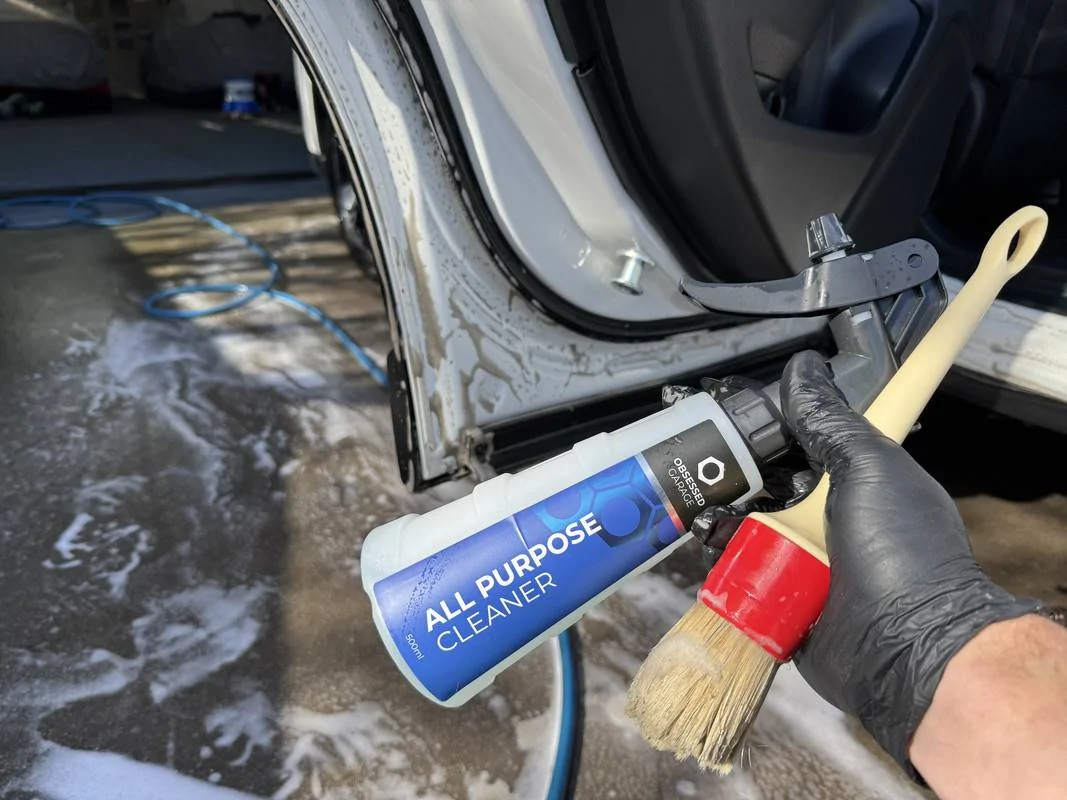
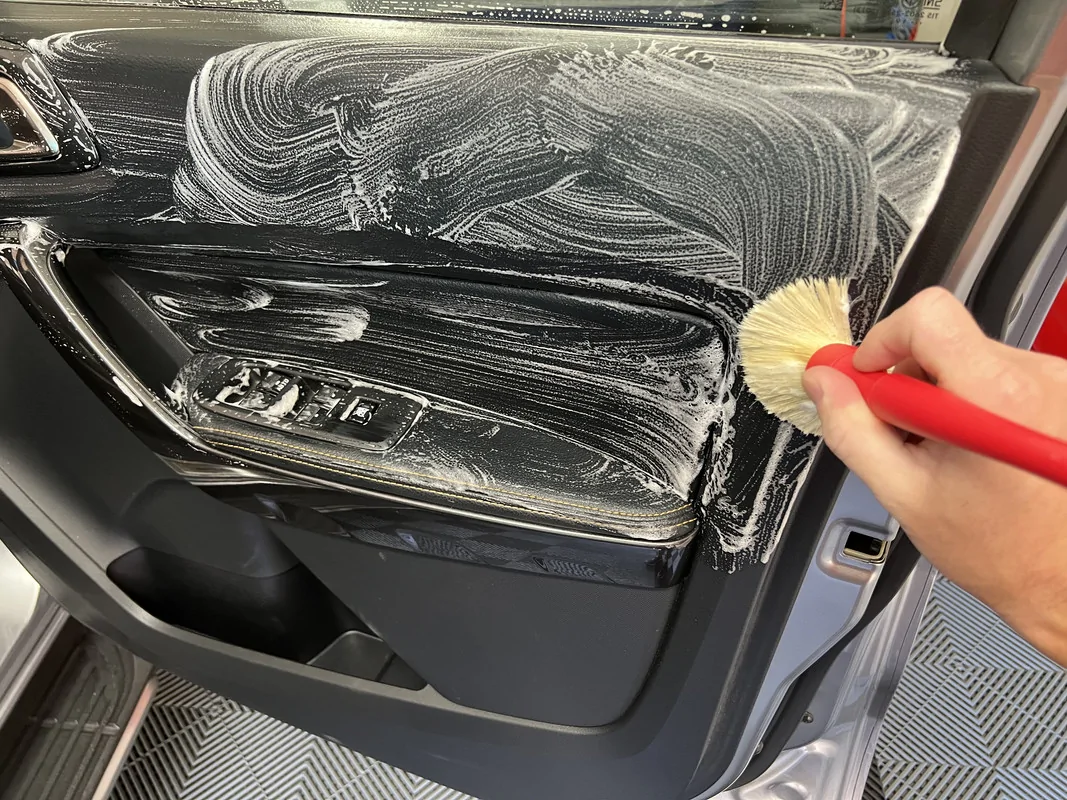
Apart from the dashboard, all interior plastics were cleaned using P&S Xpress and the Carpro InnerScrub Mitt, which is basically scrub ninja in glove format. The InnerScrub helps lather up Xpress, which is then followed with a towel to mop up the residue. The dashboard and console only needed a spray and wipe with Xpress. I even needed the Xpress for sections of the glass.
The Little Surprise - Removing the rubber cup holder insert, I discovered a thick, sticky residue that was hidden underneath. Then the stench hit me................rotten milk from a spilled coffee. Yuk! To address this, I took the rubber insert over to the sink and cleaned it with Gtechniq Tri-Clean, which in addition to being a general interior cleaner, it contains anti-microbial agents. I then flooded the cup holder with Tri-Clean and sacrificed two TRC Rip-n-Rags.
At this point, I could still smell the milk on the rubber insert, so I sprayed with P&S Finisher, left it to soak for 5-minutes, then rinsed again in the sink. That sorted the smell. Finisher is the third step in their carpet cleaning trio, but it worked here as well.
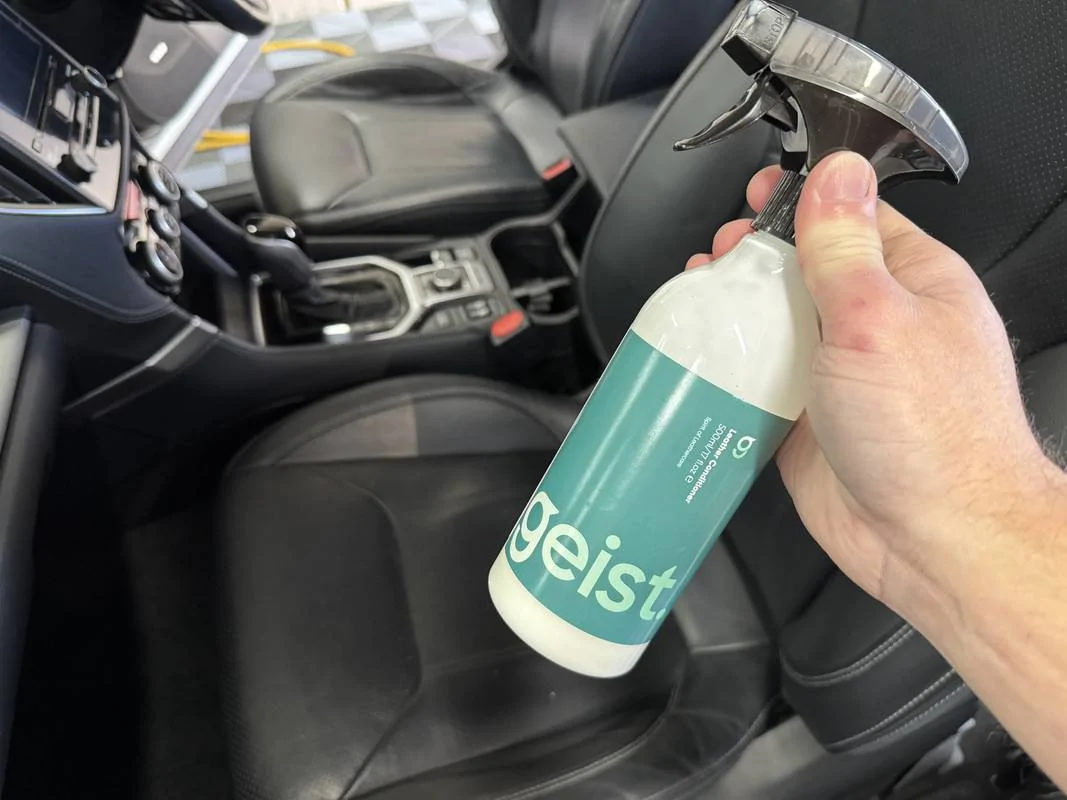
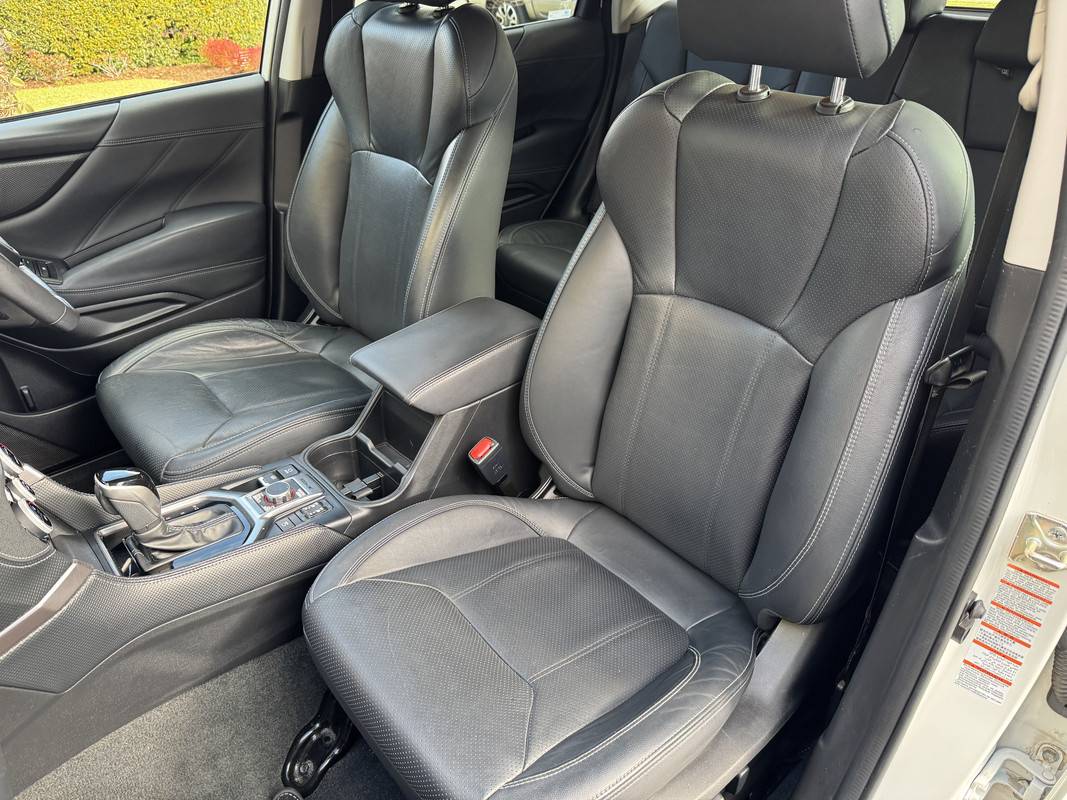
For protection and enhancement, I followed with Geist Leather Conditioner, applied using a microfiber brick and levelled with another interior towel. I’m liking this product more and more, in this case providing a subtle enhancement without being looking tacky.
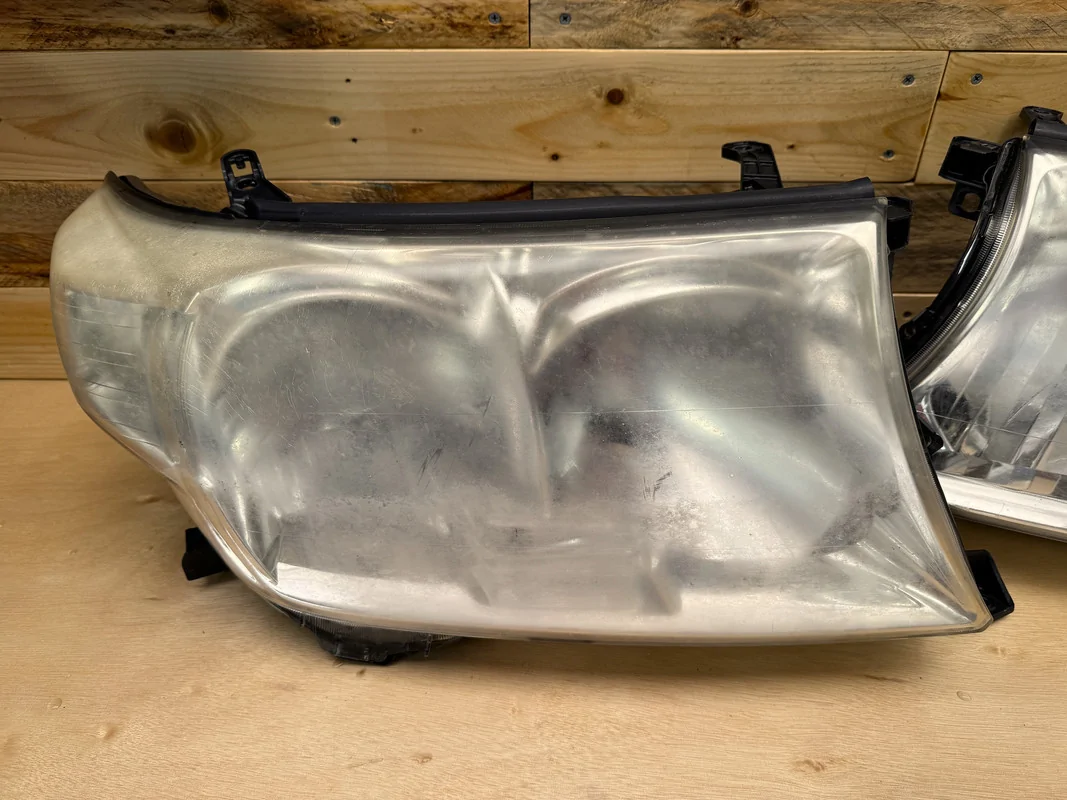
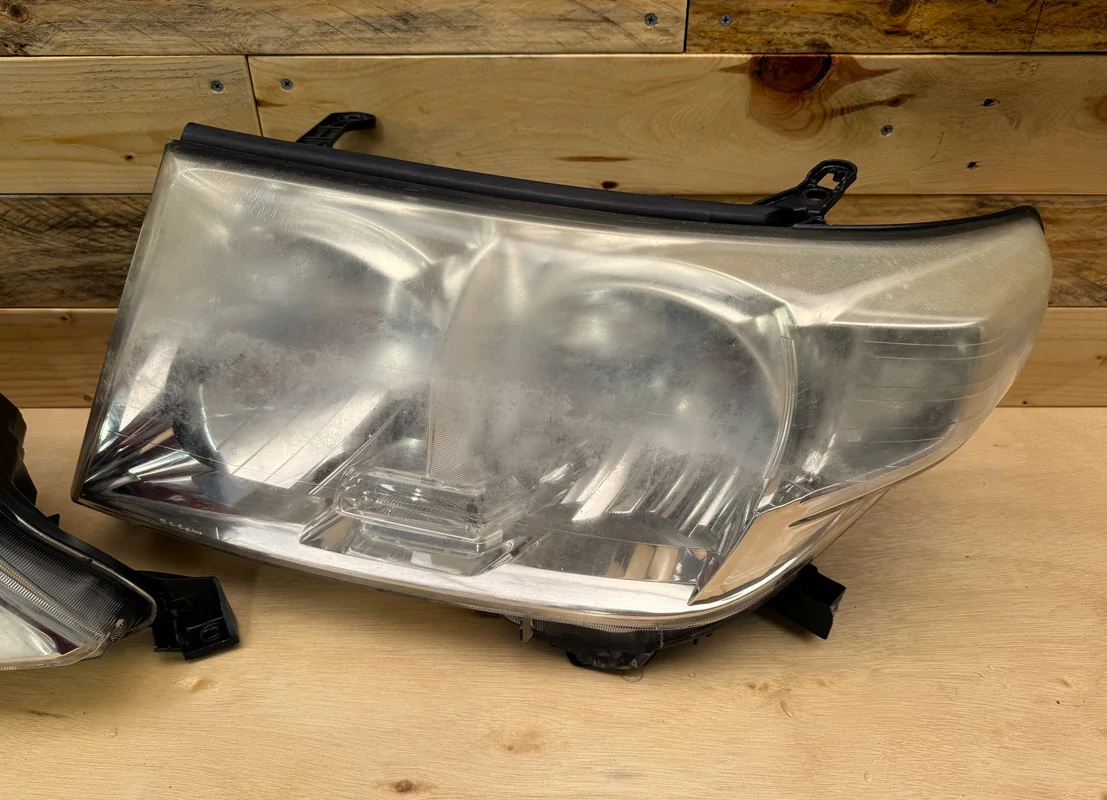
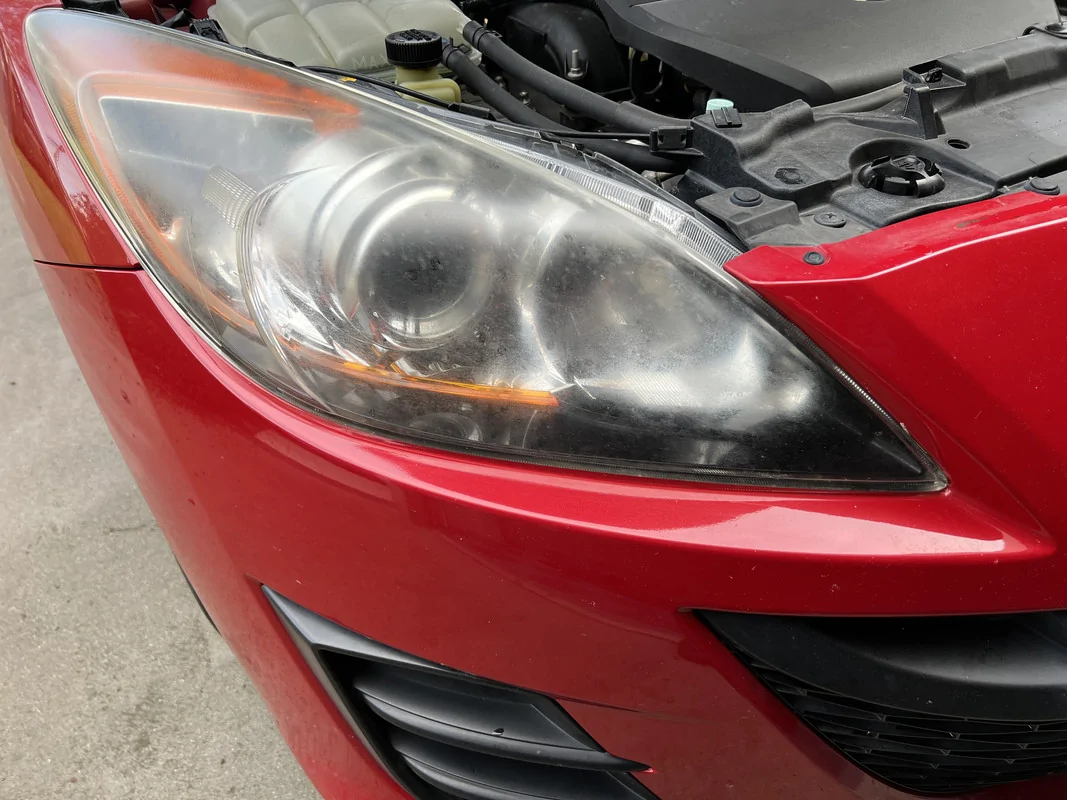
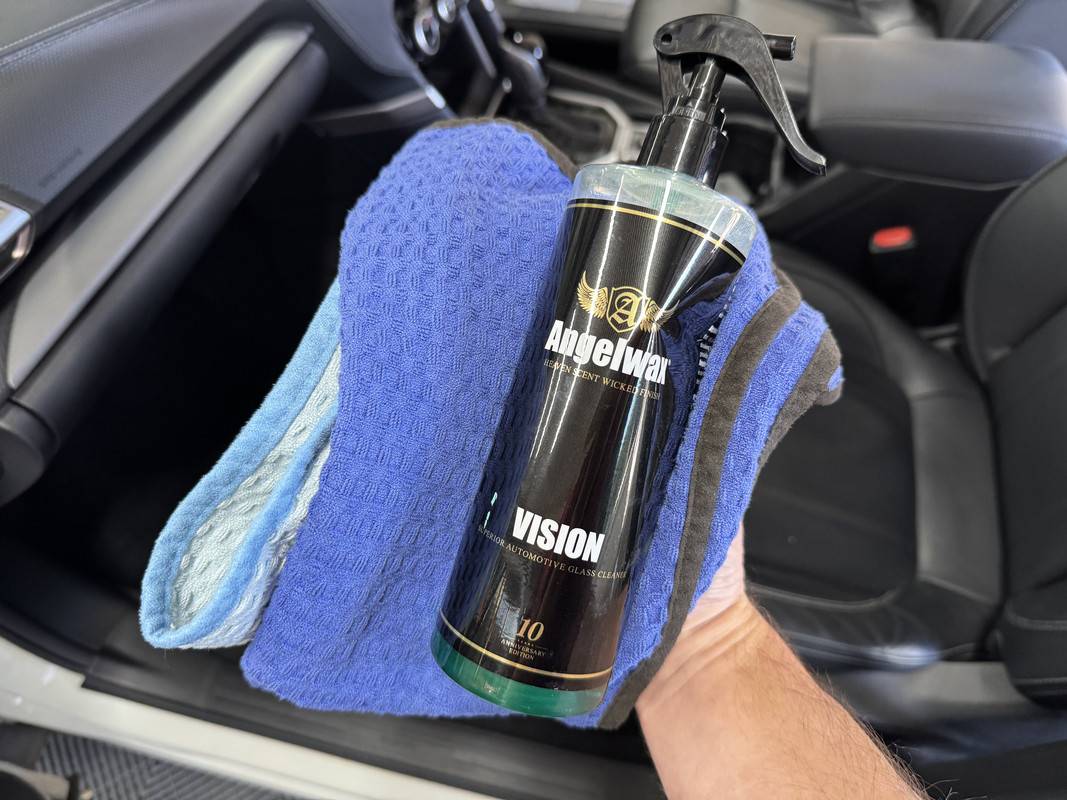
Glass – Both the windscreen and cargo area glass were nasty. Whenever presented with this sort of thing, it's too much to expect a single once over to deliver an acceptable result. In fact, it gets worse as you move from window to window as the towels become more and more loaded with funk. For the initial mow down, I went with the lethal smelling Angelwax Vision and two waffle weave towels. Even with all of the doors wide open, this stuff gets up your nose in an unpleasant way, a byproduct of the ammonia content. And yet, it's supposed to be tint safe.
Following that initial cleaning, I went back in with two FRESH towels and Invisible Glass.
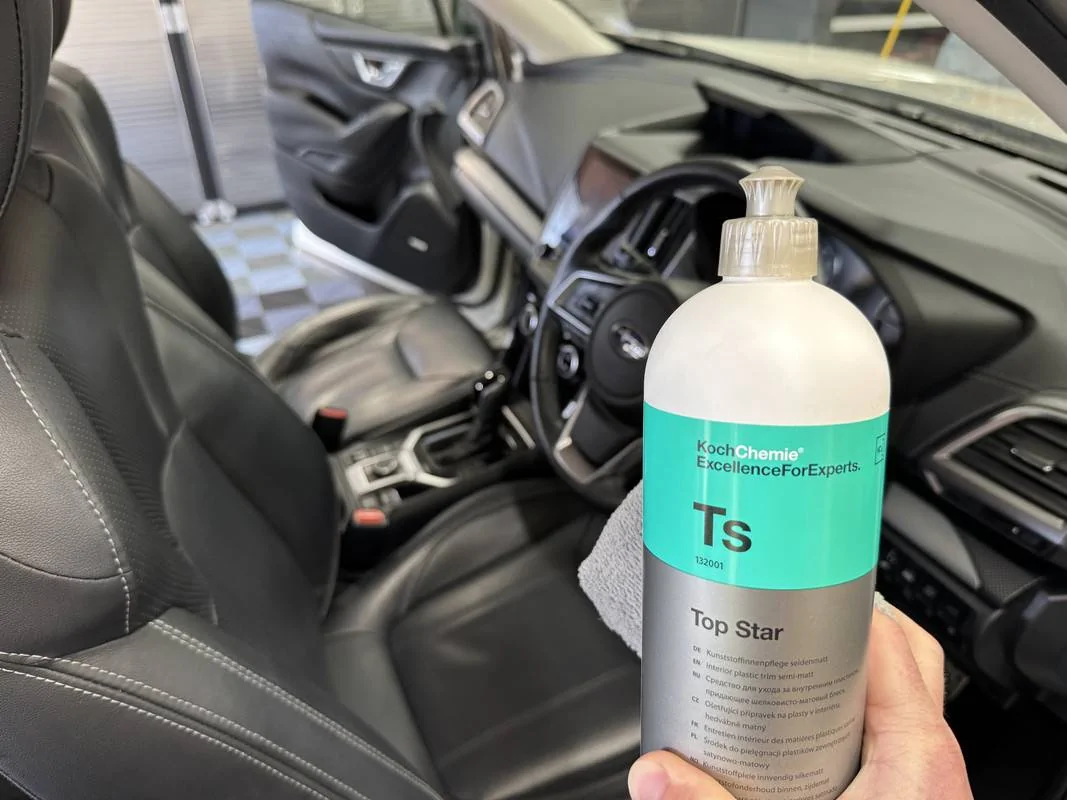
Dressing – I very rarely apply a dedicated interior dressing, mainly because I find its not needed on my garage queens, and partly because interior detailers have just the right amount of “enhancement” and UV inhibitors. However, this car sits outside 24/7, so it probably needs that extra UV protection. The interior plastics were looking a little dry too.
I went to grab an old favourite, 303 Protectant, but couldn’t find it in the cabinet. Remembering I let someone “borrow” it, I instead reached for KCx Top Star. Both products are similar in look and feel, producing a nicely balanced finish that’s not overloaded with gloss, but with enough sheen to see where you’ve been. Unlike 303, Top Star has a subtle, pleasant scent. This went on all plastic surfaces, as well as the vinyl door trim sections.
Exterior Detail -
Last week, I actually started on the exterior before tackling the interior. This involved a rather quick foam and rinse using Bilt Hamber Touch-less, basically mowing down the bulk of the road film and bugs. So, the following is the more involved exterior cleaning session that followed.
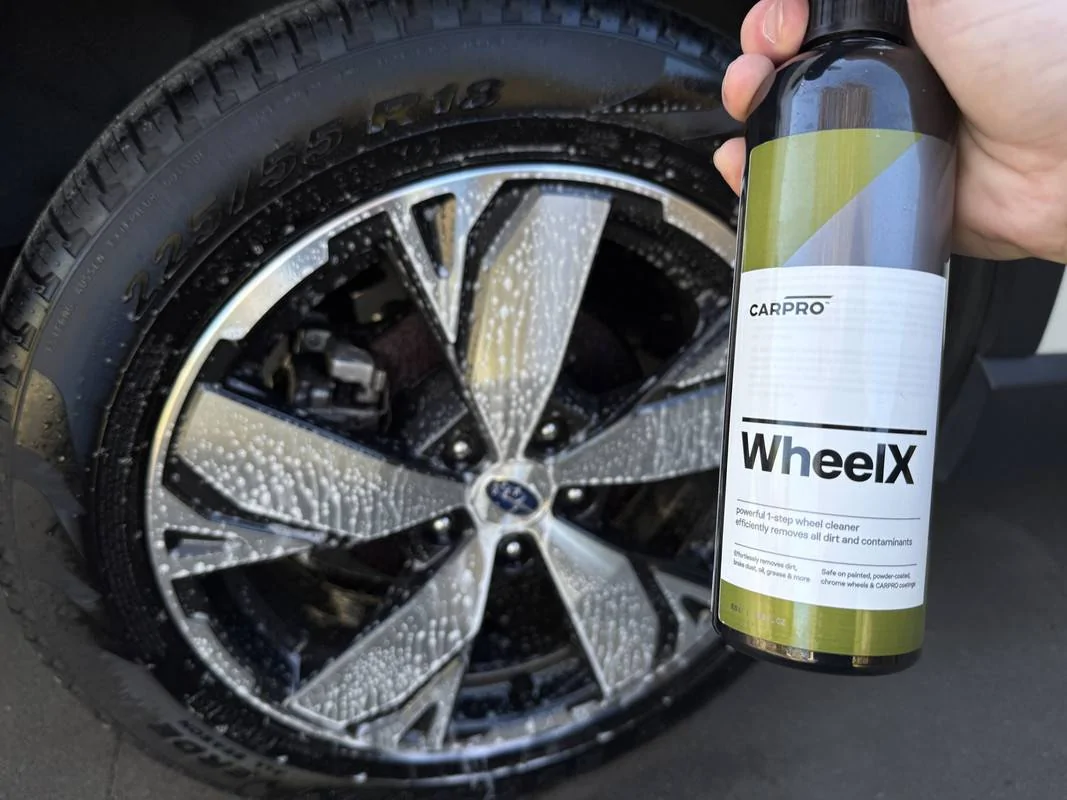
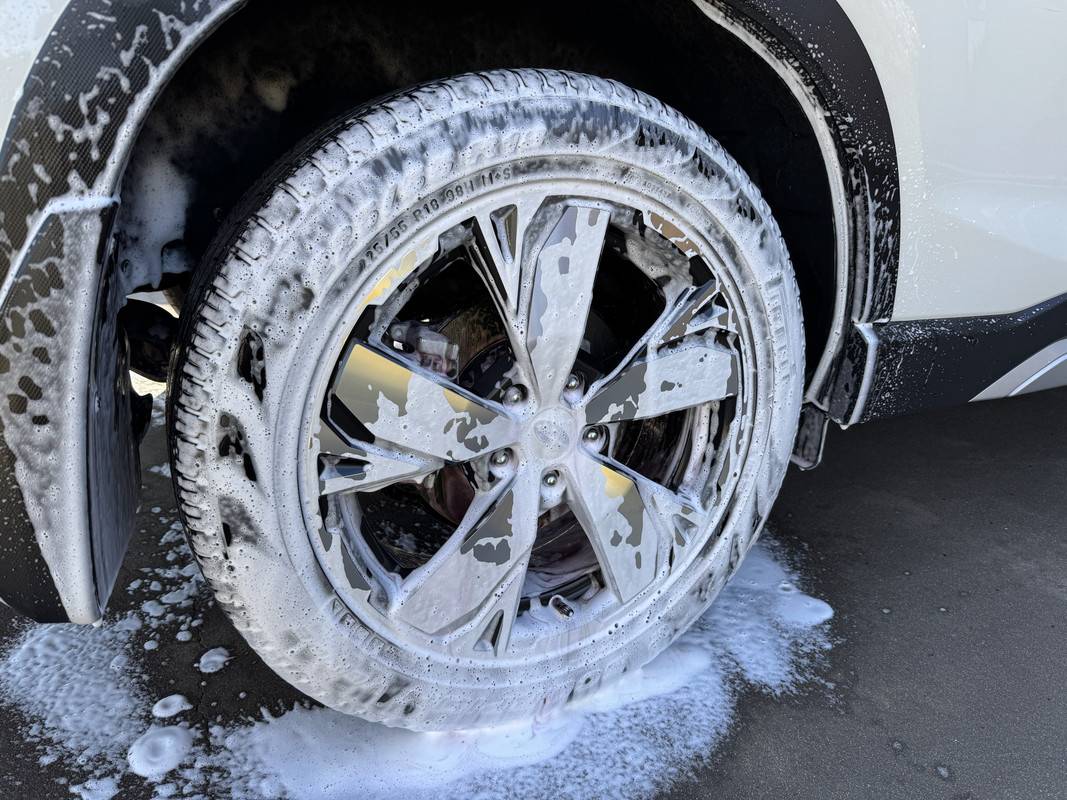
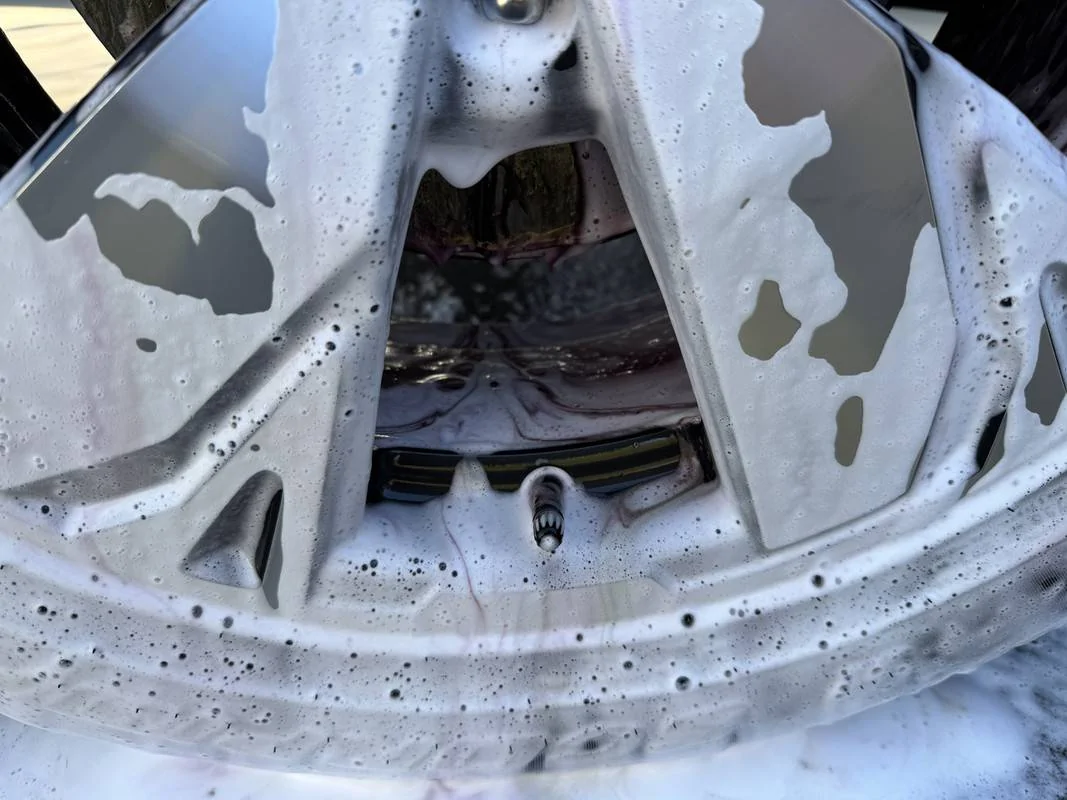
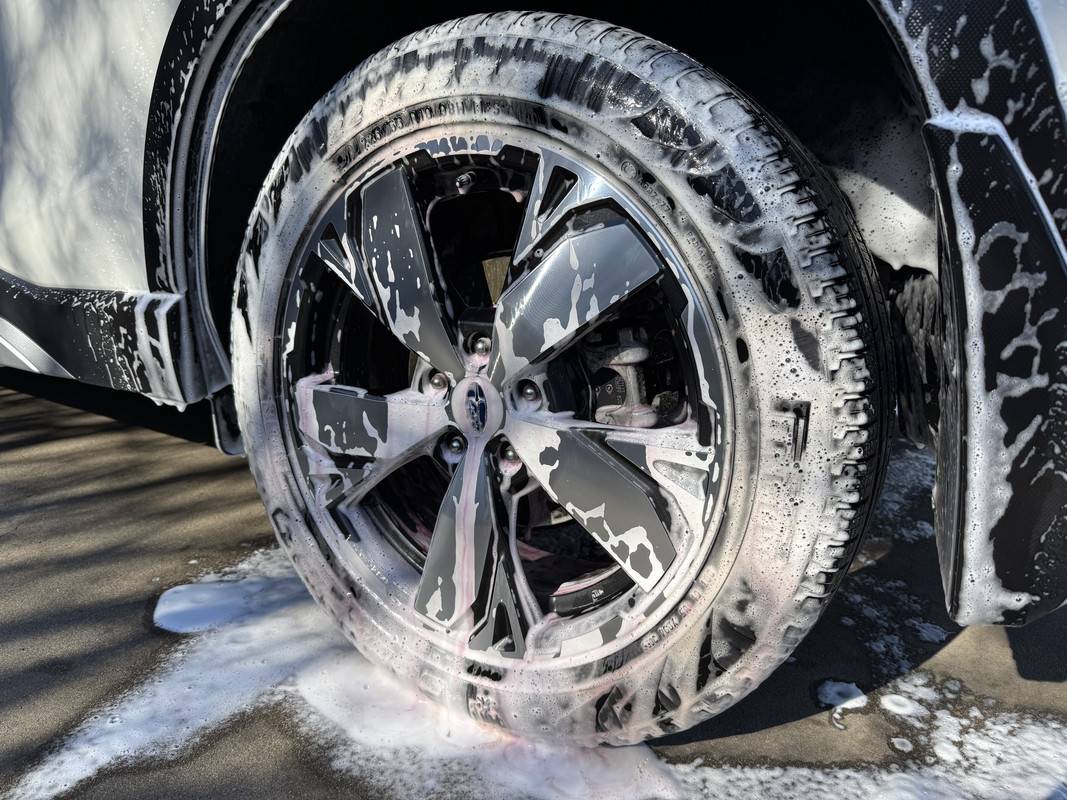
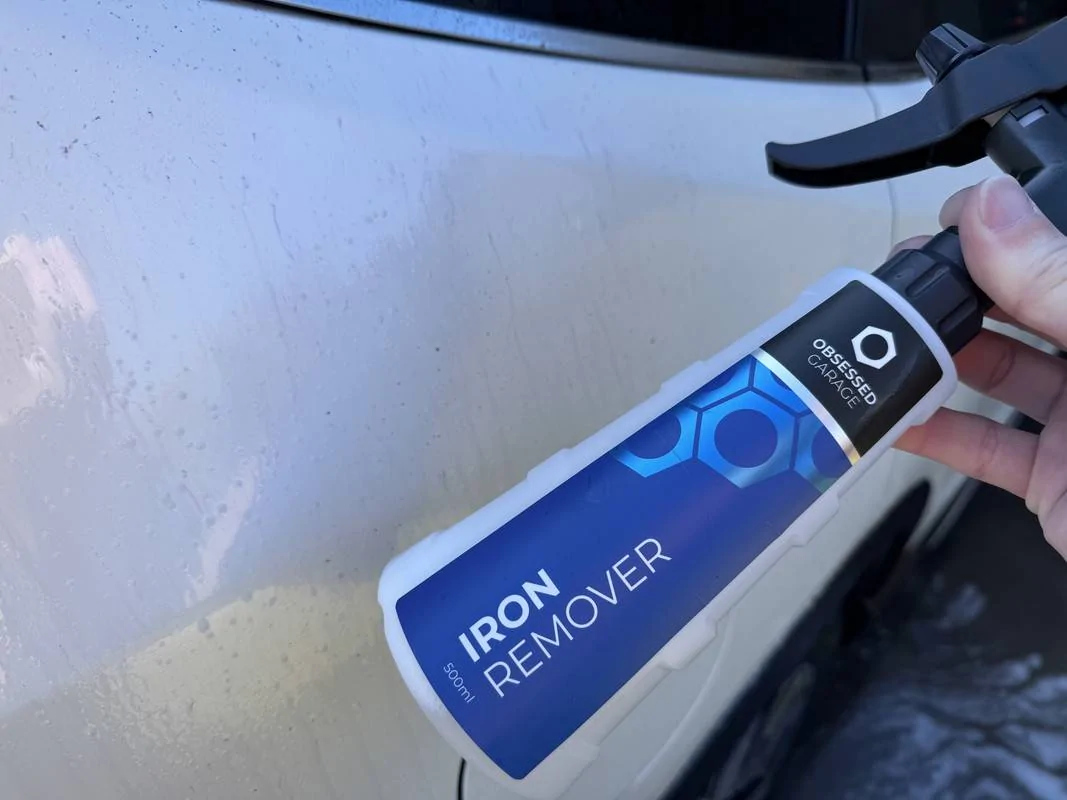
Wheels & Tyres – The Touch-less from last week did a sterling job on these wheels, so basically, today I’m finishing them off. As always, I like to pre-soak wheels with an iron-remover, Carpro WheelX the weapon of choice today. OMG, this stuff is totally revolting. I’m pretty used to iron removers now, but this is THE worst I have encountered. Now, apparently after the first batch, Carpro changed something within the formula to address the stench, but not this bottle! Regardless, I won’t be buying it again.
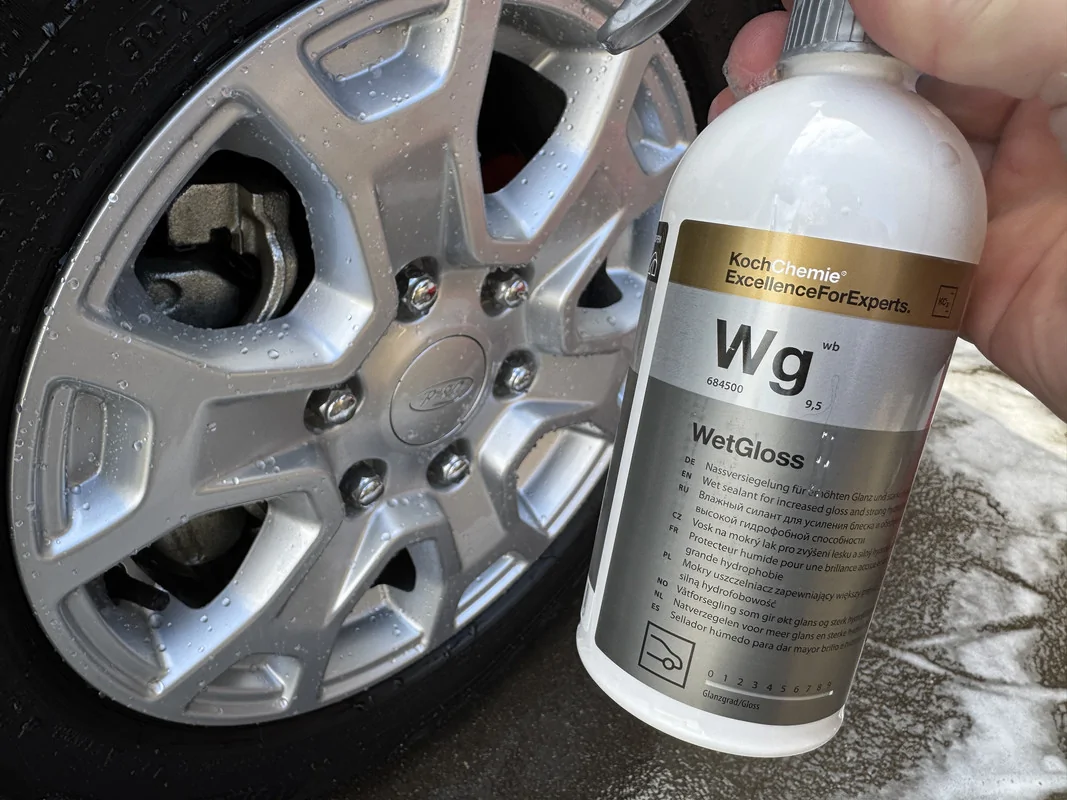
From here, I then foam with Touch-less over the top and leave the wheels to continue soaking. After that, I then rinse to deliver a nearly clean wheel. Next, the tyres are scrubbed with Wise Guy, then foamed with Brake Buster for the contact wash of the wheel and wheel arch. After another rinse, I then apply Hydr02. While addressing the wheels, I like to scrub the black plastic cladding as I move around the vehicle, likewise the exhaust tip.
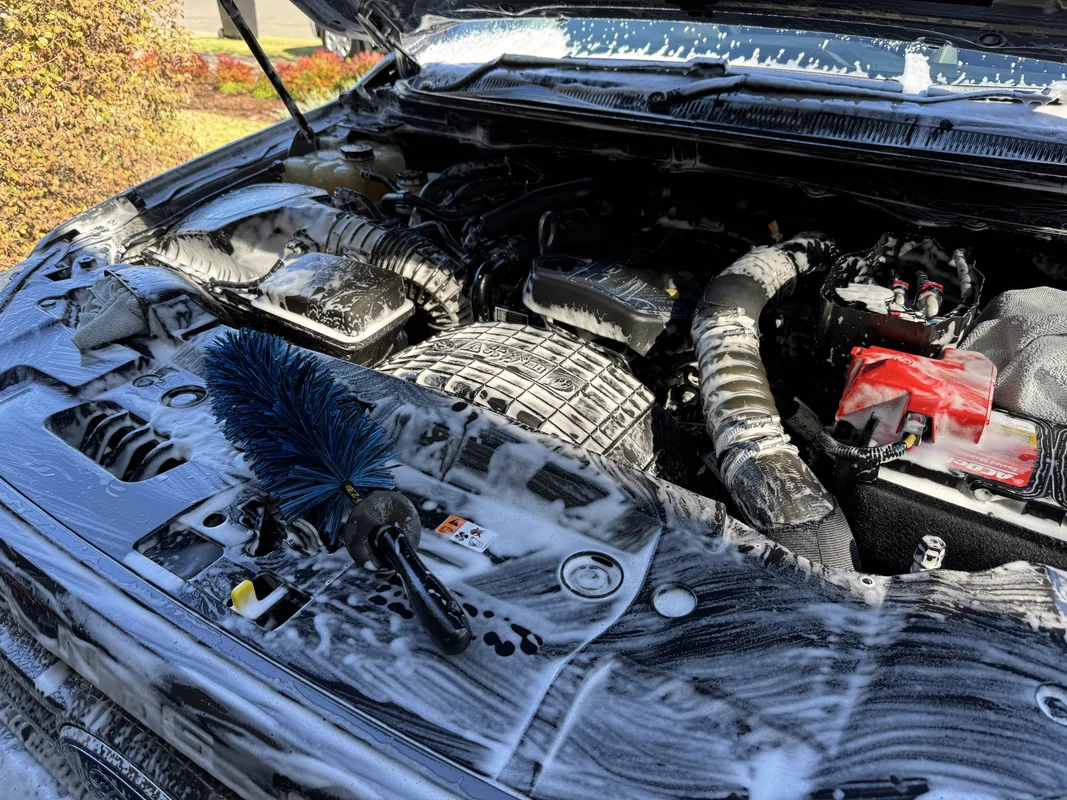
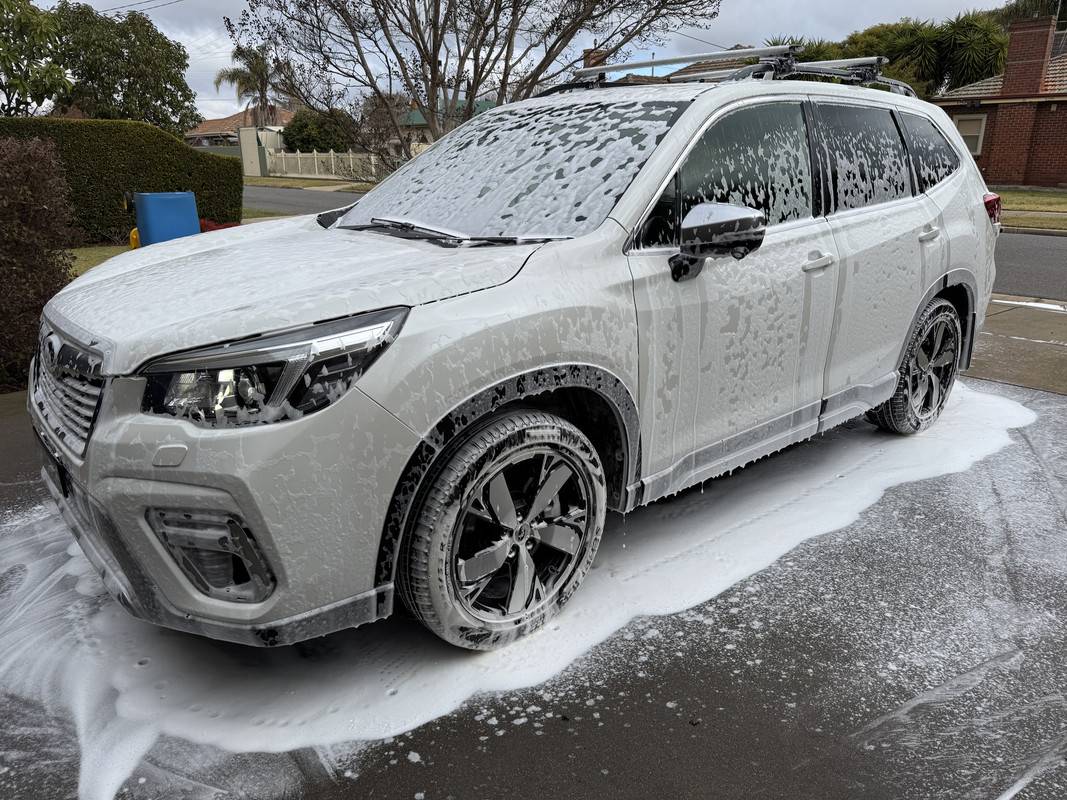
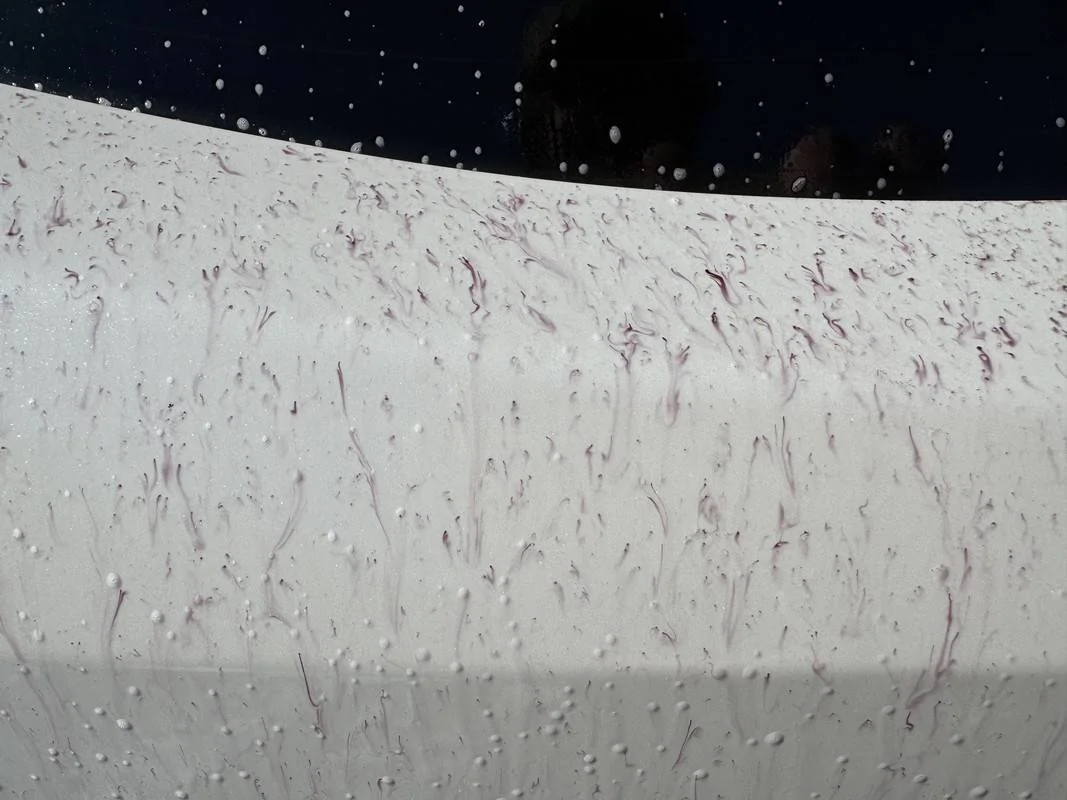
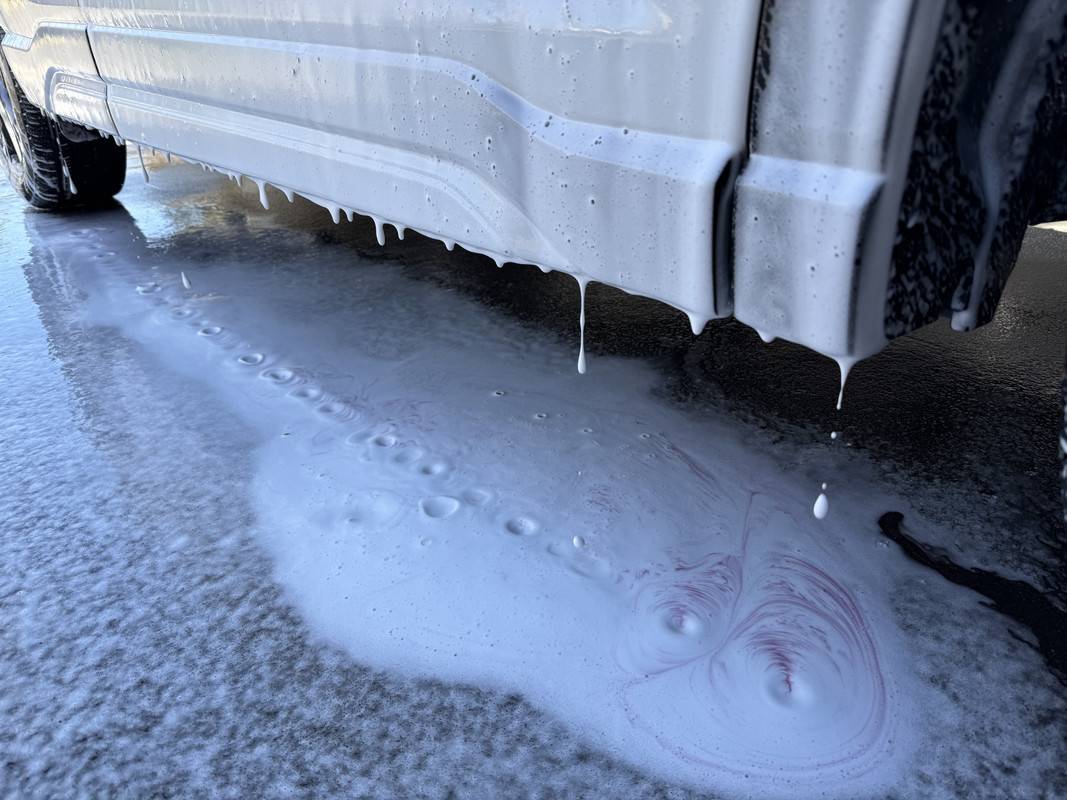
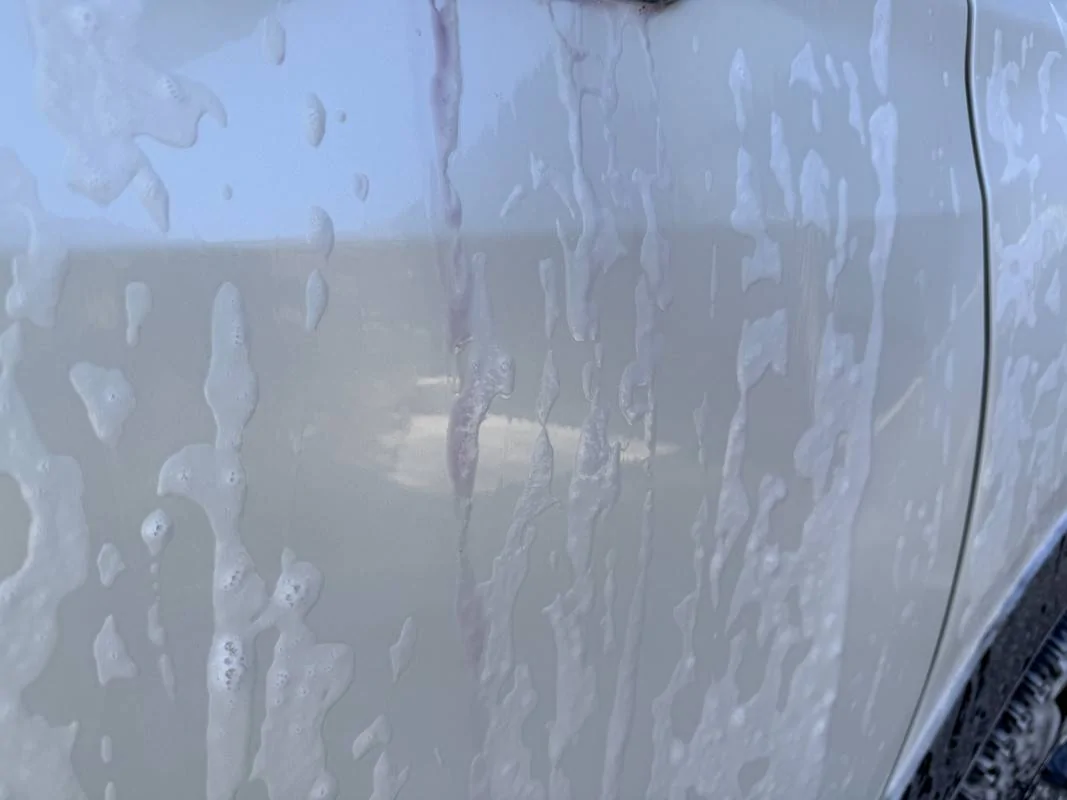
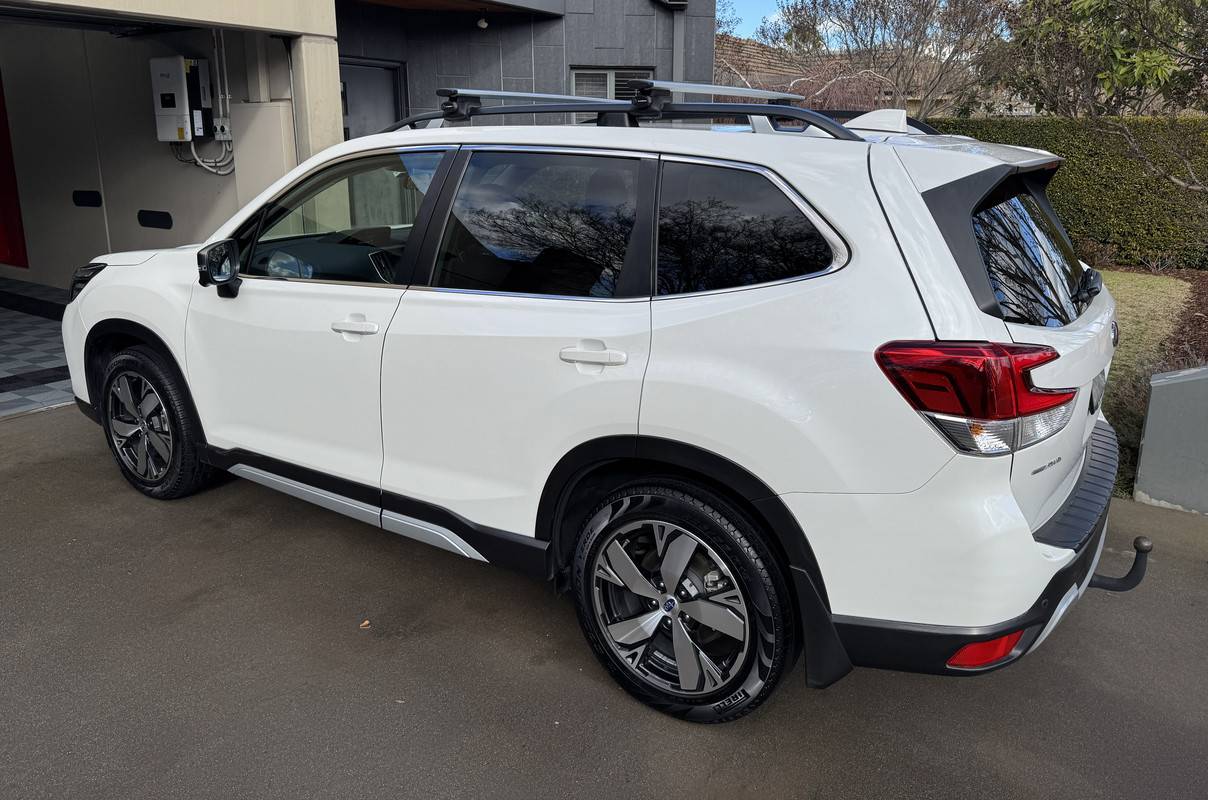
Decontamination – Now technically, I’m just washing the car. But I also knew it would be heavily contaminated. So, extra time spent removing some of that without going overboard seemed like the right thing to do. To start, I applied Gyeon Iron to the whole vehicle from dry. And yep, pretty much instantly, the purple started to bleed through.
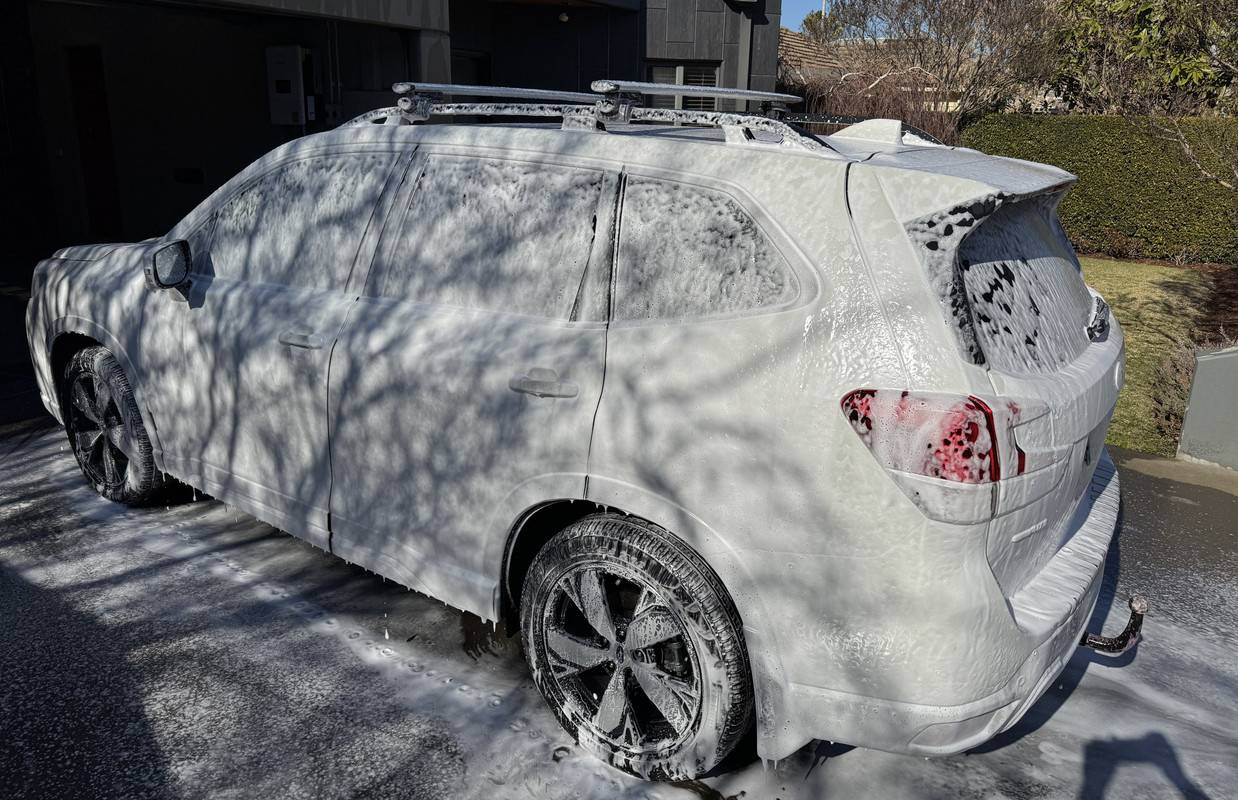
Next, I foamed the whole car with Touch-less and allowed to continue soaking.

After a very thorough rinse, I moved onto the next step.
Door Jambs – I hate neglected door jambs! They are tedious and messy to address. Normally, a careful quick blast with the pressure washer and a wipe down post wash is all you need to do. But these were feral! KCx Green Star and a brush was needed, followed by flushing with water. After the rest of the vehicle was washed and dried, I went back with some waterless wash and a towel to finish them off.
Contact Wash – For this step, I used Carpro Descale. I like to use this as follow up to my iron remover and alkaline pre-soak process because not only does it target mineral deposits, but it also CLEANS very well. As always, the car is foamed with the soap and a little added to the bucket, then washed with the foam on the vehicle.
Sqeeeeeeaky clean!
Protection – After washing and while the car was still wet, I decided to make use of some Capro Hydr02 Foam that I already had mixed up. This was foamed, allowed to dwell, then rinsed. This provided a base layer of protection, gloss and slickness, which in turn helps with hydrophobic properties, which then helps with air drying.
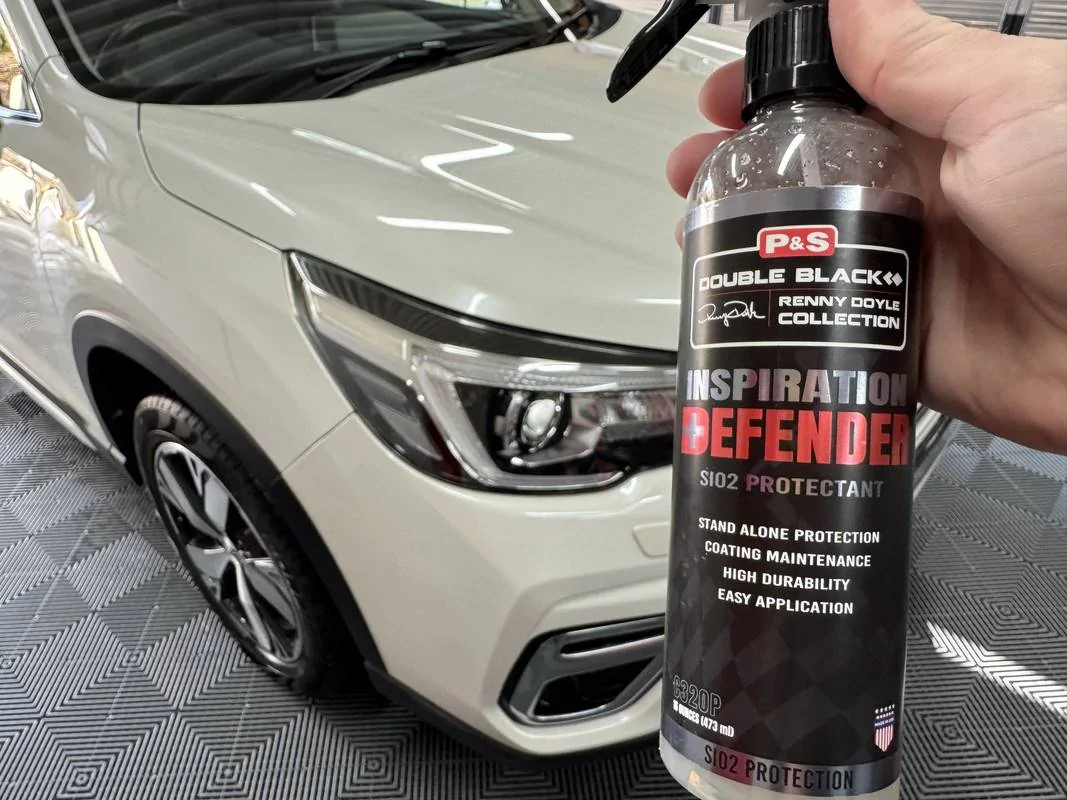
Following that, a heavy application of P&S Defender, one of the longer lasting spray sealants on the market. Not a favourite of mine, but its simple to use and decently slick.
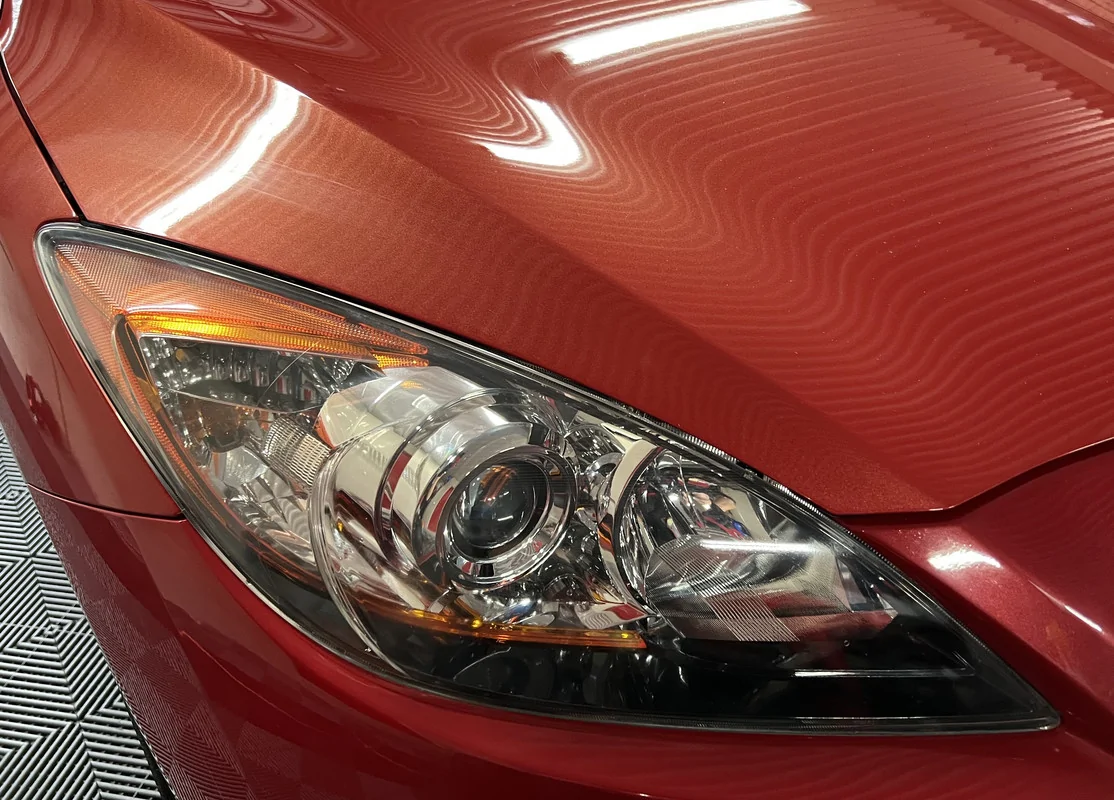
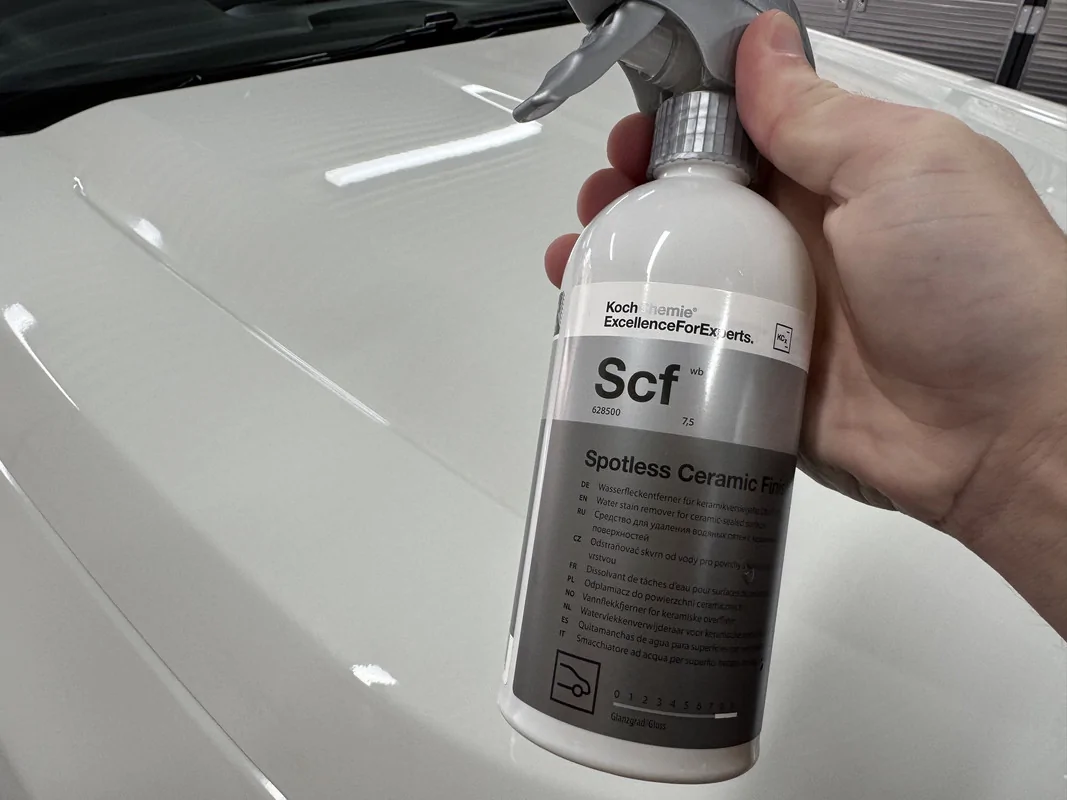
Glass – The exterior glass needed to be given a quick hand polish with P&S Clarity Crème to remove some mild oxidation and etching that wasn’t removed during the cleaning process. Following this, I wiped down with Eraser, then the excellent Stoner’s Ceramic Glass Cleaner to add some hydrophobic properties to the surface.
Black Trim – Realistically, the black plastic cladding would look amazing with a Solution Finish treatment, but would the customer notice? Probably not. So, I went over it with a Carpro Reload, which quickly freshens the trim without turning into a streaky mess the next time it rains.
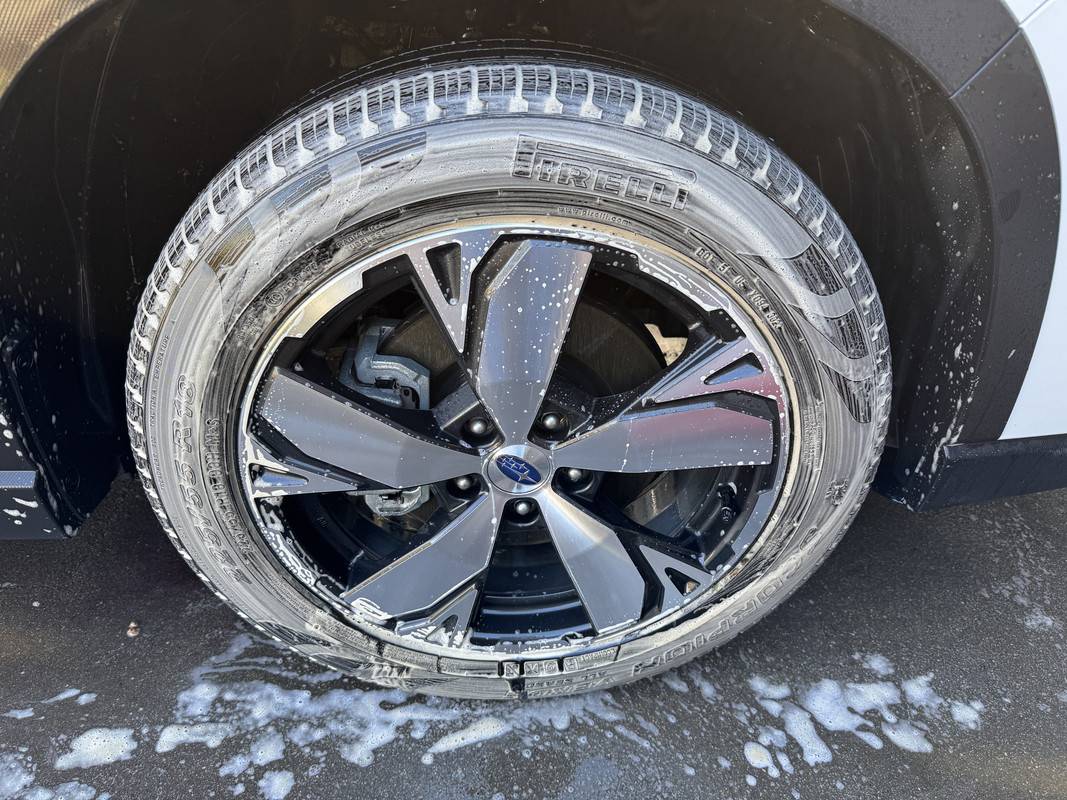
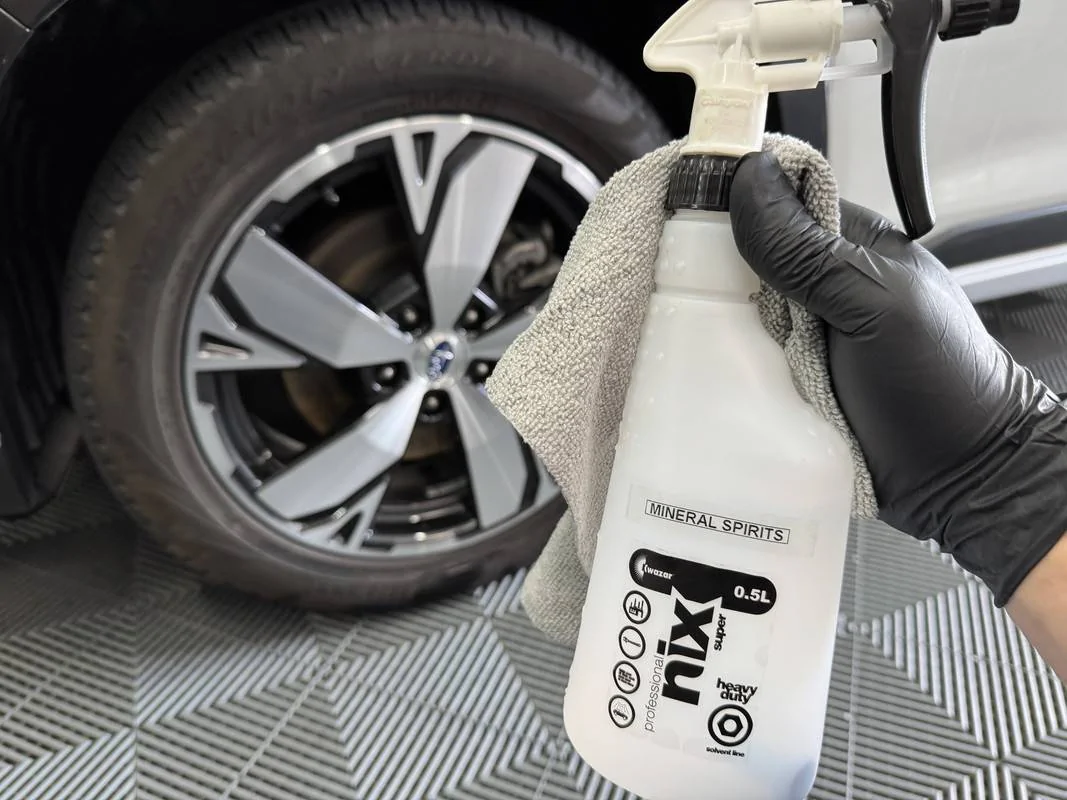
Tyre Dressing – Prior to dressing the tyres, I went over them with Mineral Spirits. I ended up following with a layer of Carpro Perl at 1:1.
Finishing Touches -
Returning to the interior, I gave it a quick wipe over with P&S Swift, a final vacuum and a misting of interior scent (Angelwax Bliss). Returning to the exterior, I removed and cleaned the licence plate protectors, wiped the tyres down to level off the Perl, then a final wipe down of the paint with Bead Maker to make it POP.


I spent over 7 hours on this vehicle, working non-stop over two sessions. Will I make money out of this detail? No, not even close. Chemicals are expensive, especially the iron removers. I don’t charge by the hour for detailing like I do for garden maintenance. Also, all the little extra’s that I do soak up time and product. However, the owners have looked after me for decades now, be that in terms of business, but also from an advisory perspective. So, when they arrive home tomorrow, there will be a little surprise sitting in the driveway.
This vehicle is owned by one of my gardening clients. I’ve detailed this car many times, but it's been quite a while since I’ve touched it. I’m currently house sitting for them, so I thought I’d treat the Subaru to a refresh. With 108,000 km on the clock, there is some wear and tear starting to appear, but it mostly just needed a dam good clean, especially the interior.
I ended up splitting this detail into two parts, the interior was first last week, and the exterior this week. And I’m glad I did because the interior required far more time than I had expected…………………………………………..
Interior Detail –
I hate doing interiors like this! And with two golden retrievers frequently riding in the back, I knew I was up for a fight!
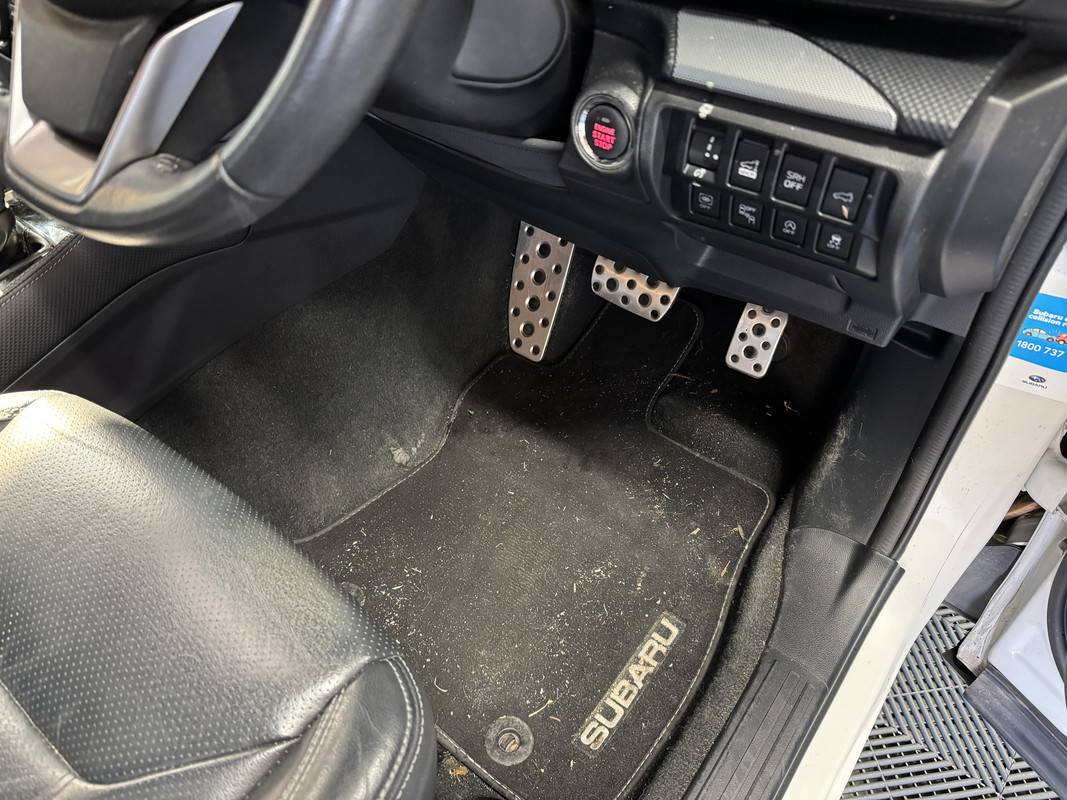

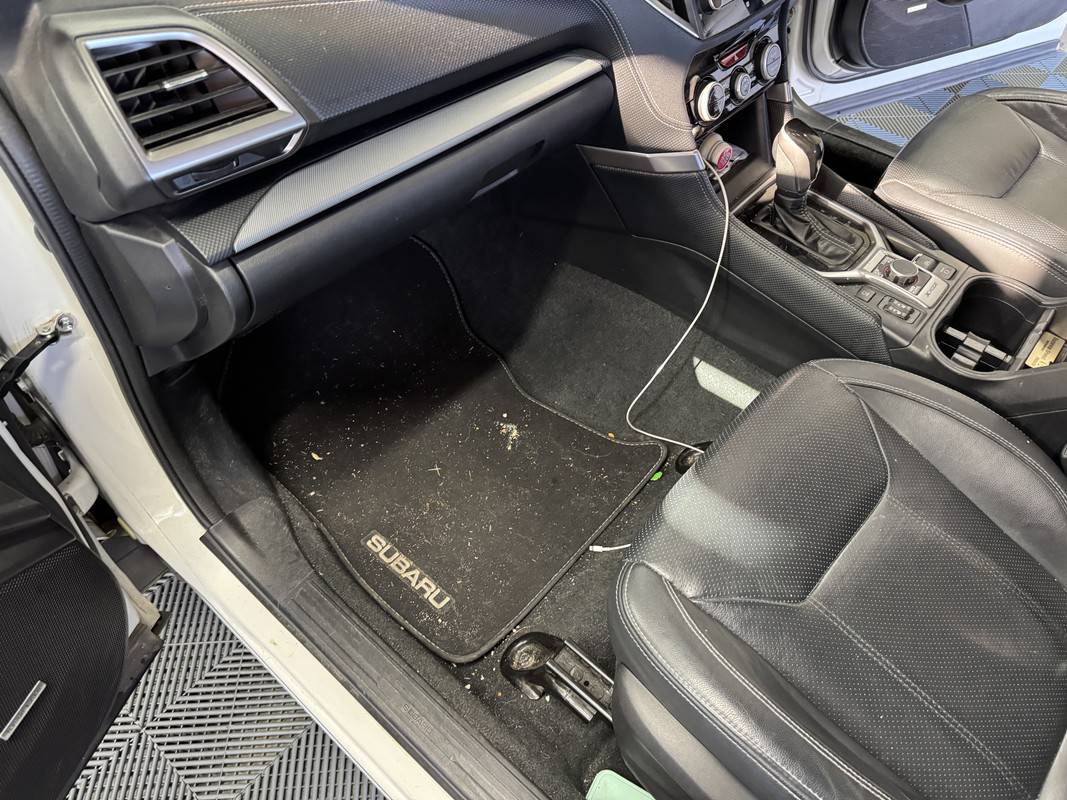
Vacuuming – I’m one of those people who likes to tackle the hardest task first, be that in detailing or for anything I do. On this Subaru, the carpet in the boot was clearly that task. I spent at least an hour attempting to remove the dog hair from the boot carpet and seat backs, I even removed the lift-up floor panel so that I could vac underneath. With cheap carpet throughout, this fought me all the way, and even then, I wasn’t happy with the result. I threw everything at it, including a Lily Brush, Fur-Eel vacuum attachment, the Tornador, even P&S Paint Gloss as a vacuum static aid. Eventually, I knew I had reached the limit of what I could achieve and decided to move on.
For the rest of the interior, I teamed the vacuum with the Tornador and Paint Gloss to address the carpets, seats, door trims and centre console. When using the Tornador, you always make more mess before it gets better. However, this tool is so handy to have, allowing you to dislodge debris from the carpet, console, door trims, air vents, and between the seats, in turn allowing easier removal via the vacuum.
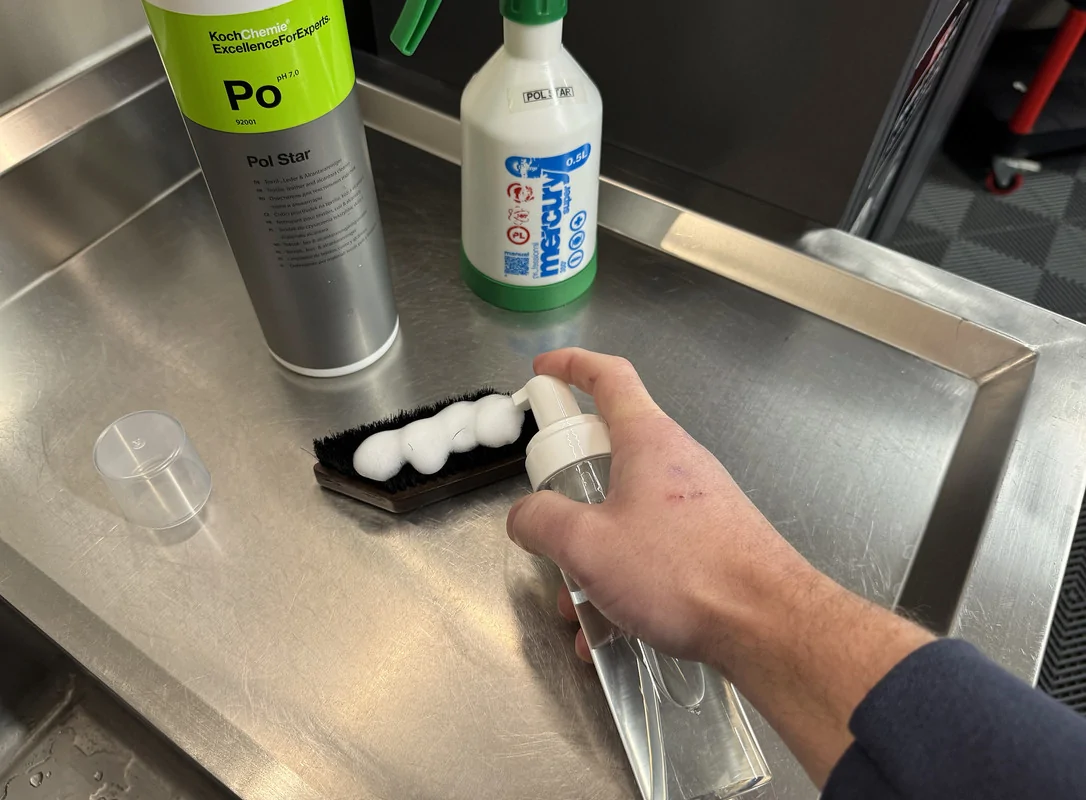
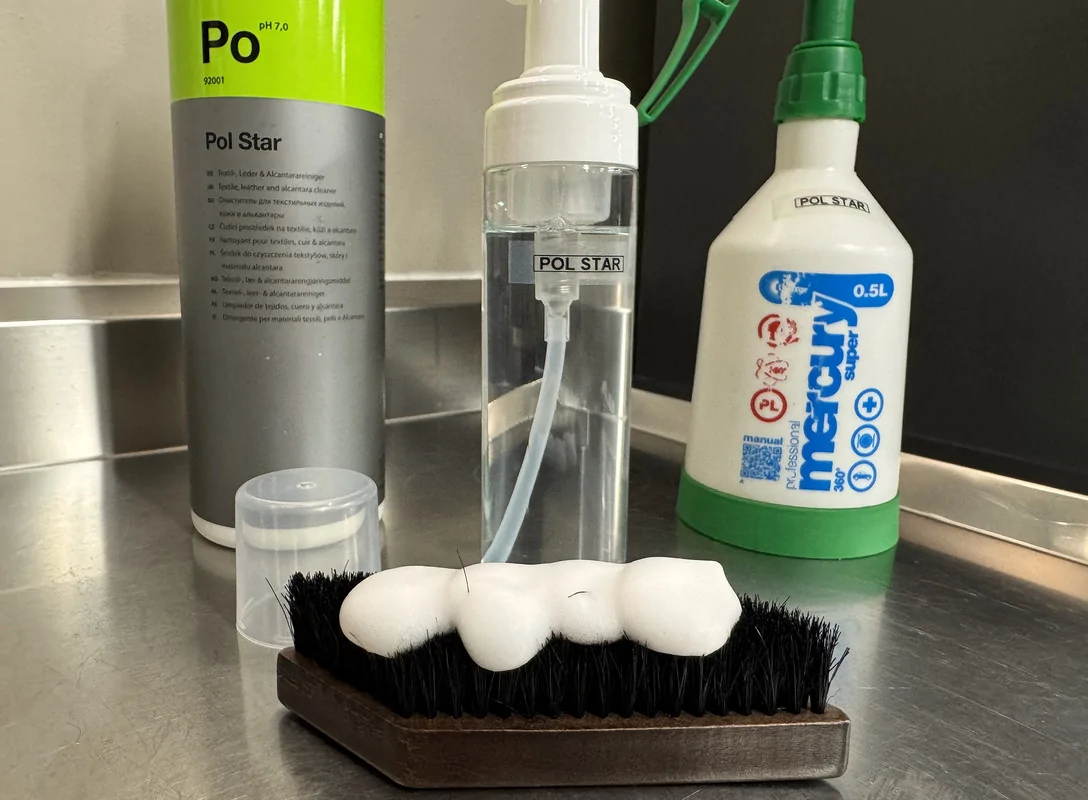
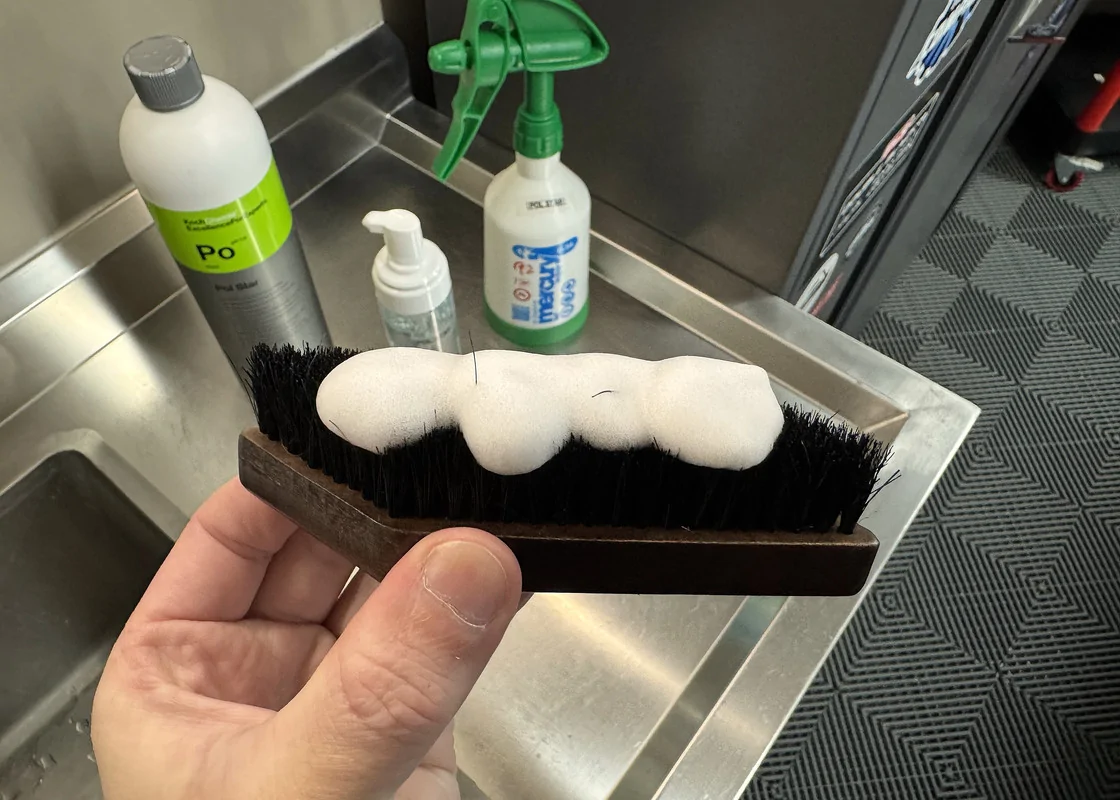
The floor mats were given an initial blast with the Tornador, then misted with Pol Star and scrubbed with a carpet brush. From there, I used the Tornador and the vacuum turbo attachment in tandem to remove the Pol Star and remaining debris. To finish, I then misted with KCx Fresh Up before being put in the sun to dry. I also sprayed the carpets with Fresh Up, which is not just an interior scent, rather an odour neutralizer. And with being home to two dogs, and the little surprise I found later, there was some neutralizing to be done!
Cleaning – Following the vacuuming, I directed attention to the initial cleaning. First, the rubber cargo mat was pressure rinsed, then scrubbed with McKee’s and a tyre brush. It was then generously misted with P&S Swift and allowed to dry and self-level in the sun.
Apart from the dashboard, all interior plastics were cleaned using P&S Xpress and the Carpro InnerScrub Mitt, which is basically scrub ninja in glove format. The InnerScrub helps lather up Xpress, which is then followed with a towel to mop up the residue. The dashboard and console only needed a spray and wipe with Xpress. I even needed the Xpress for sections of the glass.
The Little Surprise - Removing the rubber cup holder insert, I discovered a thick, sticky residue that was hidden underneath. Then the stench hit me................rotten milk from a spilled coffee. Yuk! To address this, I took the rubber insert over to the sink and cleaned it with Gtechniq Tri-Clean, which in addition to being a general interior cleaner, it contains anti-microbial agents. I then flooded the cup holder with Tri-Clean and sacrificed two TRC Rip-n-Rags.
At this point, I could still smell the milk on the rubber insert, so I sprayed with P&S Finisher, left it to soak for 5-minutes, then rinsed again in the sink. That sorted the smell. Finisher is the third step in their carpet cleaning trio, but it worked here as well.
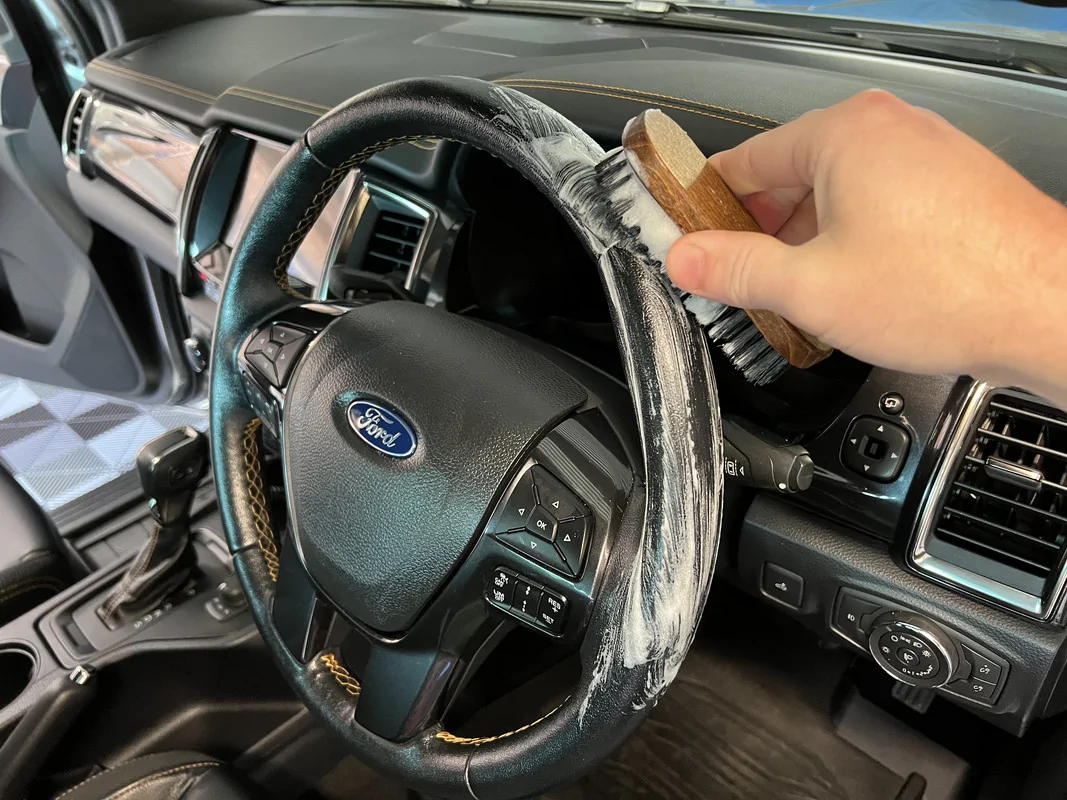
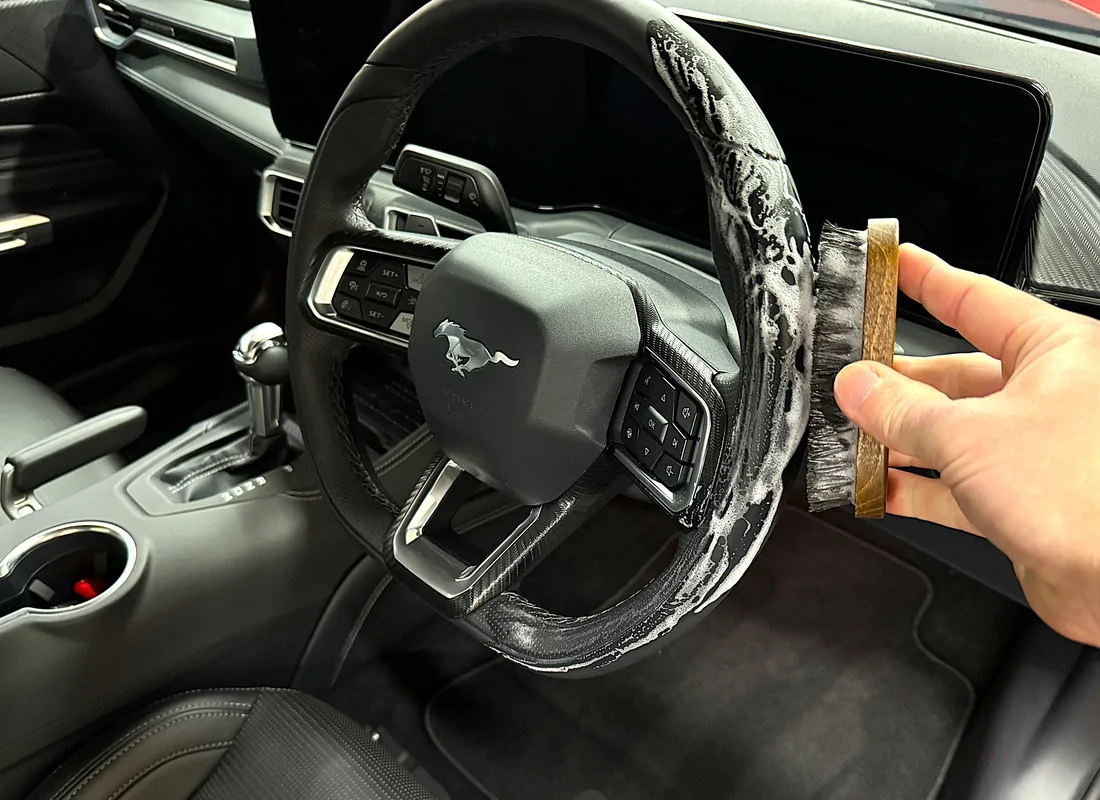
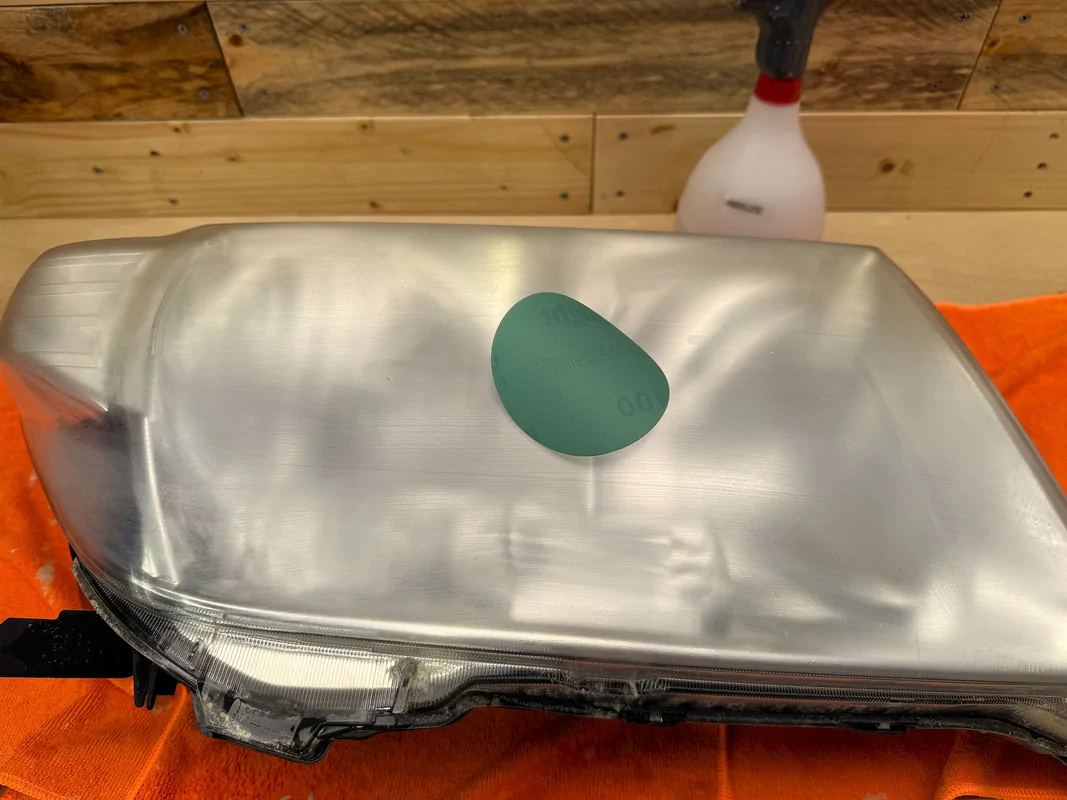
Leather – For the seats, console lid and steering wheel, I again used the InnerScrub, but teamed it with KCx Pol Star mixed at 6:1. A relatively strong ratio, at 6:1 it safely and effectively removes that shiny finish caused by a build-up of grime with NO need for a second pass. Again, a towel was used to remove the residue.Finisher completes the system by adding a final attack on odor causing molecules and organic stains. Finisher breaks down odor causing chemicals, eliminates any residual organic stains and slightly sterilizes the surface. Finisher assists in reducing water stains, mold and mildew odors as well as finalized stain removal. Finisher breaks down into oxygen and water, leaving no chemical residue left that requires further removal.
For protection and enhancement, I followed with Geist Leather Conditioner, applied using a microfiber brick and levelled with another interior towel. I’m liking this product more and more, in this case providing a subtle enhancement without being looking tacky.
Glass – Both the windscreen and cargo area glass were nasty. Whenever presented with this sort of thing, it's too much to expect a single once over to deliver an acceptable result. In fact, it gets worse as you move from window to window as the towels become more and more loaded with funk. For the initial mow down, I went with the lethal smelling Angelwax Vision and two waffle weave towels. Even with all of the doors wide open, this stuff gets up your nose in an unpleasant way, a byproduct of the ammonia content. And yet, it's supposed to be tint safe.
Following that initial cleaning, I went back in with two FRESH towels and Invisible Glass.
Dressing – I very rarely apply a dedicated interior dressing, mainly because I find its not needed on my garage queens, and partly because interior detailers have just the right amount of “enhancement” and UV inhibitors. However, this car sits outside 24/7, so it probably needs that extra UV protection. The interior plastics were looking a little dry too.
I went to grab an old favourite, 303 Protectant, but couldn’t find it in the cabinet. Remembering I let someone “borrow” it, I instead reached for KCx Top Star. Both products are similar in look and feel, producing a nicely balanced finish that’s not overloaded with gloss, but with enough sheen to see where you’ve been. Unlike 303, Top Star has a subtle, pleasant scent. This went on all plastic surfaces, as well as the vinyl door trim sections.
Exterior Detail -
Last week, I actually started on the exterior before tackling the interior. This involved a rather quick foam and rinse using Bilt Hamber Touch-less, basically mowing down the bulk of the road film and bugs. So, the following is the more involved exterior cleaning session that followed.
Wheels & Tyres – The Touch-less from last week did a sterling job on these wheels, so basically, today I’m finishing them off. As always, I like to pre-soak wheels with an iron-remover, Carpro WheelX the weapon of choice today. OMG, this stuff is totally revolting. I’m pretty used to iron removers now, but this is THE worst I have encountered. Now, apparently after the first batch, Carpro changed something within the formula to address the stench, but not this bottle! Regardless, I won’t be buying it again.
From here, I then foam with Touch-less over the top and leave the wheels to continue soaking. After that, I then rinse to deliver a nearly clean wheel. Next, the tyres are scrubbed with Wise Guy, then foamed with Brake Buster for the contact wash of the wheel and wheel arch. After another rinse, I then apply Hydr02. While addressing the wheels, I like to scrub the black plastic cladding as I move around the vehicle, likewise the exhaust tip.
Decontamination – Now technically, I’m just washing the car. But I also knew it would be heavily contaminated. So, extra time spent removing some of that without going overboard seemed like the right thing to do. To start, I applied Gyeon Iron to the whole vehicle from dry. And yep, pretty much instantly, the purple started to bleed through.


Next, I foamed the whole car with Touch-less and allowed to continue soaking.
After a very thorough rinse, I moved onto the next step.
Door Jambs – I hate neglected door jambs! They are tedious and messy to address. Normally, a careful quick blast with the pressure washer and a wipe down post wash is all you need to do. But these were feral! KCx Green Star and a brush was needed, followed by flushing with water. After the rest of the vehicle was washed and dried, I went back with some waterless wash and a towel to finish them off.
Contact Wash – For this step, I used Carpro Descale. I like to use this as follow up to my iron remover and alkaline pre-soak process because not only does it target mineral deposits, but it also CLEANS very well. As always, the car is foamed with the soap and a little added to the bucket, then washed with the foam on the vehicle.
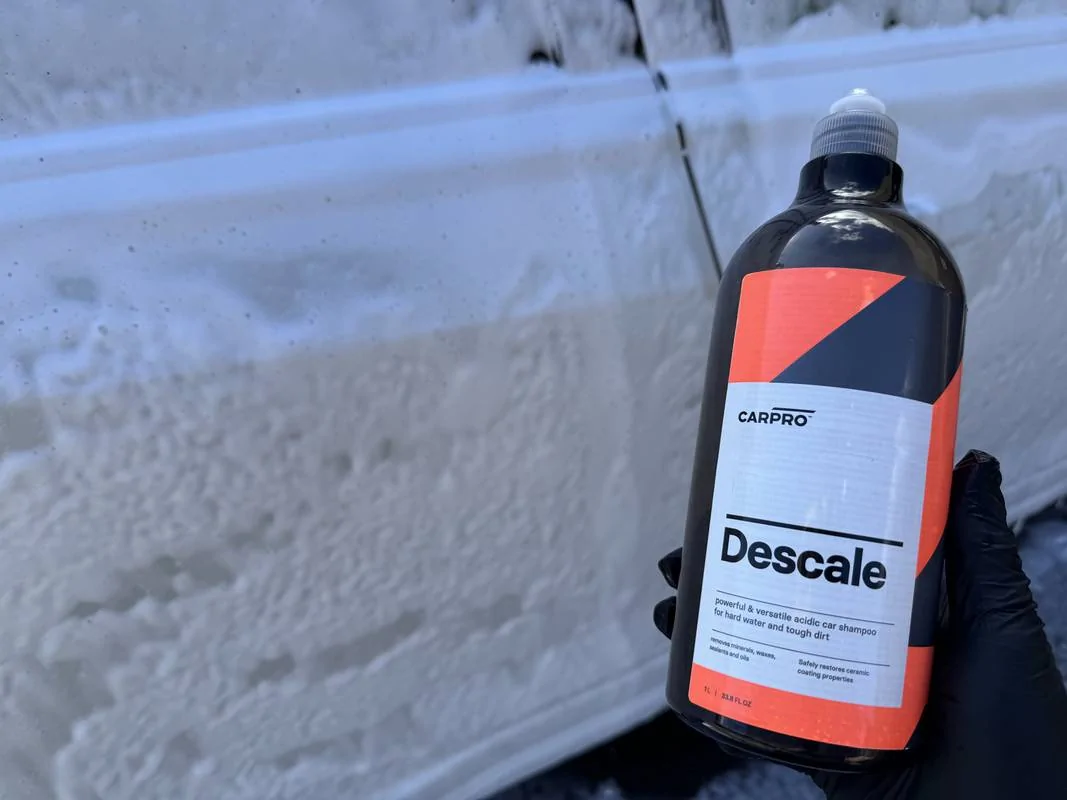
Sqeeeeeeaky clean!
Protection – After washing and while the car was still wet, I decided to make use of some Capro Hydr02 Foam that I already had mixed up. This was foamed, allowed to dwell, then rinsed. This provided a base layer of protection, gloss and slickness, which in turn helps with hydrophobic properties, which then helps with air drying.
Following that, a heavy application of P&S Defender, one of the longer lasting spray sealants on the market. Not a favourite of mine, but its simple to use and decently slick.
Glass – The exterior glass needed to be given a quick hand polish with P&S Clarity Crème to remove some mild oxidation and etching that wasn’t removed during the cleaning process. Following this, I wiped down with Eraser, then the excellent Stoner’s Ceramic Glass Cleaner to add some hydrophobic properties to the surface.
Black Trim – Realistically, the black plastic cladding would look amazing with a Solution Finish treatment, but would the customer notice? Probably not. So, I went over it with a Carpro Reload, which quickly freshens the trim without turning into a streaky mess the next time it rains.
Tyre Dressing – Prior to dressing the tyres, I went over them with Mineral Spirits. I ended up following with a layer of Carpro Perl at 1:1.
Finishing Touches -
Returning to the interior, I gave it a quick wipe over with P&S Swift, a final vacuum and a misting of interior scent (Angelwax Bliss). Returning to the exterior, I removed and cleaned the licence plate protectors, wiped the tyres down to level off the Perl, then a final wipe down of the paint with Bead Maker to make it POP.
I spent over 7 hours on this vehicle, working non-stop over two sessions. Will I make money out of this detail? No, not even close. Chemicals are expensive, especially the iron removers. I don’t charge by the hour for detailing like I do for garden maintenance. Also, all the little extra’s that I do soak up time and product. However, the owners have looked after me for decades now, be that in terms of business, but also from an advisory perspective. So, when they arrive home tomorrow, there will be a little surprise sitting in the driveway.
Sponsored
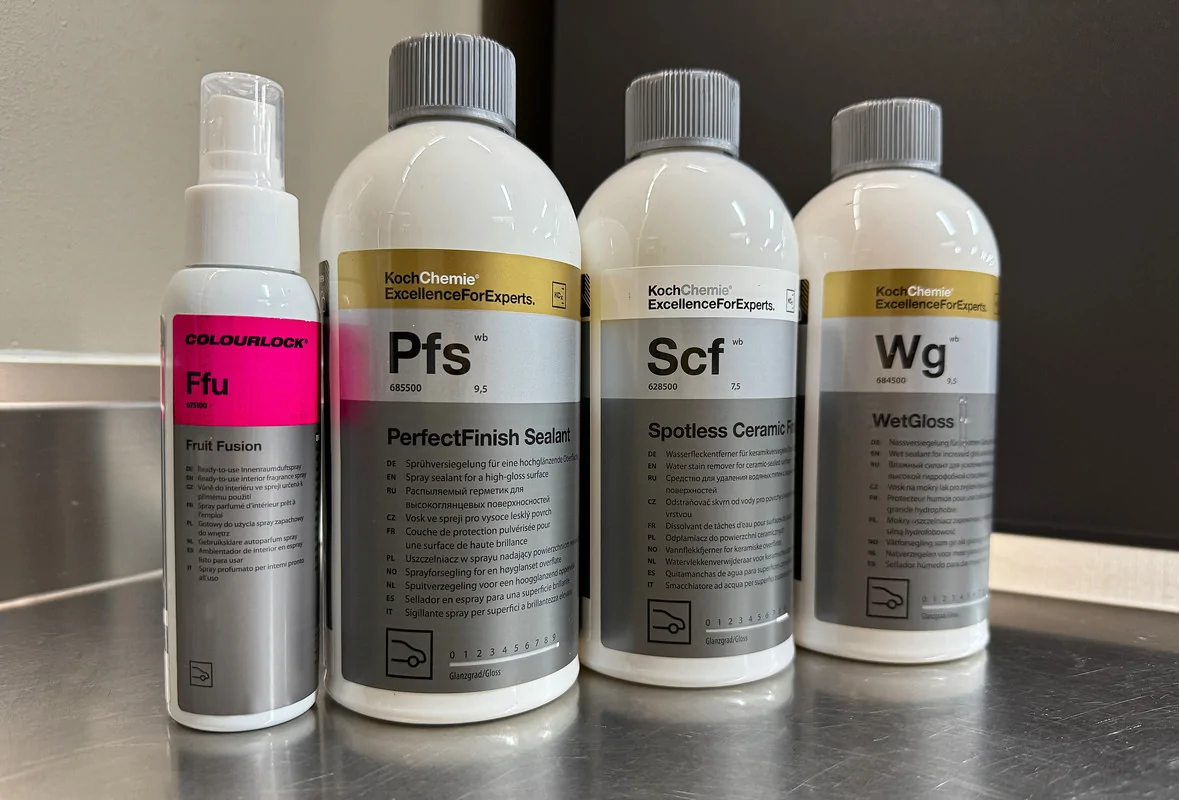

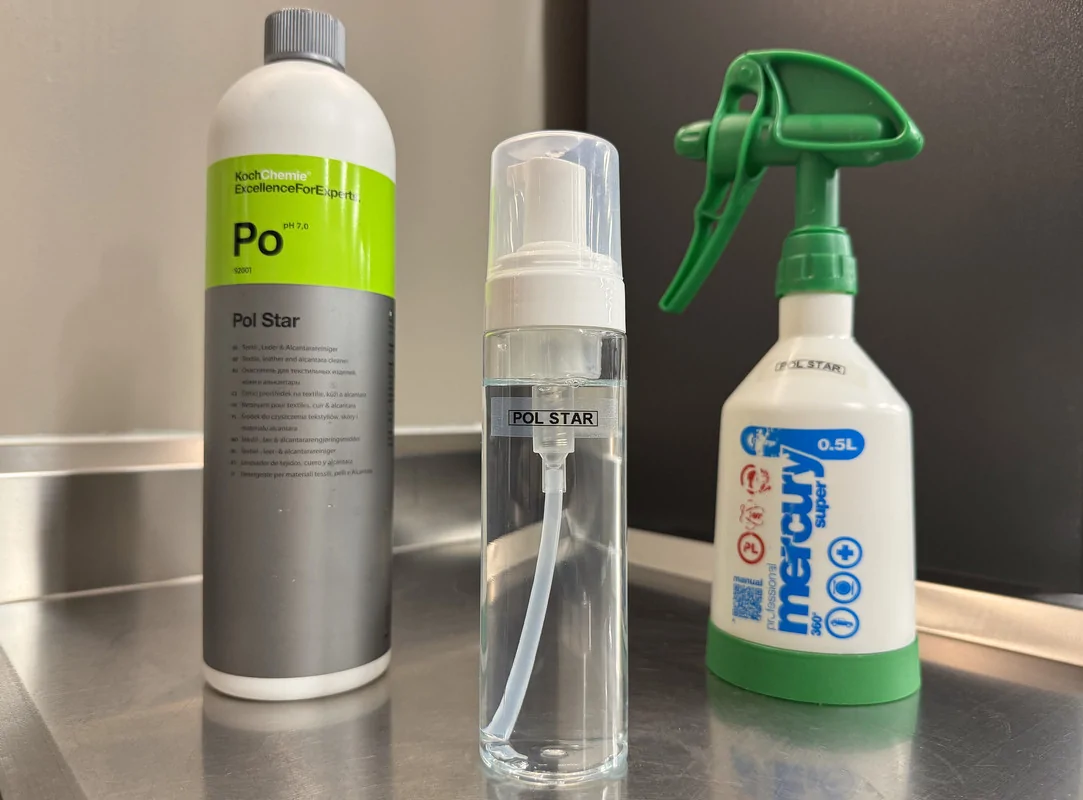
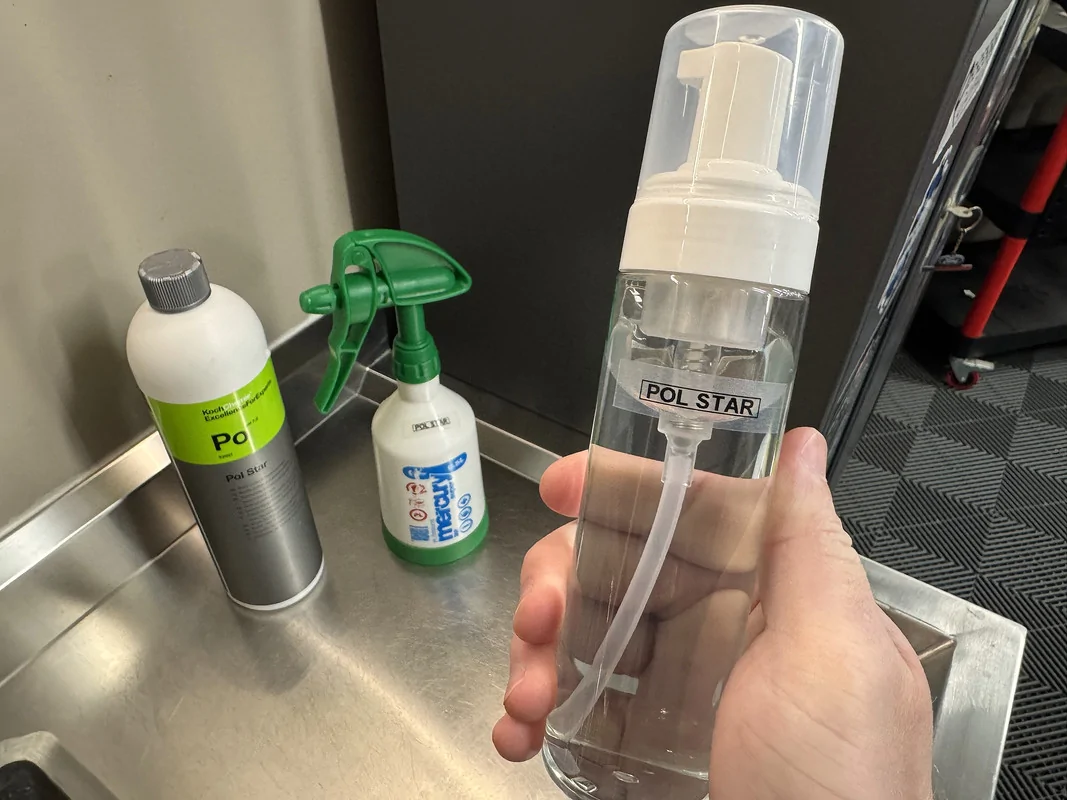
 No, in this case I'm talking about those pump action soap dispensers. In fact, Koch Chemie sell one for use with Pol Star, which mimics the same setup used by ColourLock for their leather cleaners and includes a handy dilution scale printed on the bottle.