TwiztdWun
Member
- Thread starter
- #1
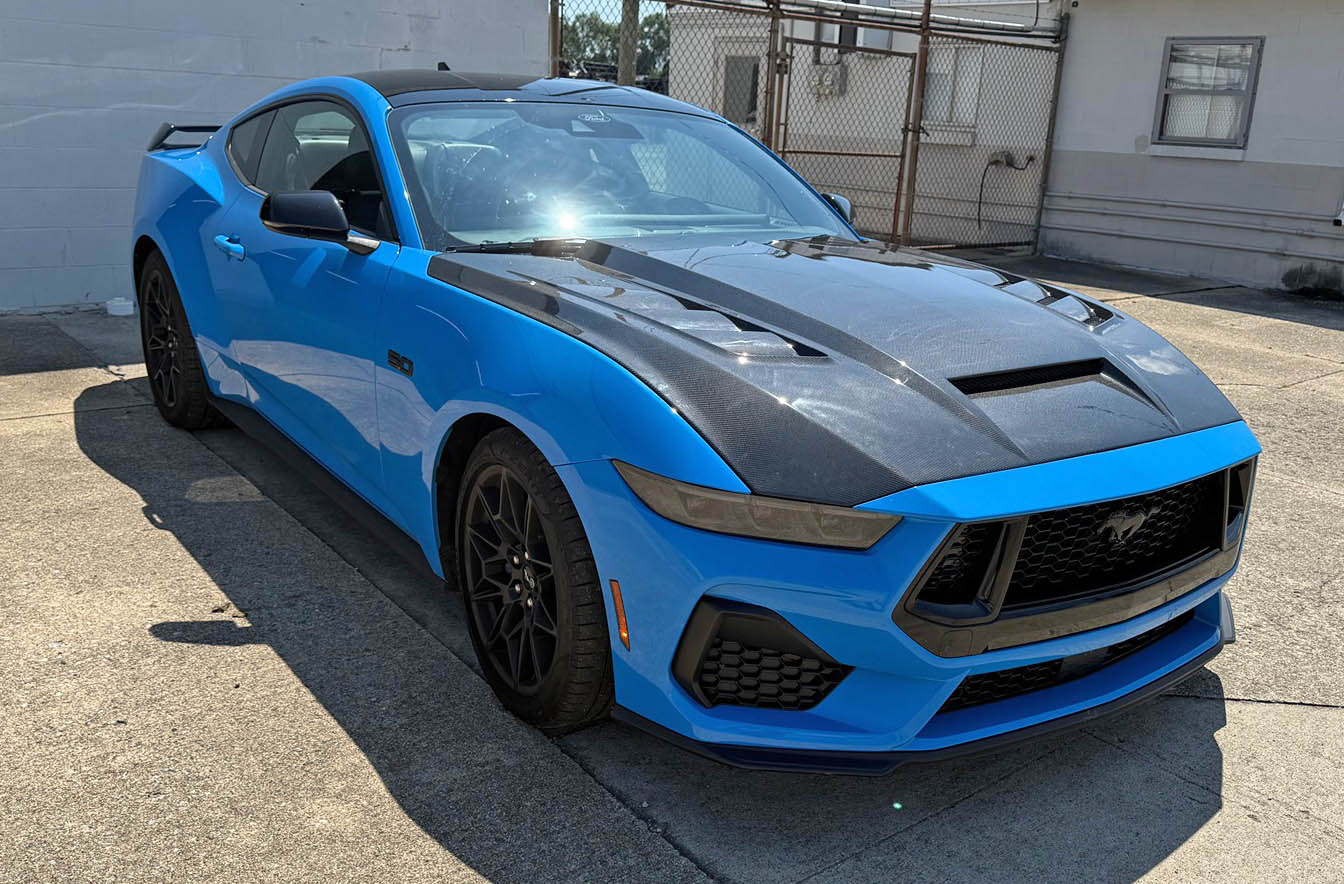
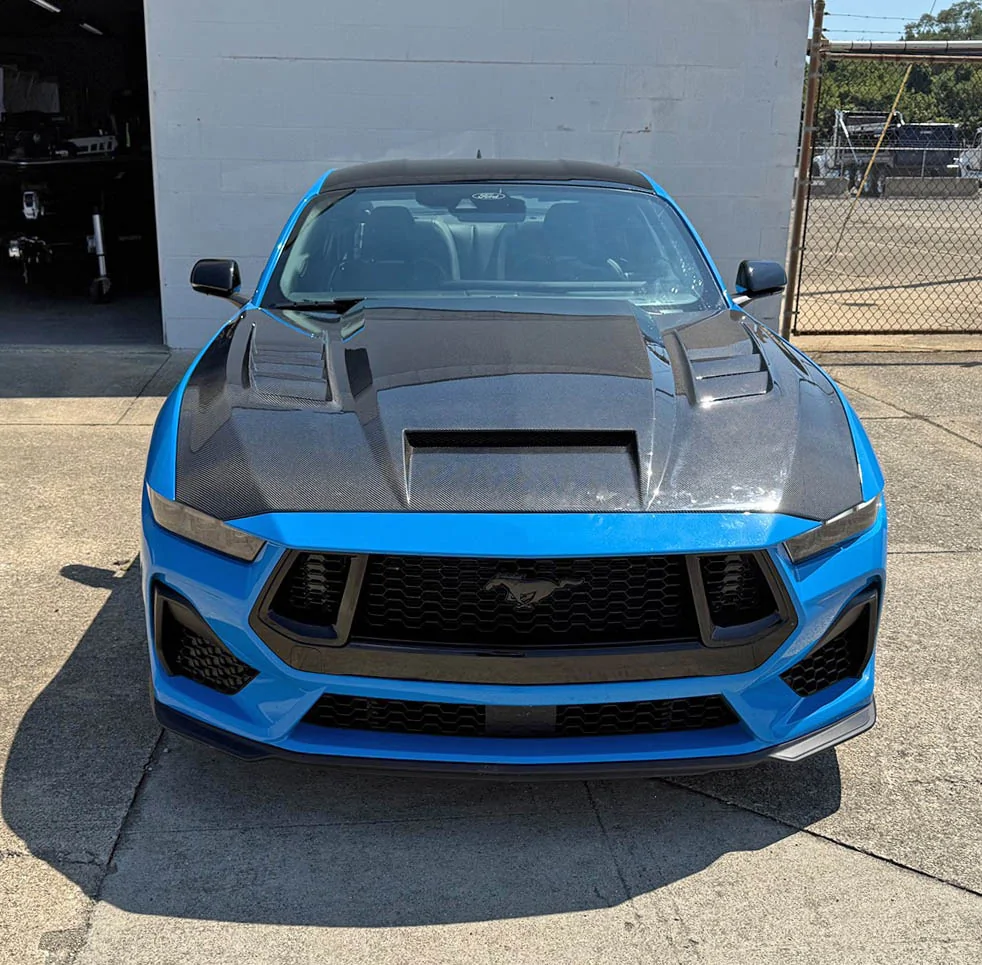
First off, I would like to say Madhav Chawla at MAZ ( Muscle Auto Zone )has a great product. I am more than pleased with the hood. There were questions in other posts and threads people had, I will answer them here plus a few things of what to expect after you get your hood.
First, expect that the package/crate is going to get knocked over in shipping. The good news is that Madhav has packed it so well in the box, it will not matter. It is packed well and packed tight.
The factory hood weighs 35 pounds without any hardware. The MAZ hood weighs 30 pounds without any hardware. I recommend using your original nuts from the hinges on the new hood as they have a bigger washer on them. You will need 2 M6x18 button head screws for the latch catch. I recommend this length so you can utilize a lock washer with a bigger washer and still get plenty of threads into the hood. The original hood uses studs and nuts. Those are of no use to you.
You will need to remove the two front seals and the long rear seal from your old hood and put them on the new hood. You may find on the new hood like I did, the holes are a little too small for the push in retainers. You may also notice a few holes were missed, but you will see where they were supposed to go. You may notice a couple holes are not extactly in the correct location. Simply drill a new hole in the correct location.
You will need to remove the insulator from your old hood to take off the windshield washer lines and squirters. The insulator is not used on the new hood. You will need to drill a couple holes for the squirter hoses to pass through on the new hood. The line that feeds both squirters has press in fittings that are not utilized on the new hood as the new hood does not have the crossbar support the old hood did. I am currently using sticky back zip-tie mounts. I do not know if they will hold. If they do not, I will remove the sticky back and use an epoxy to mount them to the hood to keep the line off the engine.
The cowl does not seem to affect visibility while driving any more than the original did. If it does, it is not by much.
The fit and finish is really good. Are there any small waves in the hood? A couple small ones. I expected much worse. This isn’t a body panel off a million dollar super car. I am very impressed with how well it looks.

Sponsored
Last edited:

")
